

Our PC builds usually follow well-defined themes. We’ve put together a small-form-factor rig for the living room, beastly 10-core workstation armed to the teeth, hardcore gaming machine primed for streaming, and VR-ready configs that hits the sweet spot. But our latest creation bucks that trend; it’s not really geared for anything in particular. The truth is, we needed a complete system for a series of upcoming articles on a range of different subjects. So we built something awesome, because that’s how we roll.
The requirements were simple: the build had to be versatile enough to serve multiple missions, fast enough to earn cred on fickle Internet forums, cool enough to run high-end hardware, and quiet enough to work with day-to-day. It also had to be handsome enough to look good in pictures—and have all the RGB LEDs, because it’s 2017. In other words, we needed to put together an all-around enthusiast’s PC. Say hello to what I’ve taken to calling the Utility Slayer.
An illuminated motherboard
ROG’s Maximus IX Code motherboard serves as the backbone for this menacing machine. The Code is a slightly stealthier version of the Formula designed for closed-loop liquid cooling. It removes the Formula’s CrossChill EK II VRM block, which is only necessary if you’re going to be doing custom plumbing, and drops the integrated I/O shield, so you have to pay a little more attention when installing the board in a chassis. Otherwise, the boards are basically the same. You still get the essentials: integrated 802.11ac Wi-Fi, reliable Intel Gigabit Ethernet, an internal USB 3.1 header, and the latest SupremeFX audio. You just pay a lot less; the Code sells for $294.99 USD and $402.99 CAD, compared to $389.99 USD and $482.99 CAD for the Formula.
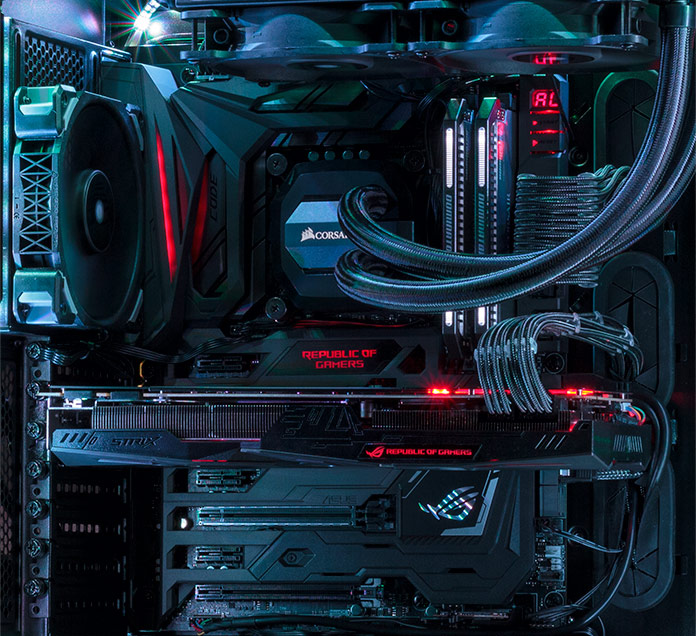
High-end PCs should look the part, so the Code wears streamlined armor that makes finished builds look much cleaner. Our designers used a monochromatic palette that makes it easier to match other system components. The mix of black, grey, and metal accents lays the perfect foundation for this system’s sinister vibe.
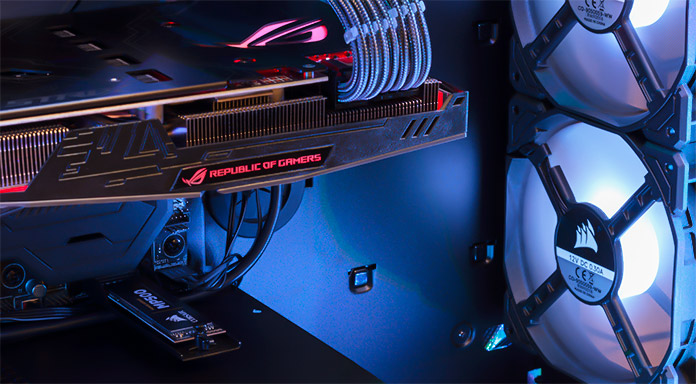
The Code isn’t completely devoid of color. Aura Sync lighting puts you in control of the RGB LEDs that illuminate the I/O shroud and ROG badge in the high-visibility area around the CPU socket. Aura also extends to off-the-shelf LED strips that plug into the board’s four-pin “5050” headers. The headers are split between the top and bottom of the PCB, which makes it easy to light different regions, and the included extension cable was a godsend for ringing lighting around the left side of the case.
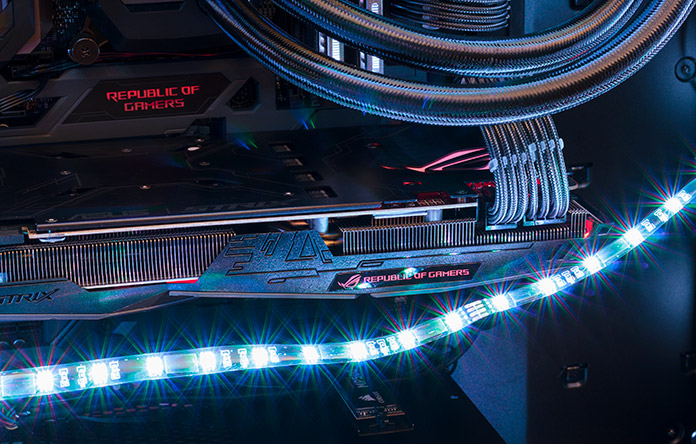
This is the fourth build we’ve lit with CableMod’s WideBeam RGB strips. We keep using them because the magnetic backs simplify not only mounting inside a case, but also making the inevitable adjustments necessary to get things looking just right. The strips are durable and extremely bright, and they’re reasonable affordable at $22.99 USD and $28.98 CAD for the 60-cm lengths we used. Each of the motherboard headers can power up to two meters of lighting at “optimal brightness.” The build uses six 60-cm strips—three per side.
Powerful Pascal graphics
The RGB strip and motherboard lighting zones can be controlled independently or synchronized in perfect harmony. You can also add other Aura Sync components to the mix, like our Strix GeForce GTX 1080 graphics card. The Strix nicely matches the motherboard’s aesthetic even with the lighting turned off. Thanks to the introduction of the GTX 1080 Ti, it’s also become a lot more affordable. Right now, you can snag the OC version for $564.99 USD and $818.63 CAD, and that includes two free games: Dawn of War III and your choice of For Honor or Ghost Recon: Wildlands.
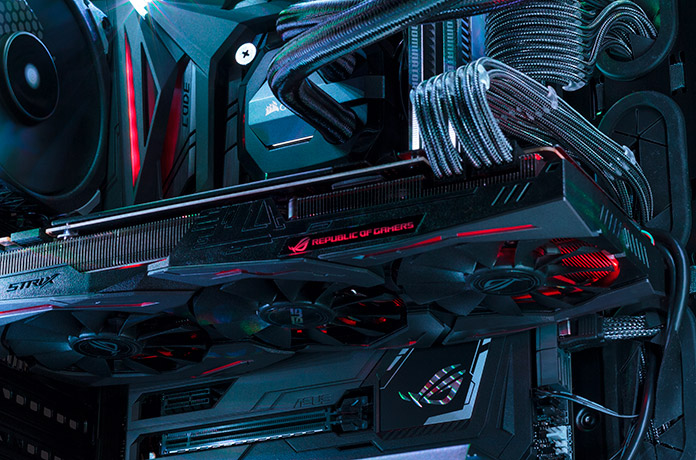
While it can’t match the Ti, the standard GTX 1080 still has plenty of power for turning up the eye candy, pushing a high-refresh monitor, and donning a VR headset. The Strix is smarter than most variants, too. Its fans spin down completely at idle and under lighter loads, making the card completely silent. And its FanConnect headers can control two additional fans using the same intelligence, which translates to better system cooling for GPU-intensive gaming loads.
Making system components work better together is a big part of our focus here at ASUS, and this build’s combination of motherboard and graphics card underscores that effort. The Maximus IX Code—along with all of ROG’s Z270 motherboards—are capable of using the GPU temperature to govern system fan speeds. The motherboard’s reinforced SafeSlots are also built to withstand the weight of heavier GPU coolers that have become popular on high-end graphics cards like the Strix. Careful spacing ensures plenty of breathing room for multi-GPU configs, and there’s even enough space to add a couple of 2.5-slot Strix 1080 Tis if you want to go all-out.
A liquid-cooled CPU
The GPU may largely define gaming performance, but the CPU still reigns supreme for everything else. We selected Intel’s top-of-the-line Kaby Lake processor, the Core i7-7700K, which retails for $349.99 USD and $479.99 CAD. The chip has quad cores and can execute eight threads in parallel, making multitasking a breeze. It’s clocked up to 4.5GHz out of the box, but thanks to an unlocked multiplier and the motherboard’s Z270 chipset, we can overclock even higher. More on that in a moment.

The shrinking surface area of modern CPUs makes dissipating heat especially challenging, so liquid cooling is the best option for most overclockers. We’re using Corsair’s H100i v2 all-in-one cooler, which channels liquid through an expansive 240-mm radiator strapped to dual fans. Spoiler alert: it keeps our CPU cool enough to hold 5GHz under load. And, despite looking a bit intimidating for newbies, it’s also easy to install. The motherboard further simplifies the setup process by including an AiO header tuned specifically for closed-loop coolers like this one. Just plug it in and go. Street price: $119.99 USD and $149.99 CAD.
Cutting-edge memory and storage
Corsair makes lots of the components we picked for the Utility Slayer. The Dominator Platinum Special Edition DDR4 memory is clocked at 3200MHz, a big step up from Kaby Lake’s 2400MHz default, and it can be pushed to 3600MHz without too much effort. 32GB is plenty for our purposes; it’s spread across just two DIMMs, leaving hardcore multitaskers and content creators an easy path to 64GB.
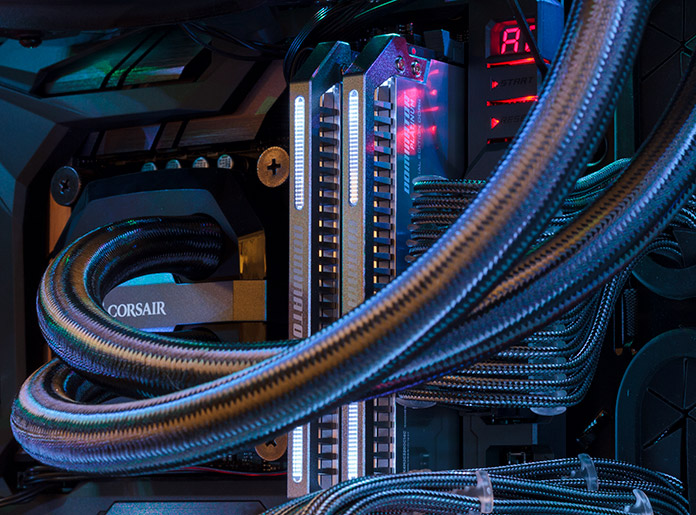
The white LEDs don’t display an RGB rainbow like Corsair’s latest Vengeance kits. However, the polished chrome heat spreaders reflect the ambient lighting for a subtler effect that fits well with the rest of the build. These Special Edition sticks certainly live up to their name; they’re available directly from the company’s website for $369.99 USD.
Storage is split between a wicked-fast SSD and copious mechanical capacity. The OS, games, and applications live on Corsair’s Force Series MP500 M.2 drive. It supports the cutting-edge NVMe protocol, which was created specifically for SSDs, and it rides a four-lane PCIe 3.0 interface with All The Bandwidth. The drive is capable of pushing sequential transfers up to 3000MB/s—more than 5X the top speed of SATA SSDs. At $254.99 USD and $389.99 CAD for 480GB, it’s also reasonably affordable given the performance.
The motherboard has dual M.2 slots situated to avoid hot spots that can slow performance on some SSDs. One runs parallel to the board, under a removable piece of the armor, while the other sticks straight out with a detachable brace. We used the latter for optimal cooling. This location puts the drive directly in the path of airflow from the front intake fans, which will become more important when we add a second graphics card for a future article. Both slots can be populated if you want to run dual M.2 drives on their own or in RAID.
There’s no beating hard drives for massive capacity, so we added a couple of WD Black 6TB HDDs for backups, photos, videos, and other files that aren’t sensitive to performance. The duo is best configured in RAID 1, which preserves your precious data in the event of a single failure. At 7,200-RPM, the Blacks are much faster than low-power alternatives—relatively speaking, anyway. Their $278.99 USD and $369.99 CAD price tags translate to extremely low costs per gigabyte that SSDs aren’t going to beat that anytime soon.

Power to spare
The build’s Corsair RM1000x PSU is admittedly overkill for this particular config. We chose the 1000W beast because it has room to grow, an important factor for a machine designed for versatility and primed to accept multiple graphics cards. The PSU fan only turns on when needed, nicely matching the behavior of our Strix graphics card, and the 80 Plus Gold certification guarantees excellent efficiency across a range of loads. That’s a nice combination for $139.99 USD and $219.99 CAD.
Fully modular cables make building with the RM1000x a pleasure. They also open the door to aftermarket cables that add another element of visual flair. The tightly braided tendrils of CableMod’s individually sleeved ModMesh cables look absolutely fantastic in the finished rig. We opted for the standard carbon kit to match the cosmetic theme, but you can go crazy with different colors and even custom combinations if you want.
At $109.90 USD and $119.98 CAD online, the kit we used is undoubtedly a luxury. But it’s worth indulging if you want to want to turn heads, and you might as well add the matching SATA cables. We can’t attest to durability with such limited use, but the ModMesh treatment certainly seems tough enough to withstand abuse. Just be sure to get plenty of combs to arrange the electrical dreadlocks. I underestimated how many would be needed for the build—and how obsessed I’d become with making everything look neat and tidy.
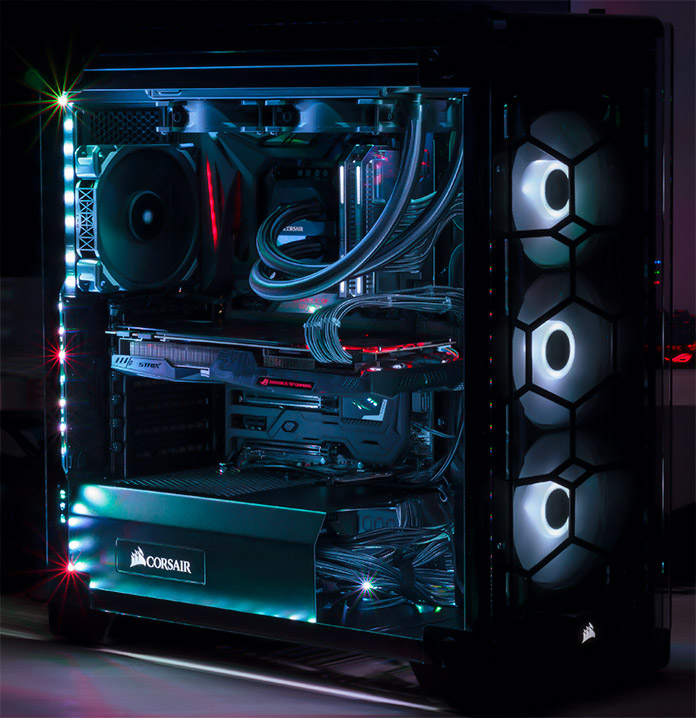
We who build in glass cases
To be fair, the case deserves some of the blame for my compulsive cable organizing. The tempered glass panels of Corsair’s Crystal Series 570X RGB mid-tower leave nowhere to hide. It’s a bit intimidating to know that every nook and cranny is on full display, including behind the motherboard tray, where I usually hide an embarrassingly tangled mess of spaghetti. But if you take the time to do things right, the results can be absolutely stunning. This is without a doubt the most beautiful PC I’ve ever built. The case really brings it all together by letting the internals shine through.
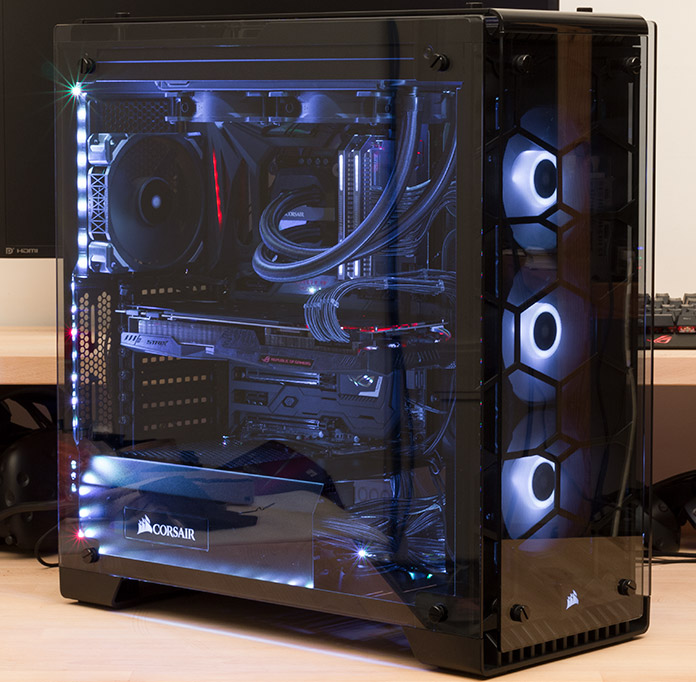
Pretty much everything on the 570X is secured by thumbscrews or magnets, so you can strip the chassis without any tools. Plentiful cable management options make it easy to be meticulous with your wiring; there’s loads of room behind the motherboard tray, lots of pass-throughs in the interior, and a removable channel to clean up the back. Cooling options abound, with a trio of RGB fans up front and room for three more in the top and back. We added one of Corsair’s ML120 Pro fans as a rear exhaust to complement the radiator pumping air out the top. The Pro rotates on magnetic bearings, making it extremely silent, and versions are available with embedded LEDs if you want even more lighting.
Tempered glass is the new hotness in PC enclosures, and it’s easy to see why. The 570X looks like a million bucks—or at least it can with the right system inside. Best of all, it’s reasonably affordable at $179.99 USD and $232.71 CAD, plus another $24.99 USD and $29.99 CAD for the extra fan.
Supporting peripherals
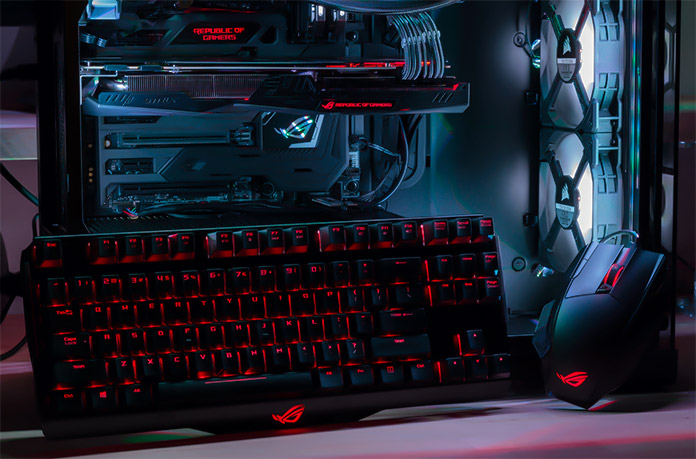
We don’t usually discuss peripherals in PC build articles. However, we couldn’t resist adding ROG’s Claymore Core keyboard and Spatha mouse to complete the picture. Coordinating the lighting across Aura Sync components takes only a few clicks and makes for a nice family photo. My only regret is that we don’t have an appropriately lit monitor to add—at least not yet. The Utility Slayer is good match for the upcoming ROG Swift PG27VQ, which will pair Aura lighting and quantum dots with high-refresh G-Sync goodness later this year. In the meantime, I’d pair it with the PG279Q or PG348Q depending on your preference for ultra-high refresh rates or ultra-wide aspect ratios. It’s hard to go wrong either way.
Overclocking the beast
If you want an in-depth look at Kaby Lake overclocking, check out our guide on the subject. We didn’t shoot for absolute top speed on this rig, but we did spend a little time seeing how far we could push it without sacrificing stability or spending hours tweaking. The process started with the 5-Way Optimization auto-tuner that ships with the motherboard. With a single click, this utility automatically overclocks the processor by slowly raising the clock speeds and testing for stability, which is the best way to ensure the best results with different CPU-and-cooler combinations. It also tweaks system cooling by profiling all the fans connected to the motherboard and setting their response curves accordingly.
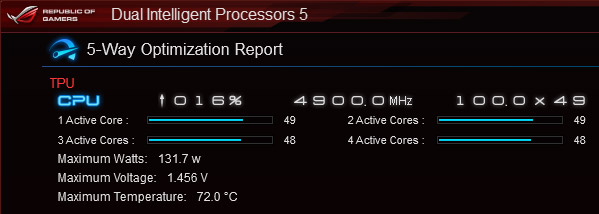
The auto-tuner cranked the CPU up to 4.9GHz for loads occupying 1-2 cores and 4.8GHz for those hitting 3-4 cores. (The more cores are active, the more difficult it is to maintain stability.) That’s an excellent result for auto tuning, especially considering how little effort was involved on our part. But we weren’t satisfied, so we pressed on with manual tweaking. After a few more clicks in DIP 5, we had the CPU running at 5GHz with 1-2 cores fired up and 4.9GHz with 3-4 cores active.
Unfortunately, our CPU wasn’t happy with all four cores at 5GHz. While it booted at that speed, it didn’t survive the RealBench stress test we used to gauge stability. It may hit that mark with more tweaking, but our time for this build was limited. We were, however, able to push the Corsair memory up to 3600MHz by backing off on the timings and upping the voltage slightly. This setup was stable through a two-hour RealBench stress test, with CPU temperatures in the 68-74°C range. It’s also held up through multiple gaming and VR sessions without complaint.
Best of all, the machine is surprisingly quiet even after hours at full utilization. Toward the end of a two-hour RealBench stress test, my decibel meter hovered under 30 dB at 12″ away from the side for the system. That’s a good result given the case’s lack of noise-dampening material—and the fact that the gaps between the tempered glass panels let more noise leak out than traditional enclosures. Thanks to smart fan controls, the system barely whispers at idle.
A premium build worth every penny
*The Edge Up PC builder doesn’t have all the parts we used, so we had to substitute different DIMMs and drop the CableMod RGB strips and cables.
In many ways, the Utility Slayer embodies the best of modern DIY PCs. It’s powerful enough to tackle anything you throw at it and versatile enough to adapt and upgrade as your needs evolve. Thanks to easily customizable lighting, its appearance can also morph to suit your mood. Personalization has never been this easy.
Putting everything together was a breeze, even with all the time spent carefully snaking the cables through the chassis. I could look at this thing all day—and I’ve caught myself just staring at it on more than a few occasions. As someone who has been doing PC DIY for more than two decades, it’s truly incredible what can now be built in a few hours with the right parts.
The Utility Slayer won’t be right for everyone, but the beauty of PCs is that there are virtually infinite combinations. You can plan your next one using the Edge Up PC Builder.