

An Objective Look At Power Consumption
From a latency perspective, changes to processor core frequencies and voltages should be defined and executed by dedicated hardware-based mechanisms. Ideally, the AVX offset parameter should include a secondary voltage target with an enforced hold time before execution of the workload commences. This would reduce voltage requirements at the upper frequency because execution of the AVX workload does not begin until the core frequency has lowered to the throttle ratio.
While we are discussing ideals, it would be better still if we had a mechanism that could detect any heavy workload, rather than just AVX, as that would provide more flexibility for application-based overclocking and throttling. Of course, we do not have these luxuries at present, so a software-based tool that works with the parameters at our disposal is the only option.
With that in mind, it is worth conducting a sanity check to see what’s happening at the electrical level when we use software to make on-the-fly changes to voltage and frequency. We need to ensure there are no excessive current spikes during those transitions. Our rule of thumb for an overclock is to keep CPU power consumption lower than 2X the stock TDP. We’ve never had a CPU fail or degrade when sticking to this rule. For the i7-6950X, that equates to a power cap of 270 Watts. To find out if we are within our self-imposed limit, we need to use an oscilloscope, as software-based reporting is not fast enough to monitor rapid changes:
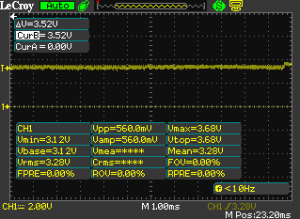
30 Watt idle power draw via EPS 12V
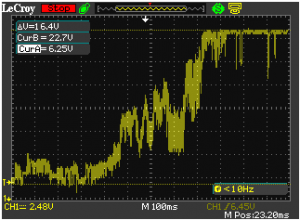
Load current ramp with a 4.6/4.3GHz overclock…
The second, condensed image, shows a peak current of 23 Amperes (276 Watts) passing through the EPS12V line when the CPU enters a load state with the RealBench stress test. The image was captured while the CPU was clocking down from 4.6GHz to 4.3GHz, and while Vcore was changing from 1.45V to 1.35V. Switching losses through the motherboard VRM are likely around 10% when faced with this type of load, so we can surmise the CPU is consuming around 250 Watts of power, which is less than 2X the stock TDP. We now have a 4.6GHz overclock for our games and light workloads, and a 4.3GHz overclock for heavy workloads. Perfect!
The ASUS Thermal Control Tool is not just beneficial when using high-end water cooling. In fact, there’s a stronger argument to be made for the tool when using less capable CPU cooling. In such cases, our overclock is thermally limited way before we approach our 270-Watt power limit. Sure, you do not have to push the CPU to such limits, but there is something to be said about an overclock constrained by the heat a single, multi-threaded application generates. Most of us run a variety of applications on our systems, some of which are performance-bound by CPU frequency. That is why the ASUS Thermal Control Tool is invaluable; it allows us to maximize performance for both heavy and light workloads.
The ASUS Thermal Control Tool works exclusively with ASUS X99 motherboards and is compatible with Haswell-E and Broadwell-E processors. Click here to download.