

UEFI setup for overclocking
We’ve taken the time to walk you through UEFI setup for overclocking, below. If you’re confused or stuck after reading through this section of the guide, head over to the overclocking section of the ROG Forums and ask questions. We’ll help!
1) If using water-cooling with a dual or triple radiator, set an adaptive Vcore of 1.30V and a CPU core ratio of 49X. When using good air cooling, set a core ratio of 48X with a Vcore of 1.25V:
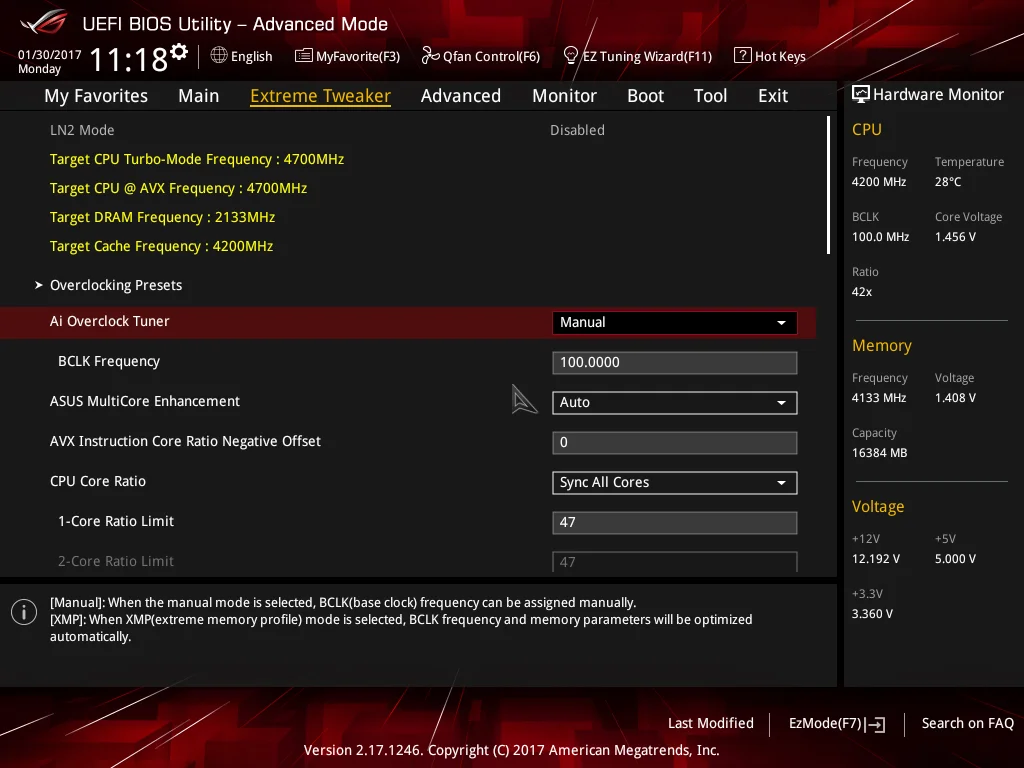
- Enter UEFI by pressing delete during POST.
- Navigate to the Extreme Tweaker menu (Ai Tweaker on non-ROG motherboards)
- Set Ai Overclock Tuner to Manual
- Set CPU Core Ratio to Sync All Cores
- Enter a value of 49 or 48 in the 1-Core Ratio limit box (according to the CPU cooling used)
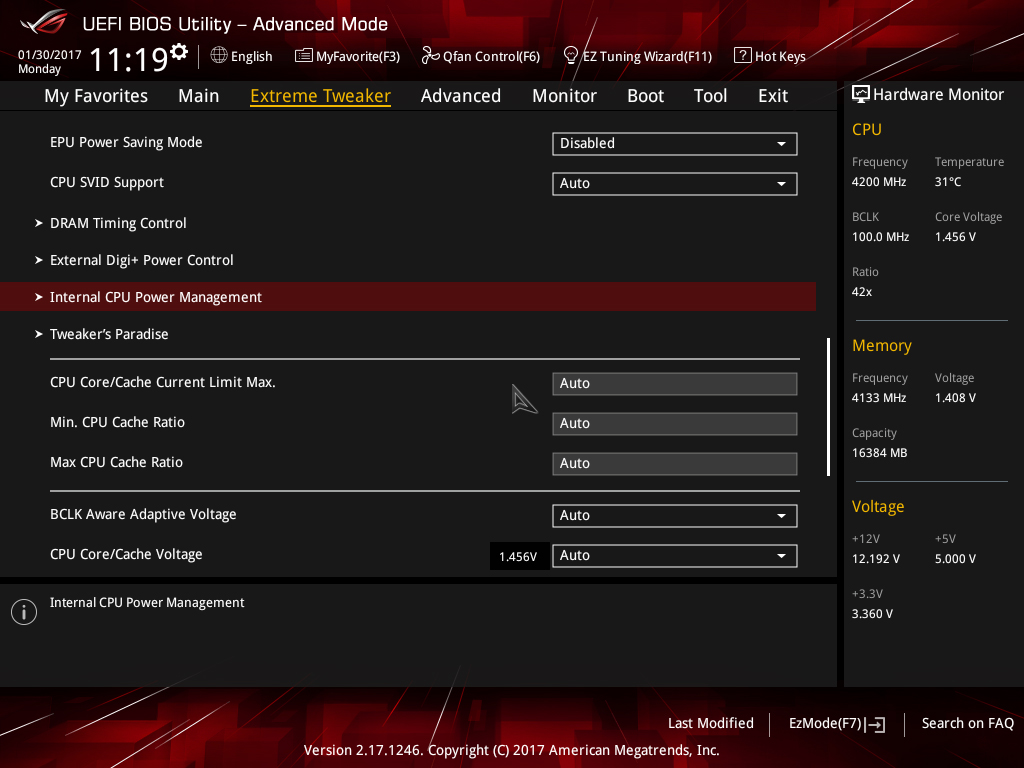 Navigate to Internal CPU Power Management and press enter
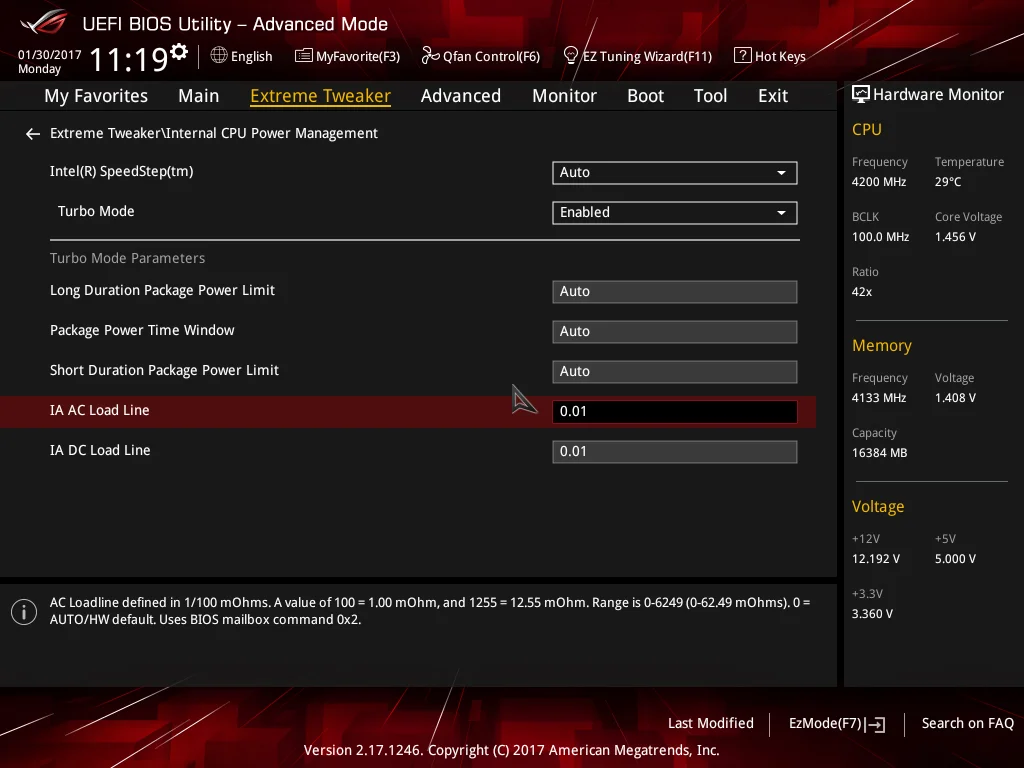
- Set IA DC Load Line to 0.01
- Set IA AC Load Line to 0.01
- Press the escape key on your keyboard to return to the previous page
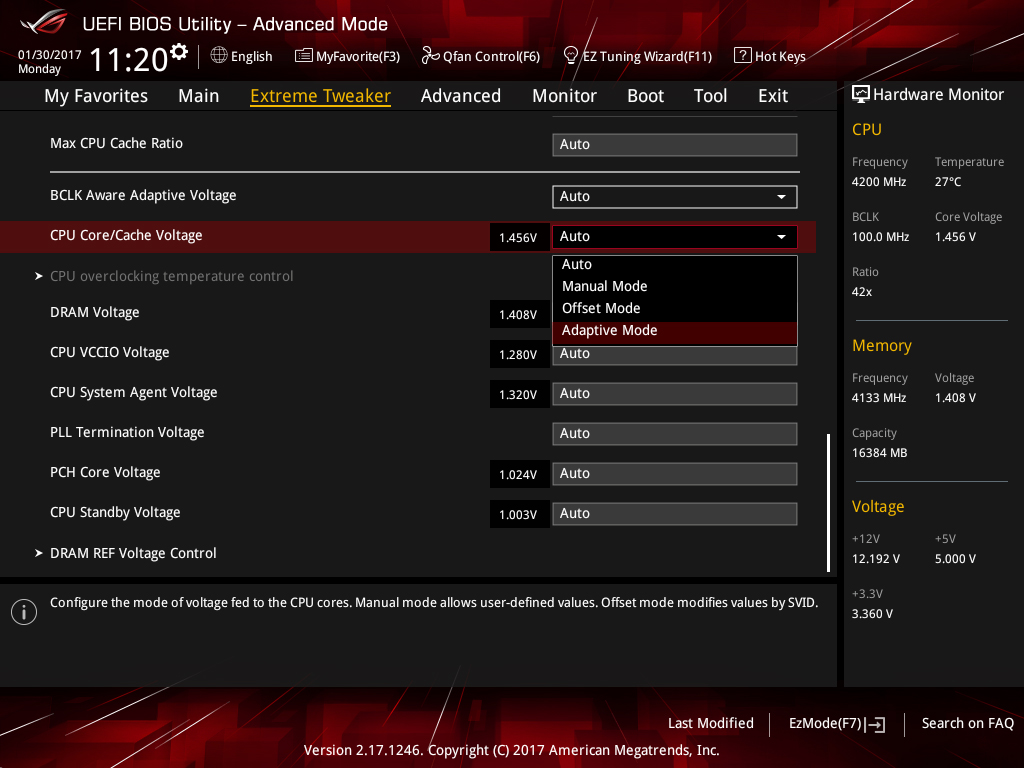
- Scroll down to CPU/Cache Voltage (CPU Vcore) and select Adaptive Mode
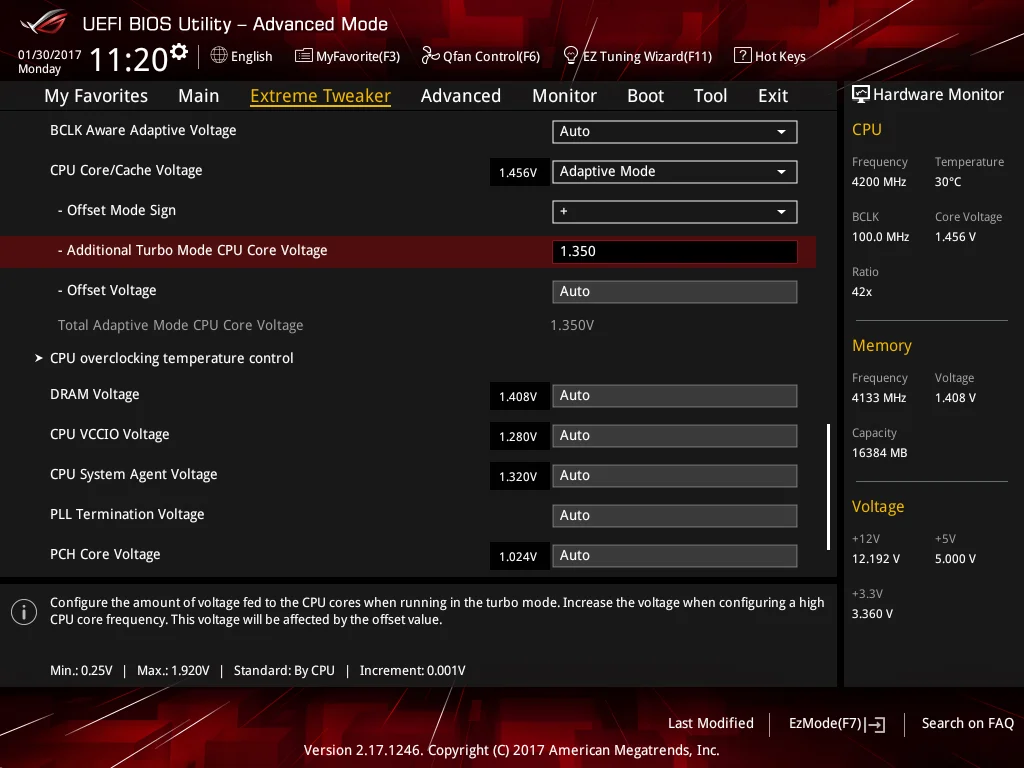
- Enter a value of 1.30 in the Additional Turbo Mode CPU Core Voltage box if you are using water cooling.
- Enter a value of 1.25V if you are using a good air cooler such as the Noctua NH-D15S
- Press F10 to save and exit UEFI
2) See if the system will POST and enter the OS. Once in the OS, run your preferred stress test.
3) If the system is not stable, leave Vcore at the previous value and reduce the CPU core ratio by one, then repeat step 2.
4) If the system is stable, try increasing the core ratio by one step while using the same level of Vcore and repeat step 2. If not stable at the higher ratio, check load temperatures and if core temperatures are acceptable under full stress test load, increase Vcore by 0.02V, then repeat step 2.
If running the AVX2 versions of Prime 95 we recommend using a maximum Vcore of 1.35V with triple-radiator cooling. If using less capable cooling, reduce the voltage according to temperatures. Keeping full-load temps below 80 Celsius is advised.
5) If the system is stable, you may enable XMP for the memory and re-gauge stability.
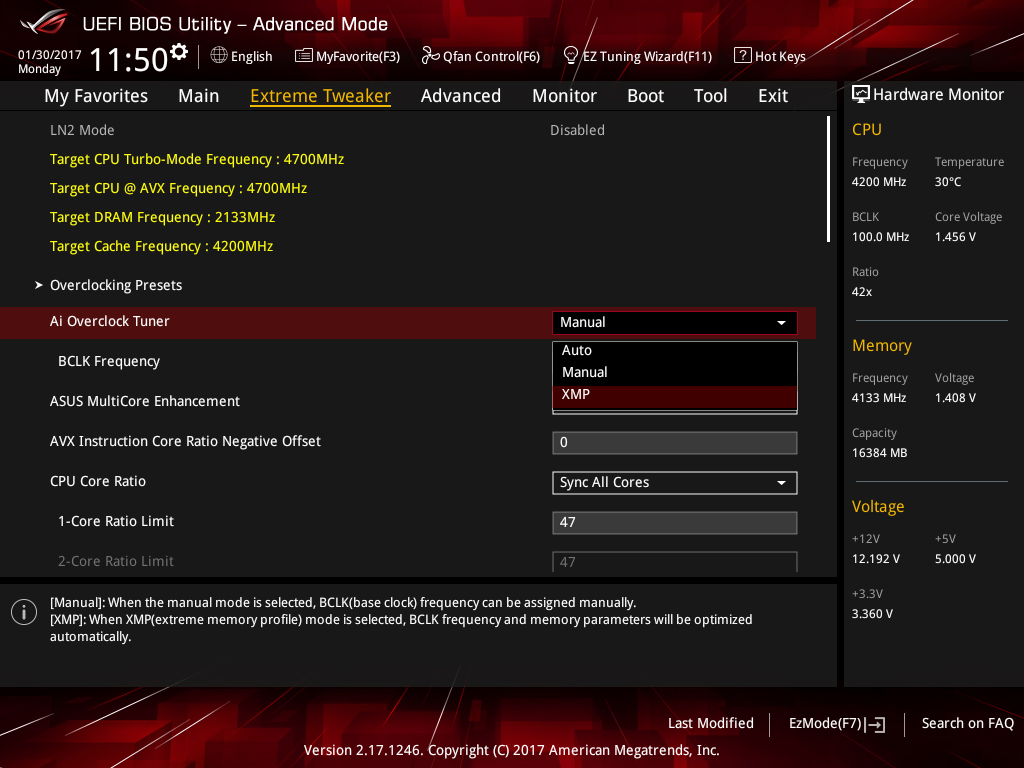
- To enable XMP for your memory modules (assuming they support XMP), set Ai Overclock Tuner to XMP and press enter
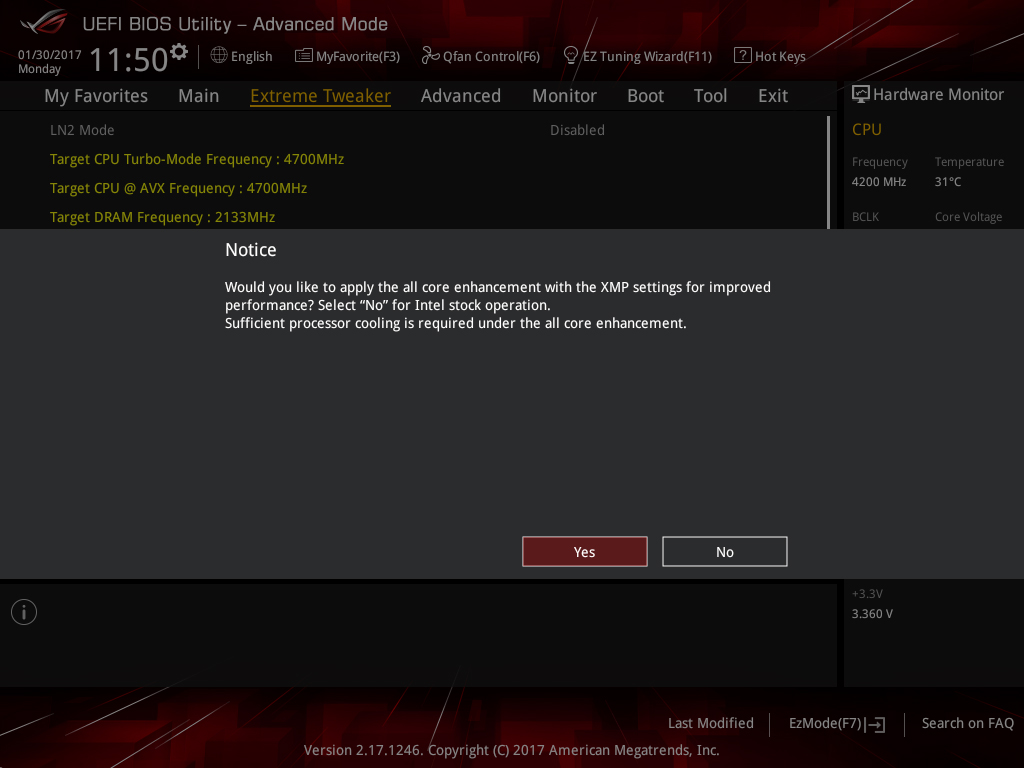
- When prompted to enable all core enhancement, press enter to confirm. It doesn’t matter if you select yes or no for this as we’re overclocking the CPU and this setting is inactive when the CPU is overclocked.
- Save and exit UEFI by pressing F10
6) If enabling XMP causes instability, then tuning of System Agent and CPU VCCIO voltage may be necessary.
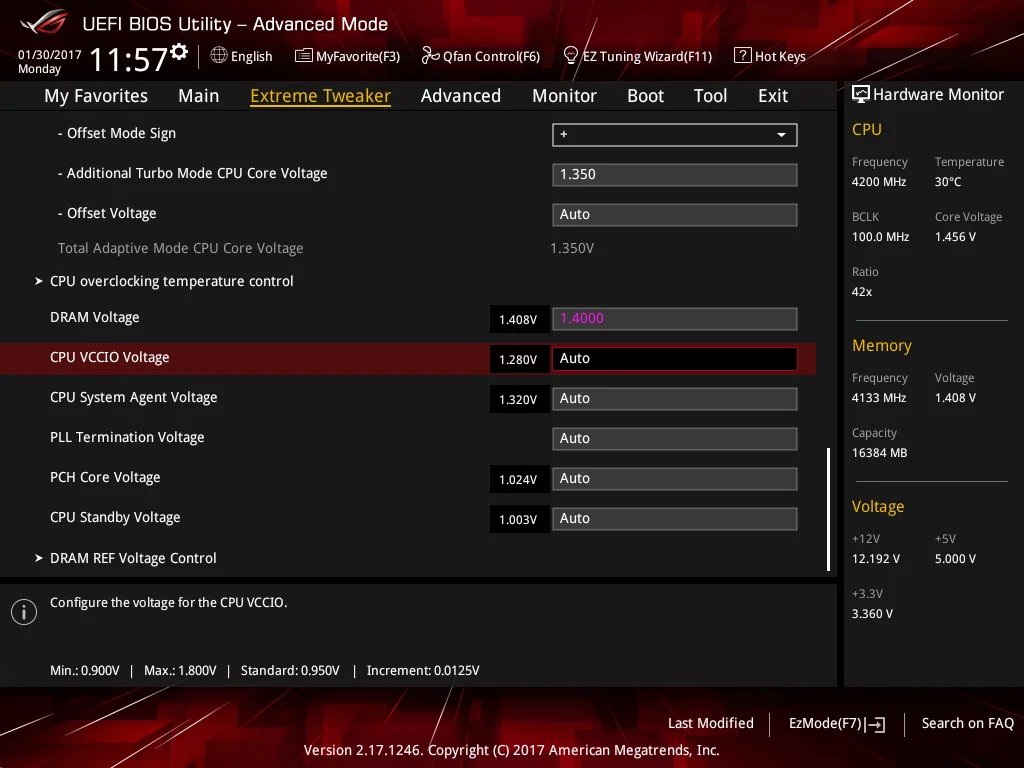
CPU VCCIO and CPU System Agent voltages are found in the Extreme Tweaker page (scroll down to the bottom of the page to find them). These two voltages are sensitive to changes because they are related to signaling. Applying too much voltage can cause instability. Note the auto value being used by the motherboard (displayed to the left of the entry box) and apply gradual changes either above or below that value.
DDR4 frequency range Required CPU VCCIO Voltage range Required CPU System Agent Voltage range
DDR4-2133 ~ DDR4-2800 1.05V ~ 1.15V 1.05V ~ 1.15V
DDR4-2800 ~ DDR4-3600 1.10V~1.25V 1.10V~1.30V
DDR4-3600 ~ DDR4-4266 1.15V~1.30V 1.20V~1.35V
The values shown in the table above are a guideline only. Some CPUs may require more voltage and others less. The amount of voltage required depends on the capabilities of the CPU’s memory controller and the memory kit used. We’ve seen some samples that can achieve DDR4-4000+ speeds needing no more than 1.25V for System Agent voltage. In fact, using more voltage simply makes them unstable. Bear that in mind.
Apply changes, then retest for stability. Also be sure to check the system can POST consistently from a power cycle and warm restart. Memory training occurs during these periods, and if these voltages haven’t been tuned properly, it will result in the system being unable to POST or BOOT.
7) Assuming all is well, you can experiment with Uncore overclocking if you wish:
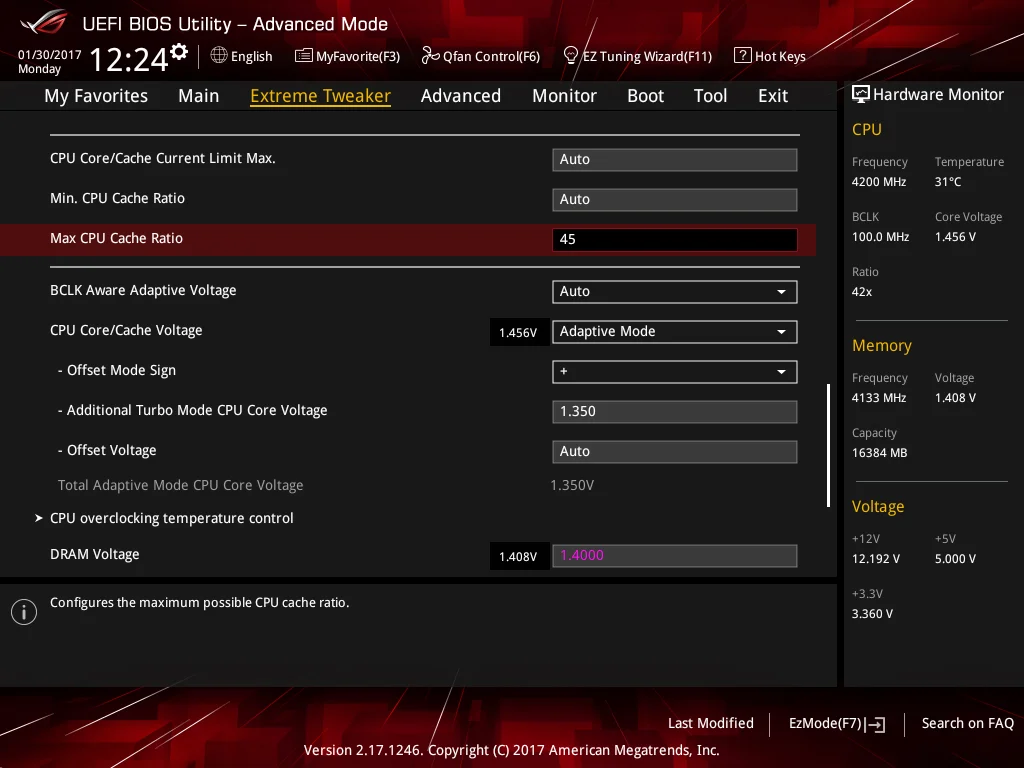
To configure the Uncore ratio, enter the required value in the Max CPU Cache Ratio box. For 4.5GHz, you’d select a value of 45 (assuming BCLK is at 100 MHz). We recommend starting at 45 and working your way up. Note, stability with an Uncore frequency of 4.5GHz is dependent on how much CPU Core/Cache voltage you have applied and is affected by memory frequency.
Use the same method to overclock the Uncore as you did with the CPU cores. However, we do not recommend increasing CPU Core/Cache voltage just to stabilize a higher Uncore frequency. For normal use and most workloads, the performance increase is negligible. Take whatever you can get for free at the same CPU Core/Cache Voltage level you applied to stabilize the CPU cores.
You can run AIDA64’s Cache stress test to check if the applied Uncore overclock is stable. Adjust the Uncore frequency as necessary to achieve stability.
8) If you’d like to make use of the AVX Core Ratio Negative Offset to reduce the CPU Core frequency under AVX workloads, navigate to the setting in UEFI and simply apply the required value in the box:
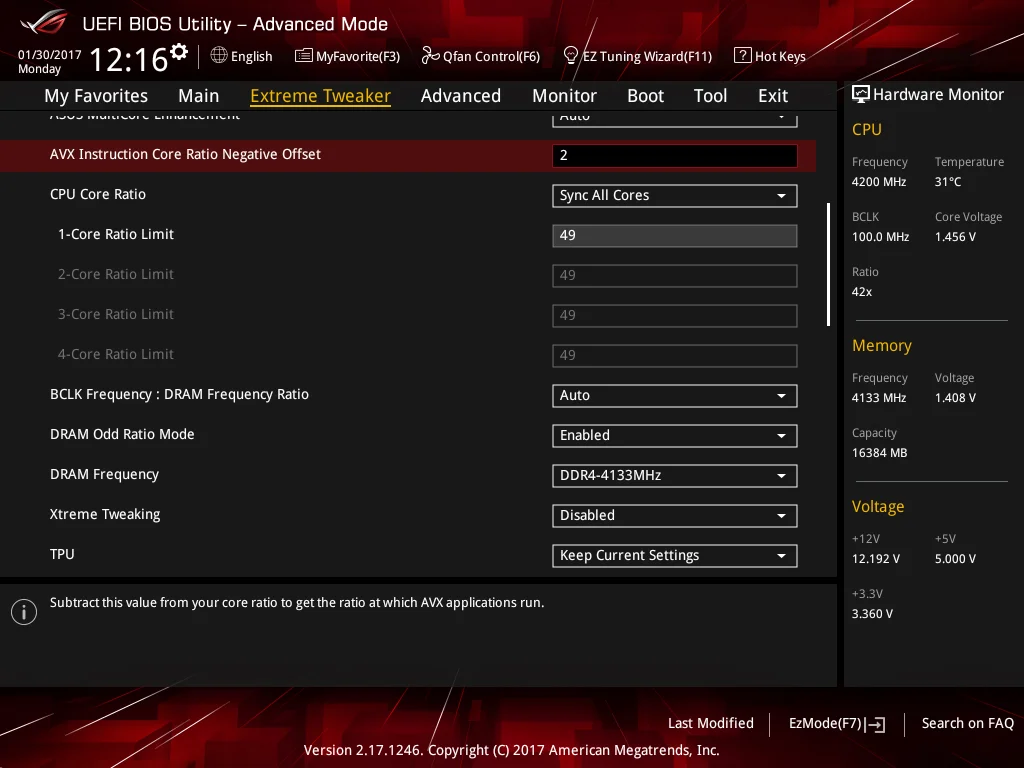
In this case, we’ve applied an AVX offset of 2, and as or Core Ratio limit is set to 49, this results in a CPU core frequency of 4.7GHz when an AVX workload is run on the system. You can test the applied setting by running an AVX application within the operating system and seeing how the system responds. If instability is encountered, you may need to increase the CPU core voltage by a small amount.
As an alternative to using an AVX offset, consider using the ASUS CPU overclocking temperature control feature to maximize the CPU overclock (details on the next page).