
There are some practical, rational arguments to be made in the debate between all-in-one CPU liquid coolers and air tower coolers, but let’s get straight to the heart of the matter. AIO coolers are popular because they’re more fun. Yes, they’re usually quieter than tower coolers when it comes to cooling a high-end CPU during heavy workloads, they contribute substantially to the entire airflow pathway of your build, and they reduce CPU socket heat buildup by shipping that heat out to a radiator. But there’s undeniable fun that comes with installing an AIO CPU liquid cooler in your PC, especially when it comes with high-end customization options.
If you haven’t installed an AIO CPU liquid cooler before, you might have questions about the process. Here, we’ll walk through the installation of the ROG Ryujin III 360 Extreme ARGB with an AMD Ryzen CPU and an ROG X870E motherboard.
This article is part of our “Back to Basics” series designed to help PC building newcomers make informed decisions about component purchases and assemble their new PC with confidence. Click here to browse the entire collection of posts.
Install your CPU and install the AMD mounting bracket
The initial elements of installing an AIO CPU liquid cooler and installing a tower cooler are quite similar. We need to get the CPU in its socket, and then we need to get the mounting hardware for the cooler in place.
You’ll find some different opinions on what order to install the components of your PC. I tend to install the CPU and pump onto the motherboard first, then install the motherboard into the PC case, then install the AIO CPU liquid cooling radiator. This approach gives me a happy little window of time to plug in stuff along the top edge of my motherboard (CPU power cables, etc.) without having to squeeze my fingers between the motherboard and the radiator. If your PC case doesn’t give you a lot of room for installing your radiator, then you might need to install it before the motherboard.

You’ll find an AM5 CPU socket on the latest AMD motherboards. As an LGA-style socket, the pins are on the motherboard, not the CPU, making any accidental bending or damage to the pins less likely.
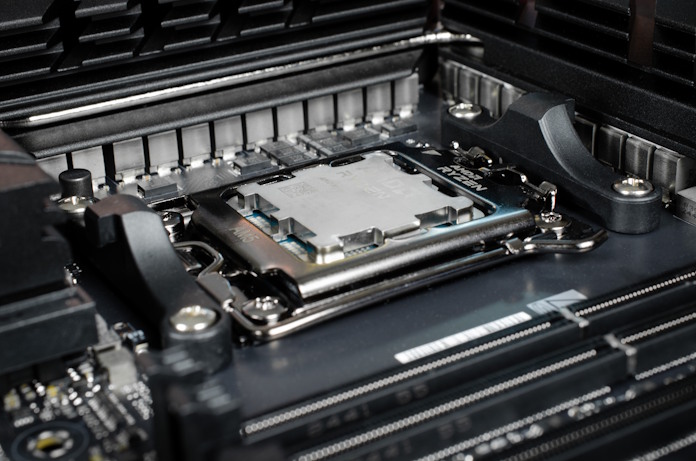
Line up the little golden triangle on one corner of your CPU with the corresponding triangle on the socket, gently place the CPU in the socket, and clamp it down with the bracket.
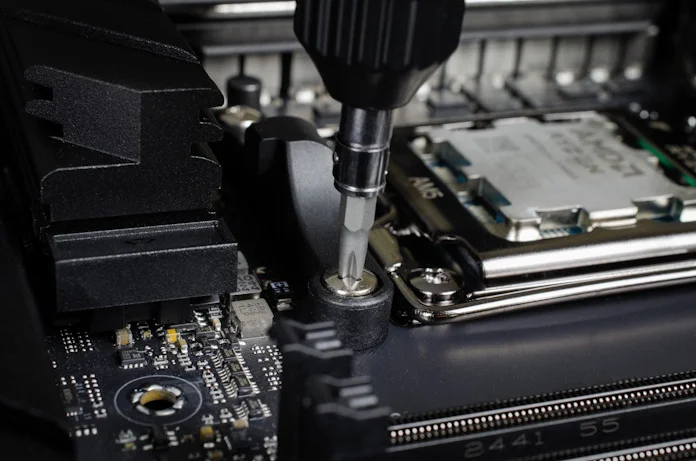
The pre-installed heatsink mounts won’t work with the ROG Ryujin III 360 Extreme ARGB. The mounts are secured in place with two screws each.
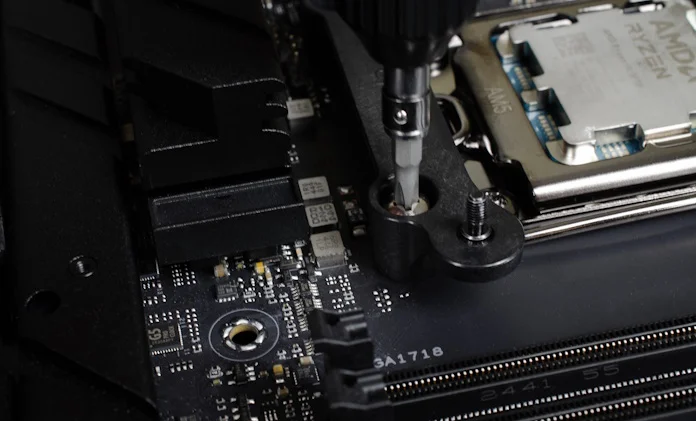
In the box, you’ll find replacement mounting brackets. Secure them in place with the four screws that you just removed from the pre-installed heatsink mounts. A couple arrows on the top of the brackets help you orient them correctly.
Attach the pump
The ROG Ryujin III 360 Extreme ARGB is designed to work with both AMD and Intel CPUs from a couple different processor generations, but there are some key differences in the physical layouts of the motherboards that support all those CPUs.
To accommodate those variations, there are a couple adjustment mechanisms on the retention ring that help you line up the thumbscrews with the attachment points on the mounting brackets. Two of the arms on the retention ring slide laterally, and the thumbscrew cap position can be moved, as well. Follow the manual’s instructions for the CPU family that you’re working with.
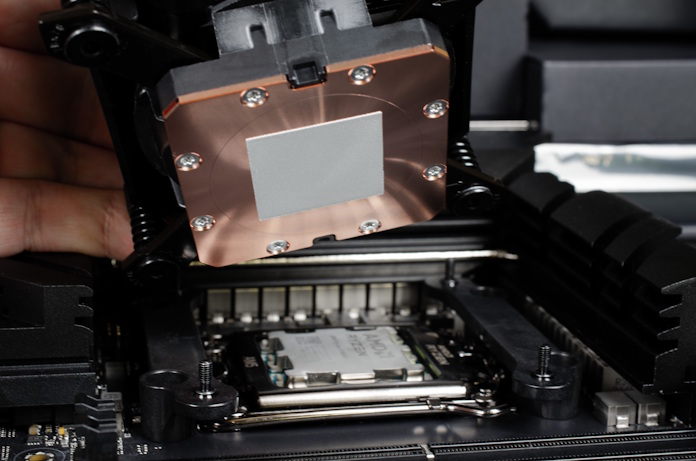
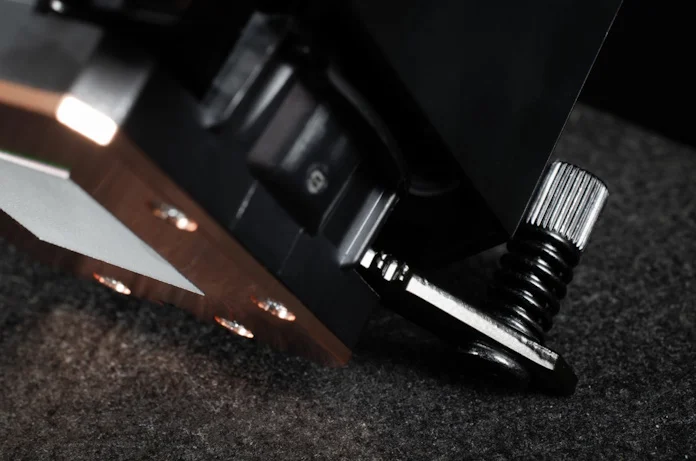
With the retention ring and thumbscrew caps lined up correctly, attaching the pump is as simple as lining up the thumbscrews over the threaded posts.
While attaching the pump is easy, you’ll need to stay aware of a few things as you’re putting it in place. First, the pump has a couple tubes attached to it, which are in turn attached to a giant, heavy piece of metal. Don’t let the radiator damage anything while your attention is on the pump. Second, be thoughtful about the orientation of the pump so that the screen on the pump housing is rotated properly in your completed build. Finally, set the pump in place carefully so that you don’t make a mess of the pre-applied thermal paste.
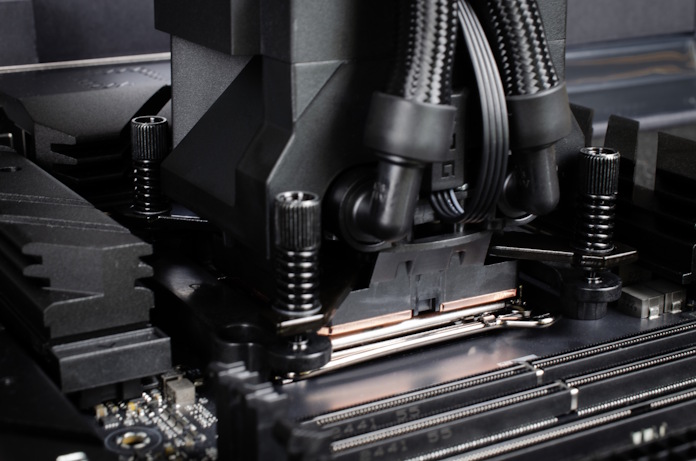
Tightening down the screws comes next.
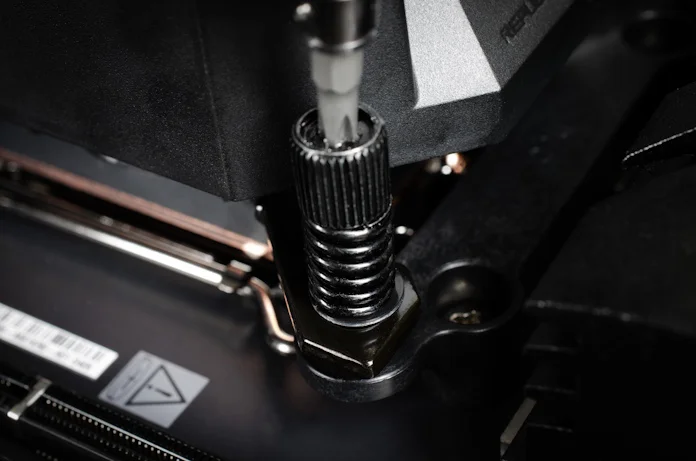
Start by getting each thumbscrew engaged on the threads a little bit — don’t tighten that first screw all the way down before you even start the others. Once all four screws are in place, then tighten each one down completely. You’ll hit a point where each thumbscrew will just stop tightening: don’t continue to apply force after that. Start with any of the four screws, then tighten down the screw on the opposite corner, and then tighten up the last two.
It’s like tightening lug nuts when you’re replacing a tire on your car. Your father will be proud. Unless your father never taught you how to replace a tire, in which case everyone’s favorite YouTube dad can be proud of you instead.
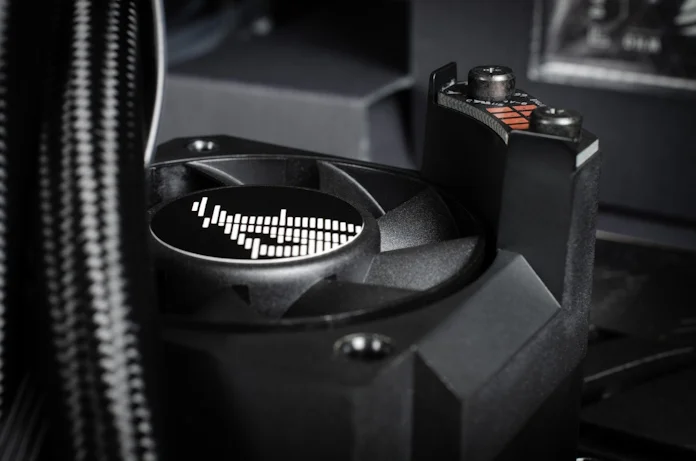
On top of the pump there’s an embedded fan that helps keep air moving around your CPU socket and through the VRM heatsinks. This fan will spend most of its life living in the dark under the pump housing, so give it a moment to take in the world before you put it into hiding.
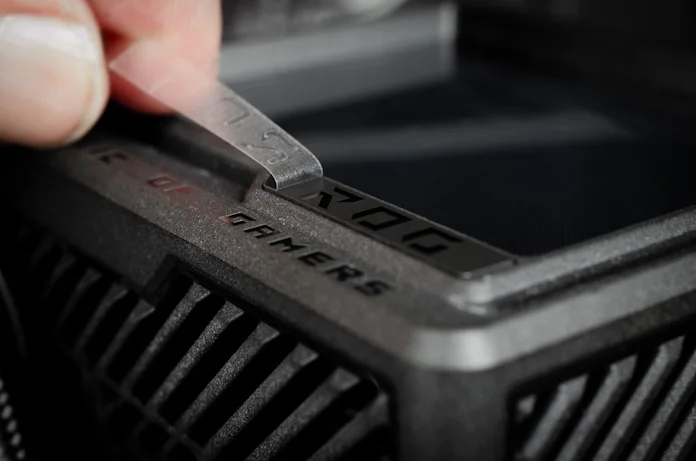
The ROG Ryujin III 360 ARGB Extreme’s pump housing attaches magnetically. Hold the tubing and wires out of the way and pop the housing in place. Then, you get to enjoy the odd satisfaction of removing some protective plastic. Why did we put a little strip of plastic on top of the metallic ROG accent? Because you’re welcome, that’s why.
Plug in all the things
With the pump and pump housing in place, you’re ready to install your motherboard into your PC case. Line up the mounting points over the posts and get thread a screw down finger-tight into every hole.
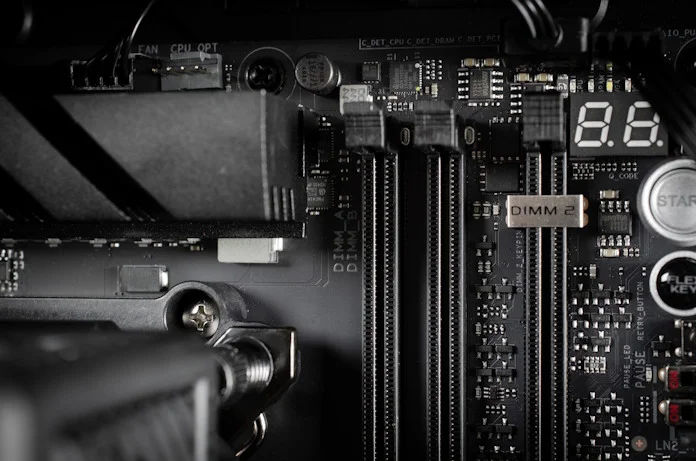
Then, take a moment to plug a few things in while the headers are readily accessible. First, grab the 4-pin fan cable coming from the pump. Plug it into an AIO_PUMP, W_PUMP+, or CPU_FAN header. For convenience, use a pump header if one is available, since it’ll keep the coolant flowing constantly without manual configuration. A W_PUMP+ header can provide extra amperage, a bonus which primarily matters only if you’re running a custom liquid cooling loop, but won’t cause problems for your AIO. Ideally, you’ll have your radiator fans connected to the CPU_FAN header so that they can ramp up with CPU temperatures — and so that you don’t get an error message as your computer boots. (Motherboards get grumpy when nothing is plugged into the CPU_FAN header.)
If your motherboard doesn’t have a dedicated pump header, you can connect your pump to the CPU_FAN header and your radiator fans to CPU_OPT, but in this scenario you should enter the UEFI and set the CPU_FAN header’s curve to a constant 100% speed so that the pump is always working. Hopefully, your motherboard will let you set up a separate fan curve for CPU_OPT so that your radiator fans can ramp up with CPU temperatures rather than running at a constant full tilt.
The screen on top of the pump housing needs to get its display signals from somewhere, and that somewhere is a USB 2.0 connector. Run the 9-pin USB 2.0 cable through the cable management compartment of your PC and plug it into a handy connector. This is also a good moment to connect your CPU power cables, since those headers will be less accessible after you install the radiator.
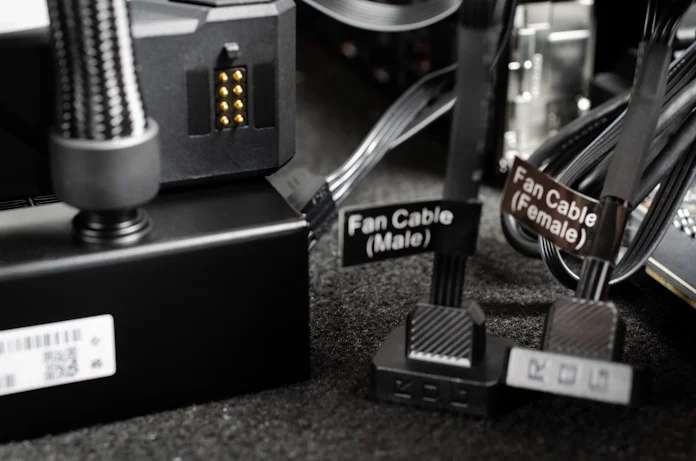
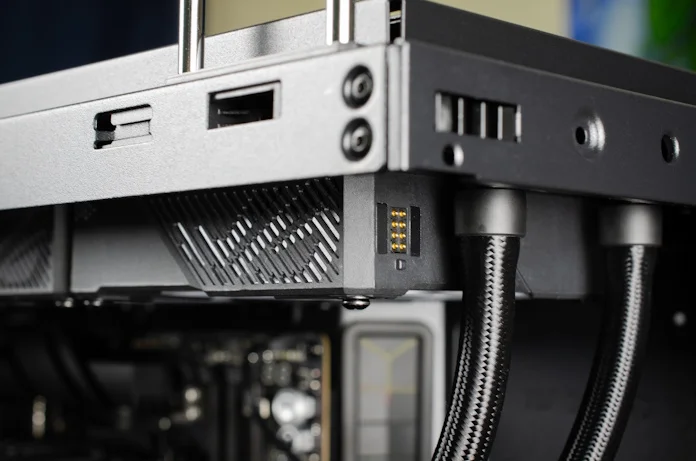
For simplified installation, the three fans of the ROG Ryujin III 360 ARGB Extreme daisy-chain together with magnets and small pins that pass along power, fan control signals, and keep the ARGB lighting synchronized. One fan cable drives all three fans, and it attaches to a fan at either end of the radiator: the male cable will pop into place on one end, and the female cable will pop into place on the other.
The other end of the fan cable needs to be connected in two places. Plug in one to the CPU_FAN or CPU_OPT header, and the other to a handy ARGB header. Run these wires into the cable management compartment of your case, and leave the other end hanging free and out of the way until your radiator is installed.
Prepping and installing the radiator
With the pump installed on top of your CPU and your wires plugged in, it’s time to turn your attention to the radiator and its fans.

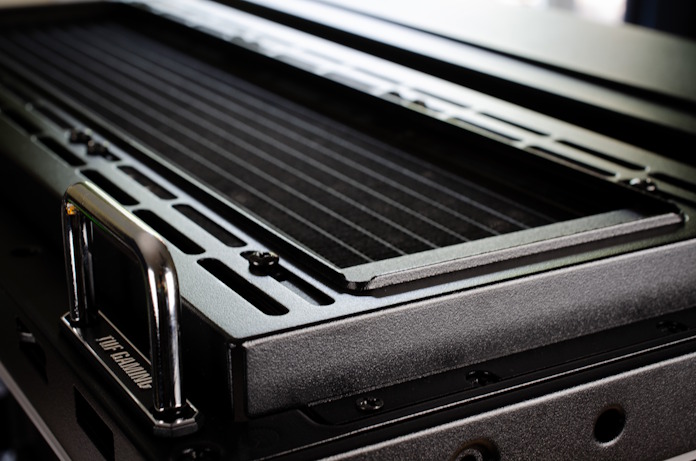
For protection during shipping, we put HEX caps on the radiator. But radiators don’t work very well when their airflow is completely obstructed on both sides. So start by pulling those caps off.
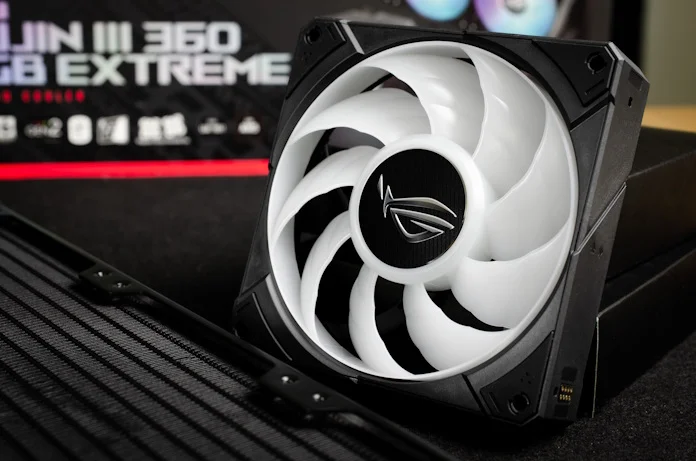
The ROG ARGB fans that come with the ROG Ryujin III 360 ARGB Extreme are specialized spinners designed to deliver high static pressure. Airflow and noise matter too, of course, but it’s vital to have fans capable of pushing air through the dense fin stack of the radiator.
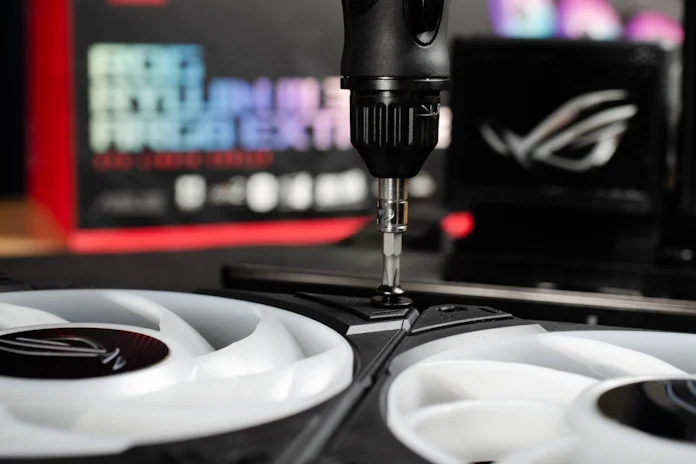
Line up the fans on the radiator, then secure them to the radiator using the long screws provided in the box. Rubber grommets on each corner help minimize noise created by fan vibration.
Now, you’re ready to install the radiator. Here, I’m attaching it to the top panel of the TUF Gaming GT502 Horizon chassis. Popping off a cover gives me access to the attachment points. Then, I can hold the radiator in place with one hand while threading in screws with the other. Using only the screws provided in the box ensures that I don’t damage the radiator while installing it.
Tips for placing your AIO CPU liquid cooler radiator
Depending on your chassis, you might have front, side, and top panel installation options for the radiator. My personal preference is usually to install the radiator in the top of the chassis, as that means that the heat from my CPU gets immediately vented from the case without warming up any other components. Also, I like how these fans act as an exhaust for all the air in my chassis, limiting any recirculation or dead zones. I could accomplish this with standard case fans, of course, but I like it when components play double duty.
This arrangement does mean the radiator draws in relatively warmer air from the interior of my chassis, not fresh air from outside. Whatever heat gets dumped into my chassis from my graphics card will end up going through the radiator for my AIO CPU liquid cooler, potentially limiting its cooling effectiveness. The alternative is to use the radiator and its fans as intake instead of exhaust. This would ensure that the radiator receives nothing but fresh air from outside the chassis for cooling my CPU, but it would involve running that heated air into my PC. If more of my PC use cases were CPU-bound, I might prefer this orientation, but since my PC is mostly a gaming rig, I’d rather have an airflow setup that gives my graphics card first dibs on fresh air. A dual-chamber PC case might help you avoid this issue altogether by establishing separate airflow pathways for your CPU and GPU.
Your mileage may vary, but here’s one thing that’s true for any AIO CPU liquid cooler installation: be careful about where you put the bubble. In any AIO cooler, there’s a little pocket of air, and that bubble will always rise to the highest point of the liquid cooling loop. For quiet, effective, and long-lasting operation, don’t let this bubble live in your pump. That’s why we don’t recommend mounting your radiator to the bottom panel of your chassis, even if it looks like there’s a spot for it. But you also don’t want the bubble to sit in any part of the tubing, so if you’re attaching the radiator to your front or side panel, make sure that it’s mounted in such a way that the tubes attach near the bottom of the case rather than the top, and that some part of the radiator is higher up than your pump. Such an arrangement puts the bubble in the radiator, as does mounting the radiator to your top panel, and when the bubble lives in the radiator it won’t cause any trouble.
With your radiator installed, you’re ready to connect the fan cable. Grab that fan cable that we connected earlier to the motherboard, and run it inconspicuously to the attachment point on one of the fans at the end of the radiator. It’ll pop into place magnetically.
Ready to chill
And with that, you’ve successfully installed an AIO CPU liquid cooler. From this point, you’re ready to keep installing the rest of your hardware for your PC.
Once your PC is up and running, don’t forget to personalize your hardware. You’ll likely want to synchronize the ARGB lighting on the radiator fans with the other RGB LED illumination in your gear, and you should definitely personalize the display on the pump housing. This screen can display preset ROG animations, hardware monitoring information, or custom pictures or animations. Through the Armoury Crate app, you’ll be able to do all this and much more. If you’d prefer a standalone application that does nothing but control your ASUS all-in-one liquid cooler’s LCD display, grab the ASUS InfoHub app instead.