So we are at the end of June getting ready to jump into July and really kick of system building with the recently launched range of ASUS z97 series motherboards as well as soon to be released range of “Devil’s Canyon” CPU’s. Here in the PCDIY labs we have been hard at work overclocking CPUs and across all of our Z97 boards and ensuring the experience is great whether it manually or automatically via our Auto Tuning or similar related technologies. With this in mind the end game was to have some initial results to provide a a sense of what you can expect if you are looking to drop Intel’s latest and greatest i7 CPU into an ASUS Z97 series motherboard. Whether you are wondering about the mainstream boards like the Z97-A, Z97-PRO, Z97-Deluxe or even mini ITX boards like the Z97-i PLUS as well as our remaining boards divisions like, ROG, TUF or WS we have you covered.
Our testing was completed on 6 4790K CPU samples. The specifics are noted below.
CPU: Intel Core i7 Devils Canyon 4790K
Motherboard: ASUS Z97 DELUXE Motherboard with varying UEFI builds all builds tested produced consistent results ( 901 , 1104, 1203 )
Memory: Corsair Dominator Platinum DDR3-2400 ( 4×4 Kit 16GB )
PSU: Corsair AX 850 and Corsair AX 760
Cooling: Koolance EXOS Water Cooling
EXOS – EX2-755
http://koolance.com/ex2-755-exos-2-v2-liquid-cooling-system-aluminum
Water Block – Koolance CPU-380I
http://koolance.com/cpu-380i-processor-water-block
Thermal compound
http://www.junpus.com/thermal-paste/products/thermal-paste/item/76-nano-diamond-thermal-grease-dx1.html
http://www.newegg.com/Product/Product.aspx?Item=23K-0004-00002
Results
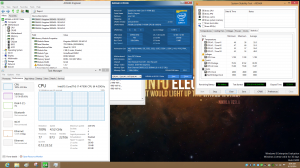
4.6GHz 2133Mhz
Aida64 Stable – Full CPU and Full Memory Load – 12 Hours and 30 Mins Stable
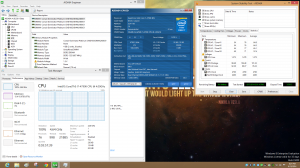
4.7Ghz 2400MHz
Aida64 Stable – Full CPU and Full Memory Load – 3 Hours Stable
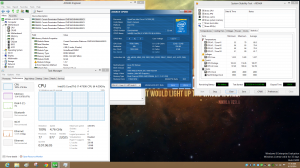
4.8GHz 2400Mhz
Aida64 Stable – Full CPU and Full Memory Load – 1 Hour Stable
As you can see the results were not only impressive but consistent. In trying multiple boards including the MAXIMUS VII HERO, Z97 SABERTOOTH, Z97-WS and the Z97-A all of the boards had no issues reaching and holding the same level of stability as shown with the Z97-DELUXE. In addition the consistency between UEFI tuning was present. For many this will be a important aspect to be aware of as it means with an ASUS Z97 series board little tuning is required as the auto rules within the UEFI will automatically adjust when primary tweaking and tuning parameters are define during manual overclocking.
Consistency across samples regarding CPU frequency scaling
In addition to the wide range of boards that I tested I spent considerable time assessing the consistency of CPU frequency scaling. Specifically this is important as it helps to outline what the possibility is to reach X.XGHz frequency if you get a 4790K. Based on this CPU sampling and additional information obtained for our performance lab we are seeing great consistency in the majority of CPU samples reaching a min of 4.6GHz. This is a considerable improvement in overclocking experience end users will have compared to the previous Haswell K series of CPUs. Regardless of this information it is important to keep in mind CPU margin varies from CPU to CPU and overclocking results are never a guarantee. Additionally initial finding show that the cache ratio or what is also refereed to as the ring bus has a higher degree of sensitivity and can impact overclocking more so than previous Haswell K series CPUs. Previously our auto rules would define a cache ratio of 39 while this slightly reduces efficiency as opposed to maintaining a native cache ratio ( 1 to 1 ) with the turbo value defined for the CPU multiplier it helps to place less concurrent stress on the CPU and allows for improved scaling of the CPU frequency. For this generation we have revised our auto rule and defined one of 44. This helps efficiency and improves performance but may reduce some 4.6GHz CPUs from being able to reach this frequency. As such if pursuing manual overclocking it is initially recommend you manually define a cache ratio of 39. Once you have verified your max CPU frequency and ensured it is stable you can increase the cache ratio incrementally attempting to see if you increase or even potentially match it to our CPU ratio / multiplier.
UEFI Options and the benefits of ASUS auto rules
During the course of overclocking especially when working with a new chipset and a new CPU one key area I evaluate is the auto rule(s) experience. For those of you wondering what “auto rules” are, they are the automatic parameters adjusted within the UEFI in relation to other parameters being modified. An example would be if you modify your CPU turbo multiplier from auto to 46 ( effectively overclocking your CPU to 4.6GHz ) there are auto rules that will be automatically put into effect to ensure a smoother and simpler overclocking experience. These could be voltage parameters, cache ratios, OCP level ( over current protection ) and much more. These values are extremely important and defined only after thousands of man hours are put into tweaking and tuning the UEFI manually prior to the launch of the chipset and the CPU. For years ASUS’s UEFI auto rules have led the industry in respect to their consistency and quality. I am happy to report this continues under ASUS Z97 motherboards. Little to no advanced tuning is required. It is not a simple as the Auto Tuning ( automatec single step overclocking ) offered within the ASUS AiSuite III system utility which can overclock your CPU consistently and effectively based on a wide range of options including frequency or temperature and more importantly overclock your CPU specific to the margin of your CPU, CPU cooling, power supply and memory. So while not being as simple as the click of the button overclocking through the UEFI is extremely simple and effective.
So what values need manual adjustment? Just CPU voltage, enabling of XMP ( Extreme Memory Profile ) and entry of the desired multiplier. All other values are defined by the auto rules programmed within the UEFI.
Below are a few screenshots of the key values that would need to be defined manually.
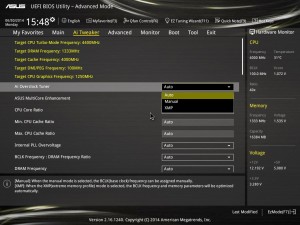
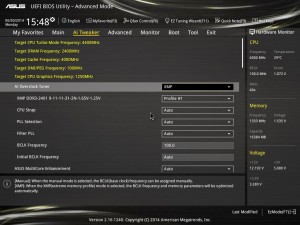
The first option is under Ai Tweaker, specifically Ai Overclock Tuner this setting allows us to manually define parameters specific to frequency and voltage for the motherboard. Two values are available manual and XMP. XMP is what we are selecting as we want to leverage the XMP profile programmed into the memory which include timings, voltage and frequency. Enabling of XMP additionally maintains fully “manual” setting functionality in that are values that are exposed and adjustable can be modified.
Here we can see the UEFI with XMP enabled
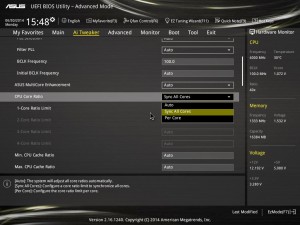
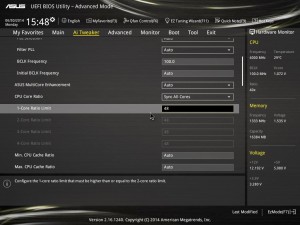
Next up is an option still under Ai Tweaker, specifically the CPU Core Ratio. This setting is used to manually define to parameters. One is how you would like to manually define your CPU ratio / CPU multiplier this is effectively the value that is multiplied by the BCLK creating your CPU frequency. You can define that the core ratio be operate in a sync all core or a per core tuning mode.
Sync all cores causes all cores to be overclocked to the same frequency. This is a traditional approach to overclocking. An example would be if you defined a 46 CPU ratio / CPU multiplier this would be a target for 4.6GHz for the operating frequency of all cores.
Meaning Core 1 = 46
Meaning Core 2 = 46
Meaning Core 3 = 46
Meaning Core 4 = 46
Per core allows for the ability to manually define the CPU ratio / CPU multiplier for each core. The advantage of this approach is great potential overclocking. Some CPUs have limited CPU frequency margin and may not be able to operate a higher frequencies across all cores but may be able to reach higher frequencies with similar or the same values. This allows for potentially higher clocks speeds on 1 and 2 cores / threads. This can be very beneficial for many applications as much applications do not fully leverage advanced multi core cpus. An example would if you defined a 46 CPU ratio / CPU multiplier for cores 3 and 4. This would be for a target of 4.6GHz. The difference comes in then being able to define 47 or 48 for cores one ( 1 ) and two (2).
Meaning Core 1 = 46
Meaning Core 2 = 46
Meaning Core 3 = 47
Meaning Core 4 = 48
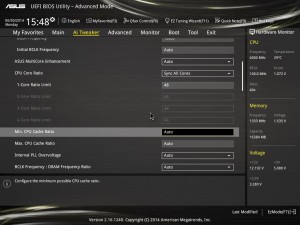
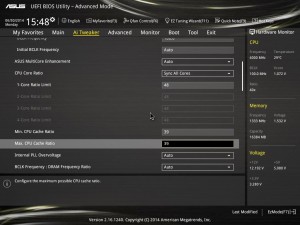
Next is an option under Ai Tweaker, specifically CPU cache ratio. This setting is used to when you want to define the frequency of the cache ratio or ring bus. The ring bus helps to provide information to the CPU as well as IMC ( integrated memory controller ). Ideally this value should be running in a one to one ( 1:1 ratio ) with the CPU ratio / CPU multiplier. The issue is that it becomes more difficult / stressful for the CPU as a whole to have multiple parameters run at high speeds ( CPU ratio / CPU multiplier along with the memory controller and high speeds ( 2400MHz and greater as well as the GPU ). This value will not generally need to be modified as the UEFI will automatically adjust these via auto rule optimizations. In some cases and for some CPUs though it may need to be lowered to improve CPU frequency scaling. Lastly it can be increased towards a one to one ( 1:1 ) ratio should you want to maximize performance and total system efficiency.
Last you have voltage options. These are all still located under Ai Tweaker. These voltages are specifically in relation to the operating voltage of the CPU. There are multiple options
Stock per CPU command
Manual ( Absolute ) vid – Maintains a static define voltage. While can be beneficial in ensuring consistent voltage which may be need for very aggressive high frequency overclocks to help ensure stability it is extremely inefficient. This is due to the fact that the voltage will not drop down when the cpu is in moderate to idle states. So even if the CPU frequency drops in these states the CPU is consistently supplied an aggressive high level of voltage. This also directly affects and increases temperatures and power consumption.
Offset vid – Allow for more flexibility and efficienty while allowing for voltage increase to aid in overclocking. Efficiency is improved as the voltage will drop when the CPU is under moderate or idle loads. It carries the disadvantage though of still applying an offset to the based SVID voltage.
Adaptive vid – Is the newest form of the voltage control is and extremely efficiency and effective allowing for the best of both worlds approach in yielding almost the maximum vid efficiency under idle and moderate loads ( dropping to SVID defaults ) and only increasing the vid when the CPU reaches turbo multipliers.
A visual representation of how these voltages operate is below.

