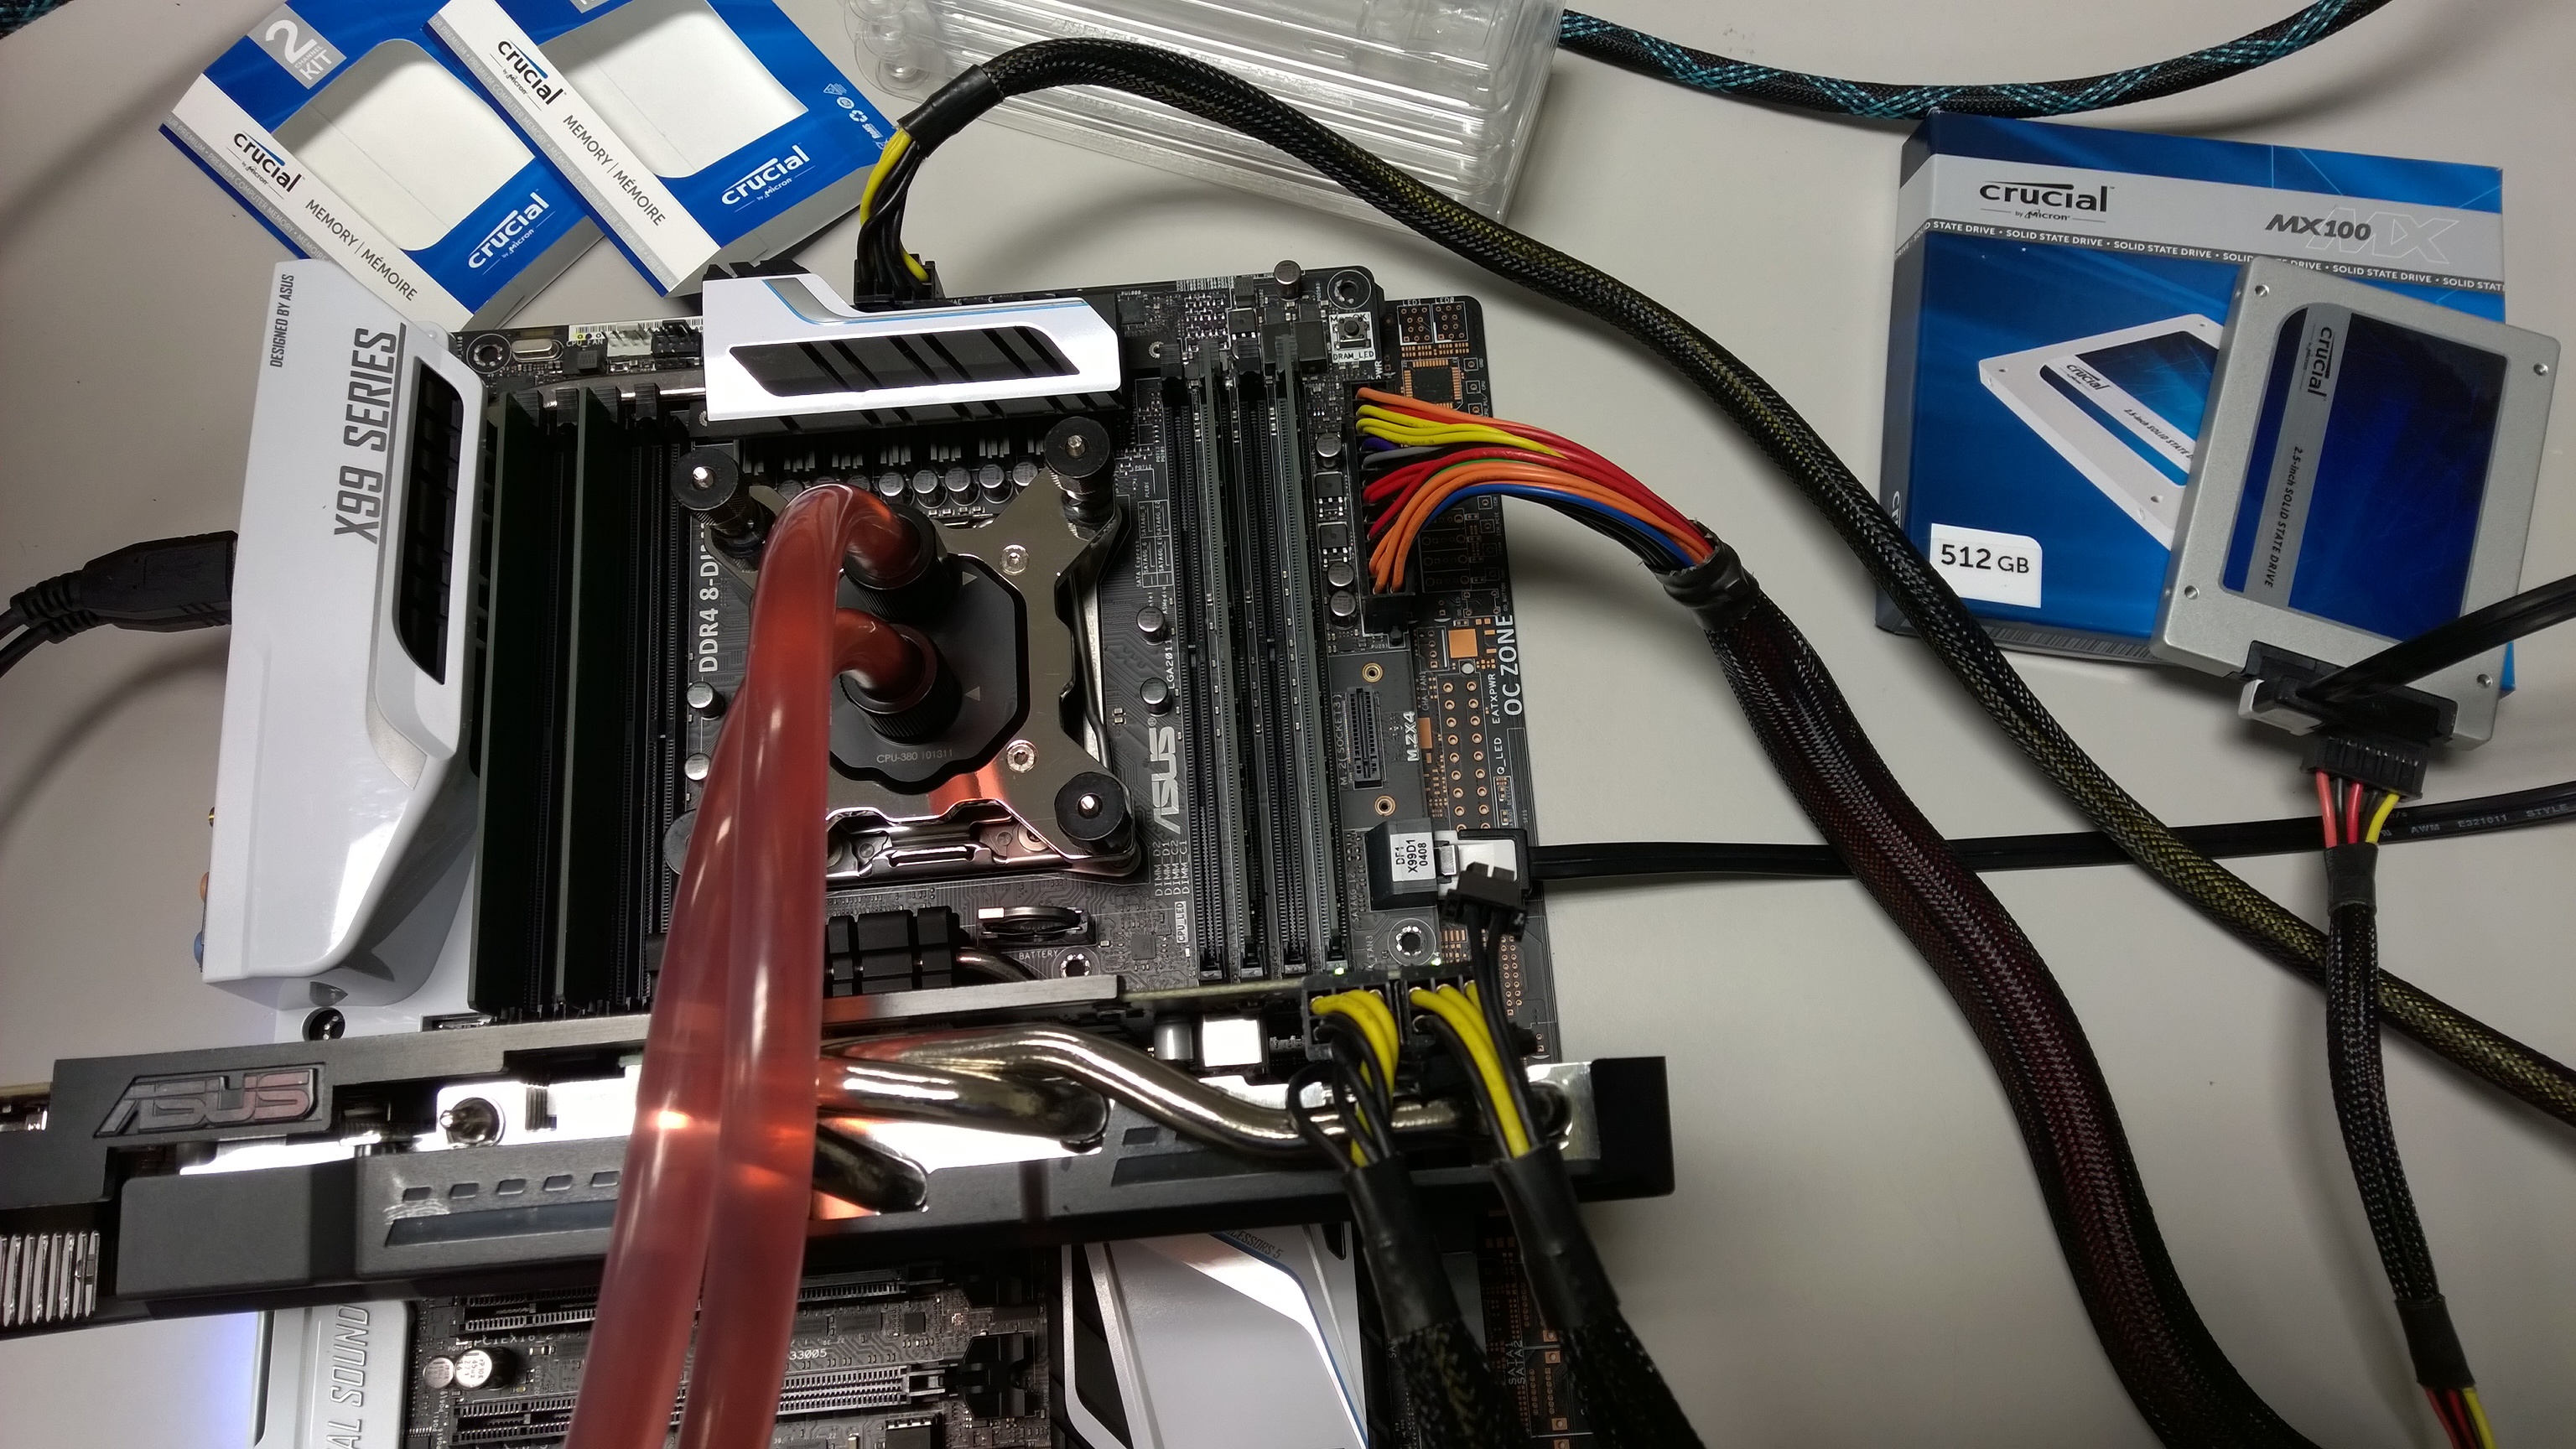
As you guys know X99 and Haswell-E recently launched. Both the chipset and CPU combine to create and enable a true enthusiast platform. Top that off with fact that all Haswell-E CPUs offer unlocked overclocking and it is off to the races. While ASUS has a track record of pushing CPUs and platforms to their limits and has already done so on the X99 platform here in the PCDIY labs we focus on real world cooling and long term stability outside. This is a little different than the world of benching and extreme overclocking and extreme cooling where the focus is on a of blaze of glory with uber high frequencies and momentary screenshots or exotically cooled multi GPU 3D mark runs. With the help of my awesome and trusted Koolance water cooler as well as a X99 DELUXE motherboard and a Intel 5960X CPU and some extremely solid an stable Crucial 2133 DDR4 I set off on my overclocking pursuits. The goal to reach a real world overclock and document its stability and hold it for 24 hours continually under 100% CPU and 100% RAM / memory utilization. As is the case with overclock it does not matter what you can run at if it is not stable. So let’s see what kind of stability the X99 DELUXE can offer us.
So let us get some the specifics out of the way in regards to the setup it is pretty straight forward. Links are active below if you are interested in picking up any of these components.
CPU – Intel Core i7 Extreme Edition 5960x ( Haswell-E )
RAM / memory – Crucial DDR4 16GB Kit ( 4GB x 4 DIMMS ) of 2133
Motherboard – ASUS X99 DELUXE with UEFI 0701
PSU – Seasonic SS-860Xp ( Seasonic 860 WATT ) Platinum power supply
Cooling – Koolance EXOS EX2-1055 Fully integrated water cooling solution
Cooling – Koolance CPU 380i CPU water block
GPU / graphics card – ASUS GeForce GTX 660Ti DirectCU II OC
SSD / storage – Crucial MX100 512GB
High performance and high quality design helps to ensure solid and consistent and stable overclocking.
So before we jump into overclocking and screenshots there are some important points to detail regarding what we used and why . The X99 DELUXE features a wide range of design implementations to maximize and ensure outstanding overclocking and stability. All of the components selected serve equal important but the motherboard of course plays a critical role. Some of the benefits of the DELUXE specifically are.
1. Specialized OC socket design
2. Specialized trace layout and topology layout
3. Carefully tuned UEFI, MRC and auto rules. The UEFI and MRC as well as auto rules ( automatically enabled or defined parameters within the UEFI based on other conditional parameters ) are critical to ensuring and enabling a smooth and stable and safe overclocking experience. More UEFi coding can result in reduced compatibility and stability and also effect the smoothness to overclock recovery and much more. ASUS has worked extensively to produce a UEFI that helps to aid in the overall overclocking experience whether it be manually or automatically.
4. Robust VRM design with digital power delivery and control enabled by Digi+VRM power implementation for the CPU, VRM and DRAM. This includes ultra high amperage inductors with advanced drivers & mosfets. These comprise to offer outstanding power delivery to the CPU when under load as well as ensuring solid thermal dissipation performance. The digital PWM allow for extensive granularity and control over parameters of operation allowing the best performance to be realized whether it be towards efficiency, or maximum power delivery.
5. Advanced VRM heatsink assembly – A dual VRM heatsink connected by a sintered heatpipe helps to quickly and effectively cool the VRM components. Even at full load and overclock you can feel confident in the thermal design ensuring cool and stable operation.
Setting up the overclock and picking a middle of the road CPU
So moving to the actual set up of my overclock system I decided to do it manually. This means doing it via the UEFI. This was only done for fun but not for any benefit compared to using the Auto Tuning implementation offered within AiSuite III motherboard utility. Auto tuning is a realtime CPU specific auto overclocking implementation. It’s advanced logic and tie in to firmware and hardware allow it to overclock in the same way a user does manually. This means voltages and ratios and corresponding parameters such as VRM operation are automatically adjusted and directly written into and stored within the UEFI. While not recommend you could uninstall the application after running Auto Tuning and still have your overclock enabled. Specific to this generation Auto Tuning brings even further improvements more advanced levels of control to the Auto Tuning process. These include
It is CPU specific. All CPU’s have varying margin meaning some can operate at faster frequencies than others. Some can operate a higher frequencies on a lower number of cores compared to all cores, this can be selected along with a new OC threshold option to allow for greater margin while offering maximum frequency via per core overclocking. Auto Tuning overclocks your system and finds the margin of your CPU providing you a easily executed overclock that is efficient and stable. These points are important as Auto Tuning uses the most advanced voltage adjustment available in the form of adaptive voltage control. This allows the CPU to reduce its voltages when idle or under minimal workloads reducing power consumption, heat output and consistently higher voltage being supplied to the CPU. In addition all power saving and speed reduction features such as SpeedStep are left enabled. This allows for the best balance between efficiency and improved performance. No other auto overclocking application comes close. This is due to the continual fine tuning over multiple generations as well as the fact it is a firmware and hardware based implementation. The software is purely the mechanism used to enable it. This is the same level of overclocking normally reversed for enthusiast who manually defines all parameters in the UEFI ( BIOS ).
- Per core or All core overclocking, allows for the most flexibility and scaling in overclocking
- Adaptive voltage utilization for overclocking, enables the most efficient overclocking while improving thermal performance and reducing power consumption
- Selectable voltage range to use during overclocking
- Selectable target frequency to attempt to tune for during overclocking
- Selectable temperature target to have be the maximum temperature reached while overclocked
- New stress testing algorithms including multi threaded memory stress test as well as AVX instruction set support
So getting back to manually set up the overclock. I also selected a middle of the road CPU that while it offers solid overclocking range it requires a bit more voltage than most traditional coolers would allow for. This is where the excellent cooling from the Koolance EXOS and 380i water block come. So got the CPU installed along with a couple of basic adjustments in the UEFI which include voltage and multiplier. Otherwise no other parameters were touched. The board of course makes via auto rules for specific parameters including VRM operating parameters.
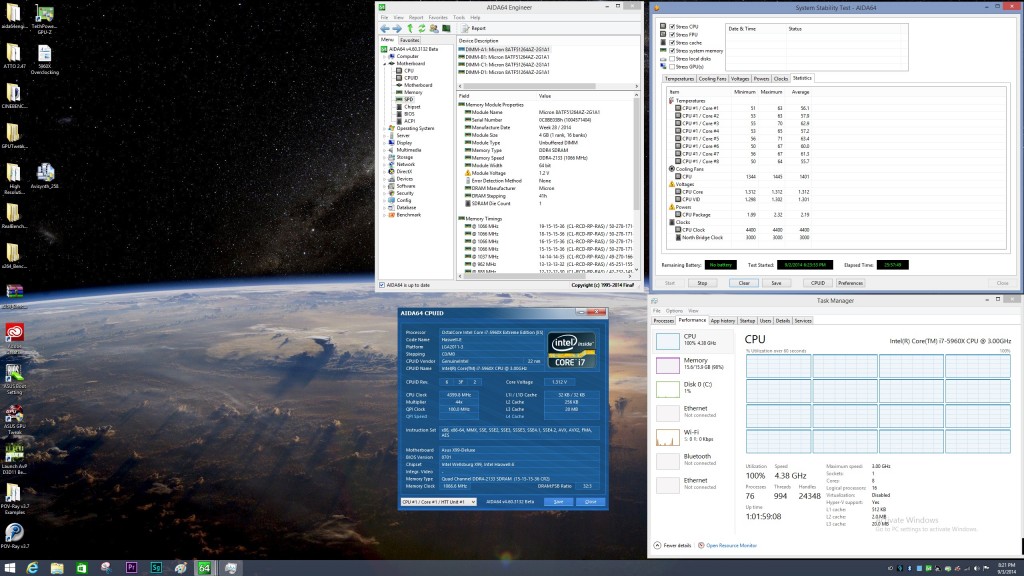
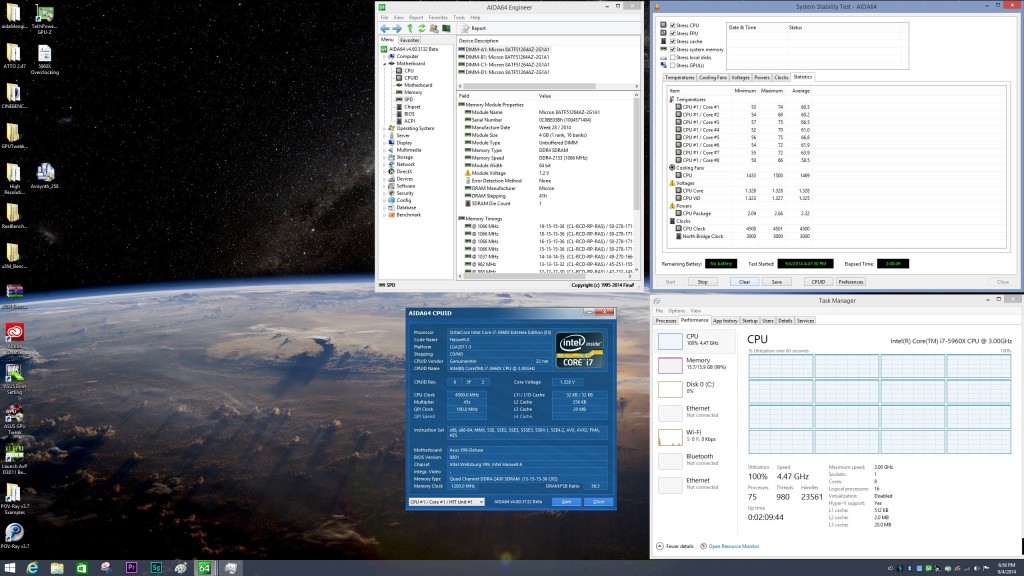
Proof is in the screenshot – 24 Hours Stable 100% CPU and MEMORY load via Aida64 Stability Test 8 Cores and 16 Threads at 4.4GHz DDR4 2133.
Pretty awesome right! Yes I continued to be impressed with the quality and stability of the X99 DELUXE and not to mention Haswell-E and its overclocking capabilities. While the best overclocking CPU we have it is still amazingly impressive to be able to have a 16 thread CPU operating at 4.4GHz especially when you considering max normal turbo frequency is approx 3.3Ghz that is a 1.1GHz overclock. Pretty impressive. Equally as impressive was the memory. Crucial DDR4 2133 16GB kit while aggressively price and lacking of heat spreaders did not even flinch let alone fail us. It held up under extreme 100% memory loading without even any active airflow. This is what we like to see out of memory stable and reliable operating even under extreme workloads. When you also consider this memory has some pretty good overclocking legs colored me impressed and I find myself giving this kit an easy recommendation. Later we will show you how we were even able to take the same kit and easy get 2400 and 2600+ speeds without much tuning at all. This combination of ASUS and Crucial is definitely “better together”. Rounding out the components on hard we cannot forget about the cooling. Koolance excellent EXOS cooler not only making water cooling extremely easy but affords us true high performance water cooling in a simple setup. Pair that with the Koolance 380i water block and temperatures even on this platform were not any concern even at the levels which we were running. Consider that with air cooling and closed loop water cooling solution we would not advise more than 1.275 to 1.300 volts it was nice to have the headroom to push the platform and the CPU further. When you consider that this is a syntehtic stress test as opposed to real games or applications it gets even better. Seeing as that under Aida64 the CPU temperature did not exceed 75c it could be further reduced under real world usage by a range of 10 to 15c or even more.
Stay tuned for additional overclocking results and information. We are working on our overclocking guide and hope to have it out by Monday. Additionally on the PCDIY YouTube channel expect additional overclocking related content as well.


