

The RGB revolution is in full swing, and everybody is a winner. As colorful lighting made its way from keyboards and mice to cases, graphics cards, and even motherboards, we developed software to help enthusiasts customize and control all of those LEDs in perfect harmony. Now you can build a battlestation armed to the teeth with synchronized RGB lighting effects thanks to Aura Sync, and it’s easier to set up than you might think. We went hog wild on an all-Aura build to show you how to do it.
How to begin
As with any PC build, you need to start by compiling a list of compatible components. We’ve built Aura Sync into tons of our gear, including our peripherals, and many of our industry partners have done the same. That gives you plenty of options when building a blinged-out rig, and it also makes adding RGB to your existing setup really easy.
We chose our AMD Ryzen build as the bearer of RGB light for this guide. At its core, we installed an ROG Crosshair VII Hero Wi-Fi motherboard equipped with multiple built-in lighting zones. The Crosshair VII Hero Wi-Fi passes Aura signals on to any components in its PCIe or DIMM slots, so you don’t need to use the onboard headers for controlling compatible graphics cards or RAM. It’s ideal for anyone looking to build an RGB build from the ground up.

Our Ryzen build was a great starting point for my Aura ambitions, and I already had some compatible peripherals at home, too. The ROG Strix Flare keyboard, ROG Strix Evolve mouse, and ROG Strix Fusion 700 headset all feature Aura Sync RGB, so it was a snap to add them to the mix.
We are connected
Setting up the Aura utility is a snap (more on that in a moment), but the process of getting ready for the RGB LED party is just a little different for each type of device that goes into a DIY PC. Some components connect directly to the motherboard, others attach via headers, and still others rely on a USB port. For our build, our diverse set of connected components included the ROG Strix Radeon RX Vega 64 Gaming OC 8GB graphics card, the ROG Ryujin 240 liquid cooler, and the ROG Thor 850W Platinum PSU.
Getting the ROG Strix RX Vega 64 up and running with Aura was as simple as plugging it into the motherboard’s primary PCIe slot. As we noted earlier, Aura commands just pass through this slot with no further cabling required.
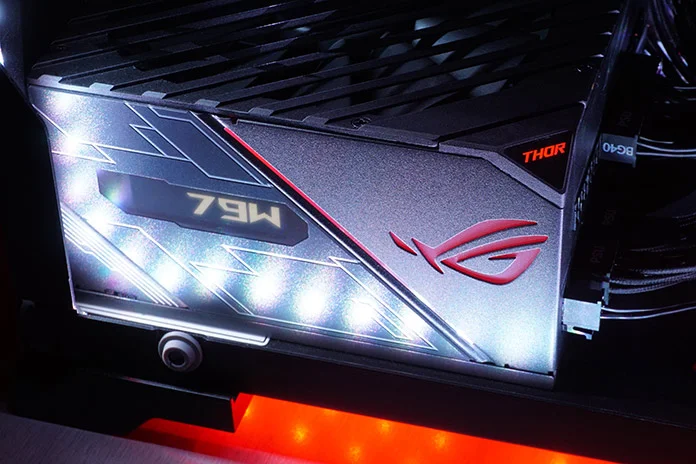
The ROG Thor PSU requires one of our motherboard’s addressable headers to join the Aura party. A two-pin port conveniently labeled “Addressable Aura RGB” lets the Thor communicate with the motherboard. Once it’s connected, you don’t have to configure anything. Aura Sync automatically recognizes it, integrating the device’s lighting with the whole Aura system. In addition to an LCD screen that displays a real-time readout of wattage consumed by the system, the Thor PSU has a backlit ROG logo on one side and a “Thor” logo in one corner, both of which glow with multicolor light.
The same sync process applied to our liquid cooler, the ROG Ryujin 240, which has a nifty mini OLED screen to go with its onboard RGB LED lighting. Just make sure you connect the included USB cable to an open internal USB header on your motherboard.
With all of those components connected and shining bright, it was tempting (not to mention easy) to complement their output with even more illumination. To really take our build over the top, we added three more addressable lighting strips with 90 LEDs in total to fill our case with a beautifully choreographed glow. We connected those strips to the Crosshair VII Hero’s other open addressable RGB header.

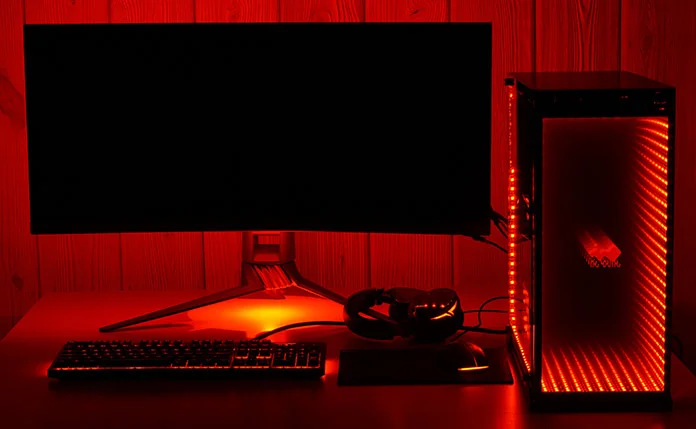
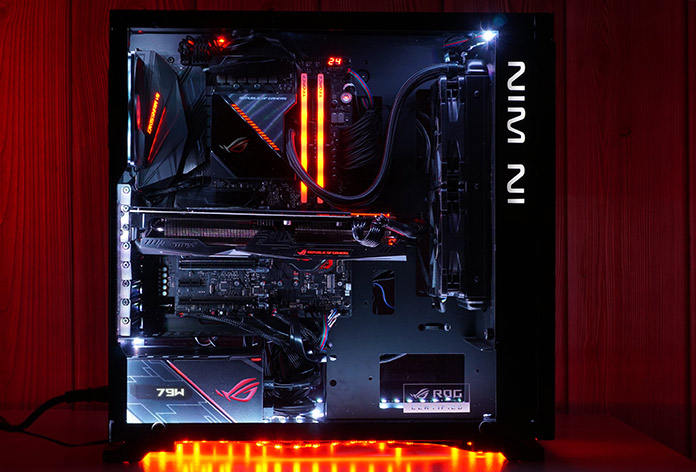
Of course, your case is key to letting your build shine. There’s no point decking everything out in RGB LEDs if it’s all hidden. Lots of cases have glass panels to show off the components inside, but InWin’s 805 Infinity boasts a stunning glass front panel with an infinity mirror effect that amplifies the built-in LEDs framing the glass. Plenty of extra room inside makes it easy to neatly tuck in additional lighting strips, too. We connected our InWin case’s traditional RGB strip header to the corresponding pins on our motherboard.
The brains of the operation
For DIY PC builders like us, the Aura Sync utility is part of the software package that comes with the Crosshair VII Hero Wi-Fi. If you’re working with a different board, or just want to be sure you have the latest version, you can grab the software from our support page. All of your compatible system components appear automatically in Aura Sync.
Owners of ASUS notebooks and prebuilt PCs will find Aura baked into the Armoury Crate system-management utility that comes pre-installed on their PCs. While the user interface of Armoury Crate is slightly different than the standalone Aura utility, you’ll find many of the same options and controls we describe below for managing the lighting zones available from your notebook or desktop. We have a detailed guide for Armoury Crate in a separate article.
If you want to match the colors on your peripherals with the other components in your system but don’t have an Aura-compatible motherboard, you need to grab the ROG Armoury II software. Armoury II lets you configure and customize your ROG mouse, keyboard, headset, and more, even if you don’t have a compatible motherboard. It also serves as a one-stop-shop for firmware updates for your accessories. You can find Armoury II on the support page for your ASUS peripheral.
Once you connect all of your peripherals and install any necessary firmware updates via Armoury II, restart your PC and launch Aura Sync. You’ll see all of your RGB peripherals included in the device list across the window’s top edge alongside your PC’s components. To sync them with other Aura-capable hardware, click the red circle under each one and then select “Yes” to save the changes.
Aura Sync treats our light strips’ addressable LEDs as one entity, for the most part. They’re all represented under the “Add Strip” label in the Aura UI. if you drill down in the software, however, you’ll find the headers identified individually. Each header supports up to 120 addressable diodes, and Aura needs to know how many LEDs are on each one to work properly. Configuring our build’s addressable strips in Aura Sync was as simple as navigating to the Addressable Headers section, punching the number of LEDs into the appropriate text box, and then clicking Save.
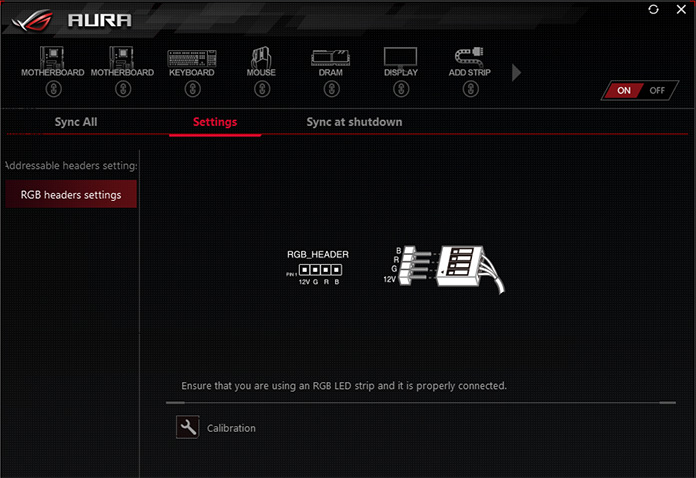
If your build has any traditional RGB LED strips, as ours does, they’ll need just a little more help to get in sync. Navigate to Settings and then RGB Headers Settings, and click the wrench icon next to Calibration. You’ll be prompted to select either RGB Header 1 or RGB Header 2 (assuming your motherboard is so equipped).
The software will ask you what color the RGB LED strip connected to that header changed to (it will be red, blue, or green). Our Ryzen build’s case is connected to that first header, so the whole front lit up red when we got to this stage of the calibration process. After confirming the first color shown, we clicked Next and answered the same question two more times. If you have traditional strips connected to other headers, you’ll want to run through this process for them, as well.
Outside the box
No build is complete without a gaming monitor, and if you carefully choose your display, it can further extend your lighting. The curved ROG Strix XG35VQ has three lighting zones: a glowing red ROG logo on the back of the monitor, another red LED lighting zone in the base, and a full RGB ring on the back that can be set to glow any color. The XG35VQ joins in the Aura party with a USB connection to the host PC.
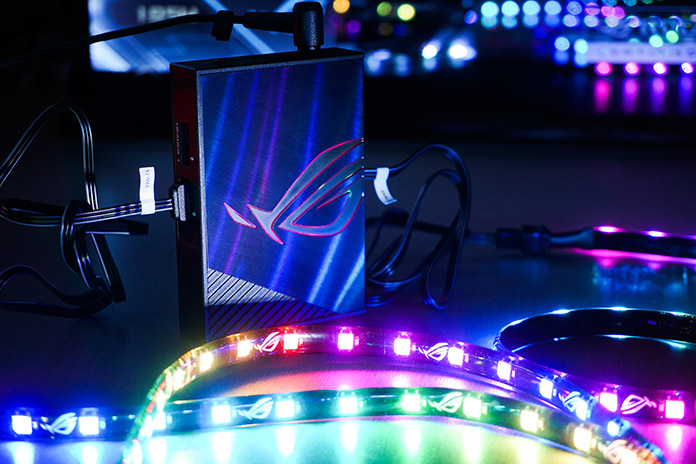
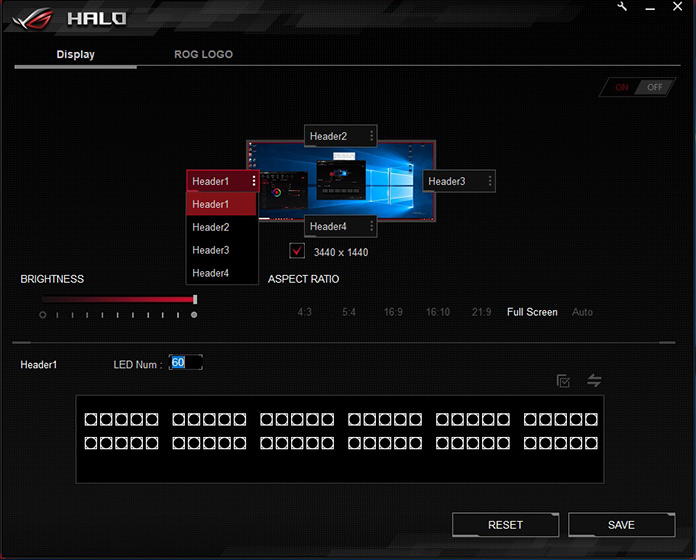
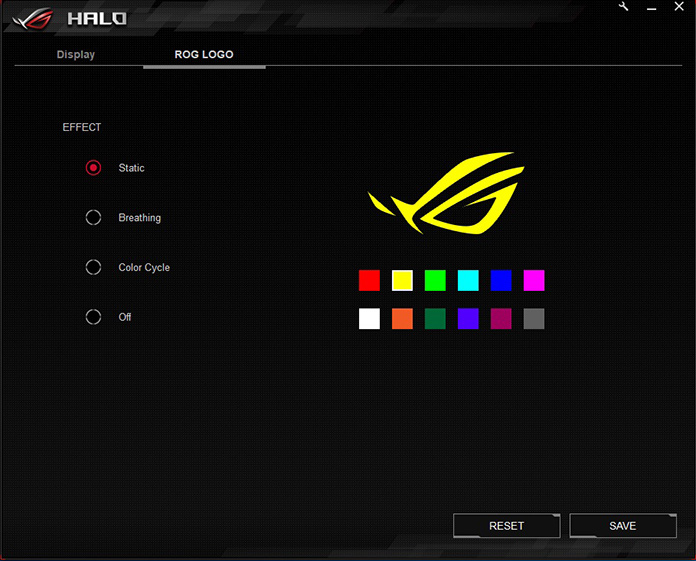
To make even more RGB light visible from the front, we decked our XG35VQ out with RGB LED strips around its edges. These lights need an elegant way to connect to the Aura ecosystem, so we added an ROG Aura Terminal. Terminal is a hub for lighting strips that can be mounted inside your case or left out in the open. It offers four ports for lighting strips and supports up to 210 addressable LEDs. Using a Terminal to add lighting strips to your monitor unlocks the ambient lighting power of the ASUS Halo utility. Halo detects the colors displayed along the edges of your screen and extends them to the surrounding area using the LED strips mounted there.
If you find yourself running out of RGB headers on your motherboard, the Aura Terminal is indispensable. We only needed ours to handle the monitor’s extra lighting, so we kept the hub mounted externally. In that configuration, it communicated with our PC through a USB port on the rear I/O panel, and the Aura Terminal showed up in Aura Sync alongside everything else.
Affecting effects
At this point, all of our build’s RGB-equipped components were connected and doing their own thing. Each device has a default lighting setting that it’ll display without user intervention when it’s powered on. In the case of the peripherals, they show whatever colors or effects you may have programmed during setup. The true power of Aura lies in syncing everything up, so I raised my baton and began to get of my RGB LED components working in concert.
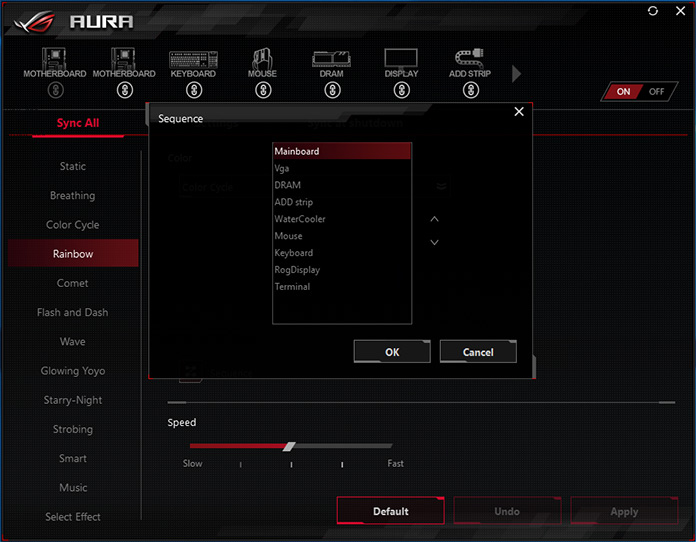
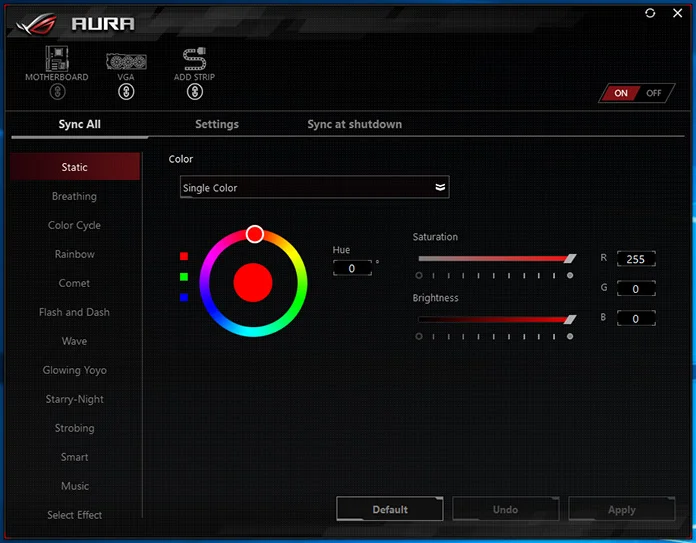
The possibilities for color and lighting effect combinations within Aura are nearly limitless. Static mode gives us 16.7 million possibilities from blending red, green, and blue. If you’d rather get more adventurous, there are 12 preset lighting effects, from Rainbow to Wave to Music and more.
Within each lighting preset, there are options for adjusting variables like speed and direction, and you can set the effects to cycle through each RGB LED component in whatever order you like. Even the Static setting, which applies a solid color to all the lights, lets you dial brightness and color saturation up or down.
If you’re more about form over function, you can set things up so the lighting serves as a visual indicator, too. The Smart setting changes the LED colors according to system or CPU temperatures, and the Music preset makes the lights react to the beat and volume of the music playing on your PC. In the event you want to end the party and enter stealth mode, you can kill all the lights at once by clicking Off in the upper-right corner of Aura Sync.
I went with the Static color first, just to ensure that everything I connected was truly in sync. With that done, I embraced the rainbow and branched out with Aura’s more advanced animations and parameters. To ensure your RGB LED components are all marching to the same beat, choose any colors or lighting effects you like under the Sync All tab in Aura, as I did.
No modern battlestation is complete without RGB lighting. Whether you just want a soft glow from your keyboard and mouse, or an entire system pulsing with lights, Aura-compatible components, peripherals, and light strips can make it all happen in concert. Aura makes it easy to get your RGB LED light show up and running quickly, and you can add compatible lights or components to the show at any time. All you need to get started is your first Aura Sync device and a desire to feel the glow.