

Intel’s latest 13th Gen Core, or “Raptor Lake,” CPUs offer exciting performance right out of the box. But if you’re the kind of PC enthusiast who likes to roll up your sleeves and tinker with your computer’s BIOS settings, there’s even more performance potential on the table from your overclockable K-series chip. Ready to start fine-tuning the performance of your Raptor Lake PC? Here, we’ll get you started with some tips and tricks for getting the most of your hardware.
Setting expectations
Professional overclockers have long used exotic cooling to push CPU frequencies into the stratosphere. But for folks building their own PC at home with an off-the-shelf air cooler or AIO liquid cooler, 6GHz overclocks have only been a dream — until now.
The Intel Core i9-13900KS offers a 6GHz Max Turbo Frequency right out of the box. But you don’t need Intel’s top-of-the-line chip to join the 6GHz club. In our internal testing, we’ve found the Intel Core i9-13900K, Core i7-13700K, and Core i5-13600K all can hit that lofty number in lightly threaded workloads, like gaming and regular desktop usage. And that’s with cooling solutions that you order online today.
| CPU Core Frequency Expectations (GHz)* | ||||
|---|---|---|---|---|
| P-cores | E-cores | |||
| Light | Heavy | Light | Heavy | |
| Intel Core i9-13900K | 6.2 | 5.6 | 4.7 | 4.4 |
| Intel Core i7-13700K | 6.1 | 5.5 | 4.7 | 4.3 |
| Intel Core i5-13600K | 6.0 | 5.5 | 4.6 | 4.2 |
There’s fun to be had with DDR5 kits, too. Overclocking DDR5 up to 7000 MT/s is becoming the new normal, and capable Z790 motherboards with high-end integrated memory controllers can take your DDR5 kit even higher. DDR5-8000 has been validated on the ROG Maximus Z790 Apex motherboard, and some kits may reach even higher transfer rates with standard cooling.
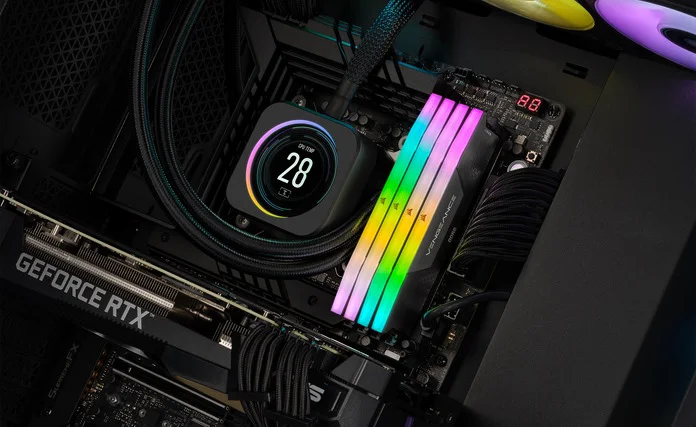
These memory speeds are especially exciting now that it’s possible to achieve them with high-capacity DDR5 kits. We’ve partnered closely with Corsair on their upcoming 2x24GB memory kits, and we’ve confirmed that our full lineup can support up to 48GB of DDR5 RAM at 7000 MT/s — or up to 192GB of DDR5 RAM at 5600 MT/s. Keep in mind that a wide variety of factors affect DRAM scaling on Z790 motherboards. Rank, density, and population all play a role in the memory overclocking heights you’ll be able to reach.
Cooling and power requirements
As with previous generations, overclocking your CPU can bump up your PC’s power consumption and internal temperatures quite a bit. Make sure that your system is ready before you dial everything up to 11. For example, when all cores are stressed the Core i9-13900K can consume upwards of 300W. To ensure ample power delivery, make sure that your PSU can deliver more than 30A on the EPS 12V rail. Consider one of our ROG Thor or TUF Gaming Gold power supplies if your current unit is lacking in that department. Offering ample wattages for today’s cutting-edge components, exceptional cooling, and an OLED display that gives you a readout of your current power draw, these units are ideal for overclocking Intel’s latest chips.
| Model | Availability (U.S.) | Availability (CA) |
|---|---|---|
| ROG Thor 850P | ASUS Amazon Newegg | |
| ROG Thor 1000P2 | ASUS Newegg | Amazon Newegg |
| TUF Gaming 1000W Gold | ASUS | |
| ROG Thor 1200 Platinum II | ASUS Amazon Newegg |
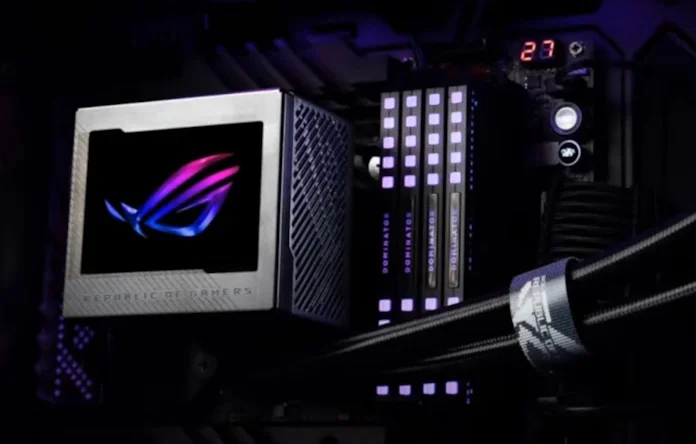
To tame the excess heat produced by overclocking, we recommend that you invest in a case with excellent airflow and a cooler that’s up to the task. If you’re overclocking one of Intel’s top-end i9 chips, we recommend an AIO or custom liquid cooling loop with a 360mm radiator or larger. The ROG Ryuo III 360 ARGB gives you exceptional performance with its 8th Gen Asetek pump and its trio of ROG AF 12S ARGB fans, and it’s a stunner, too, with its embedded AniMe Matrix display.
For users using one of Intel’s Raptor Lake Core i7 or Core i5 chips for gaming or other lightly threaded workloads, we’ve found that mainstream coolers are up to the task. Find yourself a well-reviewed air cooler, or make the jump into liquid cooling with an AIO liquid cooler from ROG Strix or TUF Gaming. A model with a 240mm or 280mm radiator should do the trick.
Overclocking methodology
For a complete walkthrough of how you can easily, effectively, and reliably overclock your 13th Gen Intel K-Series CPU, check out this livestream. In it, JJ from our technical marketing team shares his insights about fine-tuning these chips and addresses questions from the community.
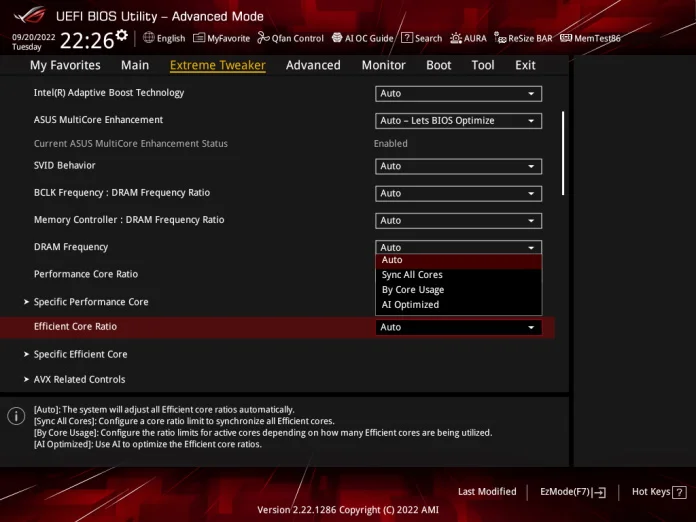
From a high level, we recommend that you start by testing your system at default settings in order to create a baseline. Use Intel’s Extreme Tuning Utility to get a detailed look at your chip’s out-of-the-box parameters, and then run a general stress test while tracking temperatures, power draw, and important voltages. It’s also helpful to run a few benchmarks that are representative of your most common workloads so that you can measure the performance impact of your overclocking endeavors.
In our experience testing a large number of CPU samples, we’ve found that you’ll see maximal performance with the CPU, DRAM, and cache all overclocked. Configure, test, and fine-tune each of these elements independently to find the ideal settings for your system.
To get you started on overclocking your CPU, we recommend starting with our AI Overclocking utility. Our in-house experts painstakingly profile thousands of processors and system configurations to hone the highly advanced algorithm of AI Overclocking. This algorithm analyses your CPU and system cooling, and then defines optimal voltage and frequency settings. You can let AI Overclocking engage these settings automatically and make profile adjustments as necessary, or you can take its recommendations, apply them manually, and fine-tune them further based on your own testing. Keep in mind that AIOC does not overclock memory. After finding the best settings for your CPU, you’ll want to turn your attention to your memory kit.
It’s worth noting here that while manual overclocking can yield performance gains over and above what you’ll get with ASUS AI Overclocking, our utility offers some key advantages. First, it uses an adaptive voltage for better efficiency. Second, it gives you a quick and straightforward way to take advantage of per-core overclocking, which pays off for both gaming and multi-threaded workloads. Finally, it gives you a bit of a safety net for your performance-tuning efforts. It offers an optimism slider that puts you in control over whether you want a more conservative or aggressive overclock. And since it’s an adaptive system, it’ll dial things back should something unexpected happen in your system, like a fan failure.
Take your DDR5 kit to the limits
After finding the right settings for your CPU, turn your attention to your memory kit. Our Z790 motherboards offer better signal integrity that allows for more memory tuning overhead, so we upgraded our ASUS Enhanced Memory Profiles (AEMP) with a memory training algorithm so frequencies can be automatically raised even further than before. These new AEMP II profiles appear in the UEFI if a generic memory module is installed.
Note that the memory speeds you’ll achieve with XMP or AEMP II profiles vary based on a number of factors. If you value raw speed above all else, you’ll be best served with a single-rank 2-DIMM DDR5 kit. Adding additional sticks will increase your total capacity — and that may be invaluable for your workflow — but you won’t achieve transfer rates that are quite so high. That’s a tradeoff that many enthusiasts are happy to make, but it is a consideration that you should make as you’re planning your build.
Here’s an easy tip to remember if you run into issues when you try to enable the XMP profile for your memory configuration. Load the XMP profile, but drop the memory multiplier a step. That’ll give you the benefits of the many optimizations that come with an XMP profile, but with better stability.
Cache Dynamic OC Switcher
With last-gen Alder Lake CPUs, Intel introduced a hybrid CPU architecture with performance cores and efficiency cores. The efficiency cores proved valuable for accelerating heavily threaded workloads, but folks looking for the best performance in gaming or lightly threaded workloads often found it ideal to disable the e-cores entirely. Doing this allowed them to raise core clock speeds and increase the cache (ring) ratio for extra gains — though it never felt great to completely disable a key feature of a shiny new CPU.
Intel doubled the e-core count for its Raptor Lake processors, making it feel even worse to disable them outright. That’s a lot of multi-threaded performance to leave on the table. You could establish separate profiles for your PC, one for high-end performance in lightly threaded workloads and another for pure multitasking muscle, but that’d require a reboot every time you switched to a new task. To make life easier for you, we built the Cache Dynamic OC Switcher. This feature lets you get both the best p-core-only performance, while also allowing the e-cores to get in on the action when you initiate a heavier task.
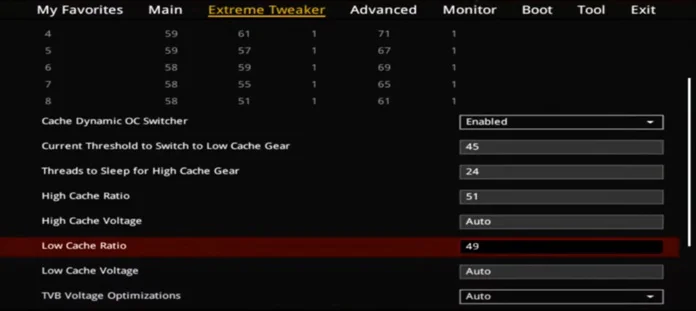
Using Cache Dynamic OC Switcher is a straightforward process. First, enable the feature in the Thermal Velocity Boost section of the UEFI BIOS utility. Then, input a threshold for when to allow sleeping threads to wake up. For the Intel Corei 9-13900K, 45A is recommended. Then, specify the amount of threads to sleep when below your specified threshold. To force only the e-cores to sleep, use the appropriate value from the table below. Please note that Intel systems have Hyper-Threading enabled by default.
Two parameters give you additional options for fine-tuning the feature. You can set your preferred ratio for lightly threaded workloads in the relevant High Cache field. You can also set a voltage value, but leaving it at Auto is fine for most scenarios. Similarly, enter the ratio and voltage for when the e-cores are engaged in the Low Cache fields.
| Model | Hyper-Threading On | Hyper-Threading Off |
|---|---|---|
| Intel Core i9-13900K / KF | 24 | 16 |
| Intel Core i7-13700K / KF | 16 | 8 |
| Intel Core i5-13600K / KF | 14 | 8 |
Beat the heat with ASUS Multicore Enhancement
Users of our last-gen boards might be familiar with ASUS MultiCore Enhancement and ASUS Performance Enhancement features. These BIOS options already allowed users with exceptional cooling systems to let their CPU boost beyond stock settings. Now, we’re adding a new option to both menus that gives you an easy way to unleash the power of your new 13th Gen Intel CPU while putting a lid on temperatures.
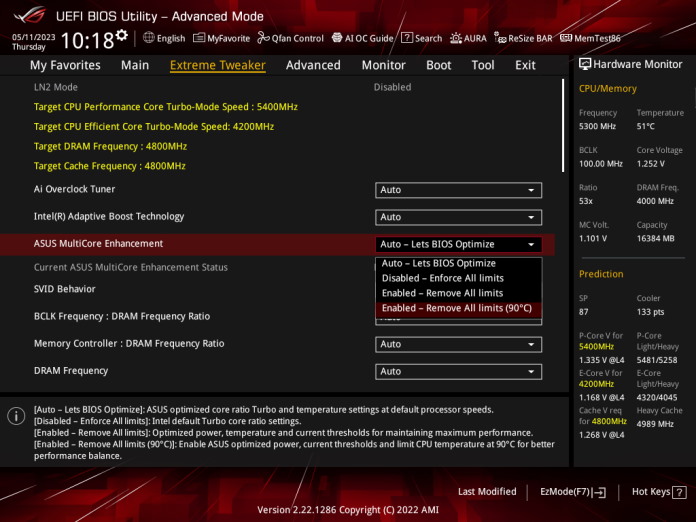
As with the existing modes, the new options remove the limits holding back CPU boosting behavior, but also imposes a CPU temperature limit at 90° Celsius. This gives you outstanding multicore performance, but with restrained thermals. Even with the temperature restriction, ASUS MultiCore Enhancement and ASUS Performance Enhancement remain powerful tools for increasing performance. We tested our two MultiCore Enhancement settings with an Intel Core i9-13900K CPU, and observed that the new setting reduces CPU temperatures by a full 10° Celsius while offering broadly similar performance—the new mode only suffers a 2.8% performance drop compared to the earlier setting.
ASUS Z790 motherboards offer powerful overclocking features
Still planning your 13th Gen Intel Core-powered PC? Set yourself up for easy overclocking with an ASUS Z790 motherboard. If you’re a power user who regularly fires up demanding all-core workloads, we recommend one of our cutting-edge ROG Maximus Z790 motherboards. Boasting our most robust power solutions, comprehensive cooling options, and a full suite of enthusiast-grade features, these boards were built from the ground up to accelerate your overclocking ambitions. Their low-loss PCBs also aid in pushing DRAM to its limits, so an ROG Maximus board might be ideal for you if your workloads are sensitive to memory speeds.
If you’re building a PC first and foremost for gaming, you’ll be well-served by an ROG Strix or TUF Gaming Z790 motherboard. They’re fully equipped for overclocking under the CPU loads that you’ll typically see while gaming. To take advantage of the conveniences of AI Overclocking, grab one of our ROG Strix options.
For an overclocking-ready option with a laser focus on the needs of creators, consider the ProArt Z790-Creator WiFi. With its pair of PCIe 5.0 x16 slots that support x16 or x8/x8 modes, it’s primed and ready for a creative workflow that depends on two graphics cards. Access to AI Overclocking also ensures that it’s easy to optimize your hardware.
We’d be remiss not to mention our tried-and-true ASUS Prime lineup, as well. Built to handle the needs of a wide range of PC enthusiasts, our Prime Z790 motherboards offer a classy black-and-white aesthetic that fits into any build, and they’re capable performers in their own right when it comes time to overclock your CPU and RAM. Head on over to our complete Z790 motherboard guide to get to know all our options.
*These frequencies are based on internal testing and are not guaranteed for all setups and users.