

The process of planning and building your own PC, also known as PC DIY, is a great way to learn more about all of the parts that go into a modern computer—and to assemble one that has just the right set of components for you, at a cost that’s tailored to your budget. But if you’re new to the world of PC DIY, it can be intimidating to even start figuring out what you need to know and what questions to ask. PC DIY has been in ASUS’ DNA from our founding, and many of us are avid PC builders to this day. We’re here to help you become an expert with this comprehensive guide to picking parts for your own PC.
There’s an avid community of system builders across the internet that can help you put together shopping lists of the components you need, and that can certainly be helpful in the short term, but it doesn’t help you think about how to assemble such a list to begin with or to figure out whether a list that someone else has assembled for you is right for your needs. We want to set you up for the long term with a broad overview of each part you’ll need for your PC and some tips for thinking through the subtleties that come with each one.
If you’ve had to ask for help with picking parts in the past, this guide will help you reason about how each component contributes to your PC’s greater whole and figure out what parts you need yourself. With practice and some community participation, you can even become confident in helping other builders put together their own parts lists—a satisfying practice all on its own.
In any case, you don’t need to look far for what you need when you build a PC with ASUS components. We make most of what you need to build your own system. Our motherboards, graphics cards, monitors, CPU coolers, cases, power supplies, peripherals, and more are built to deliver high performance, dependable operation, and user-friendly experiences, all the way from the hardware itself to the software that controls it. Read on to find out more about all the components you’ll need and how to select the best ones for you.
Part 1: The CPU is the brains of the operation
Part 2: Pair your CPU with the right motherboard
Part 3: Choose the right motherboard form factor and case for your PC
Part 4: Get the right RAM generation, speed, and capacity for your CPU
Part 5: Paint pixels and raise your game with the right graphics processing unit
Part 6: Get visual with the right monitor
Part 7: Grab the right CPU heatsink to keep your system running cool and quiet
Part 8: Put all of your data in the right place with solid-state drives and hard disk drives
Part 9: Power up your system with the right power supply
The CPU is the brains of the operation
The choice of central processing unit, or CPU, is one of the most important you can make when planning a new PC build. The CPU serves as the brain and nerve center of your system, and it broadly defines your PC’s capabilities and performance.
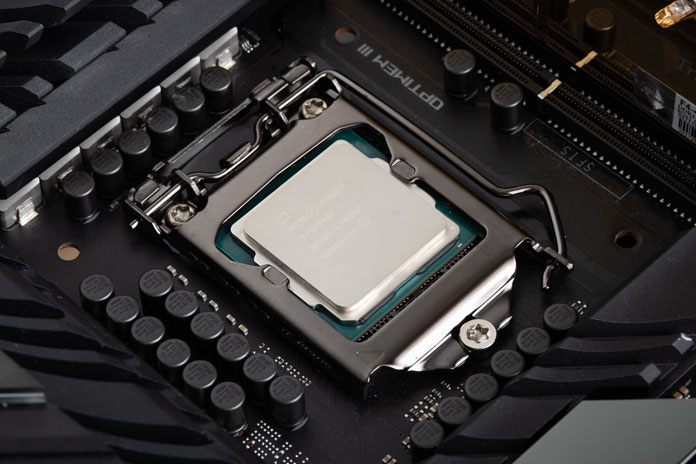
The Intel Core i9-10900K CPU
Modern desktop CPUs range in price from under $100 to well over $1000, and they can include anywhere from two to 64 or more separate processing units, or “cores,” inside. Intel and AMD are the primary manufacturers of CPUs for PC DIYers, and you’ll usually see their chips sold under the Intel Core or AMD Ryzen brands.
Perhaps the most pressing question that PC builders have when choosing a CPU is how many of those cores they need, since more cores generally result in a more expensive CPU. Every PC builder’s requirements are different, but we think the best starting point for all-around PC builds these days is a six-core processor from the AMD Ryzen 5 or Intel Core i5 series.
You can also choose more powerful processors with eight or more cores from either brand if you know that you regularly run more demanding tasks on your PC. If you don’t game and your work mainly consists of browsing the web, watching videos, or running office applications, you can choose a two- or four-core processor with an integrated graphics processor on board that provides basic display output on compatible motherboards. Most Intel processors include integrated graphics processors by default, but you will generally need to seek out an AMD G-series processor, such as the Ryzen 5 3400G, if you want Radeon integrated graphics on board a Ryzen CPU.
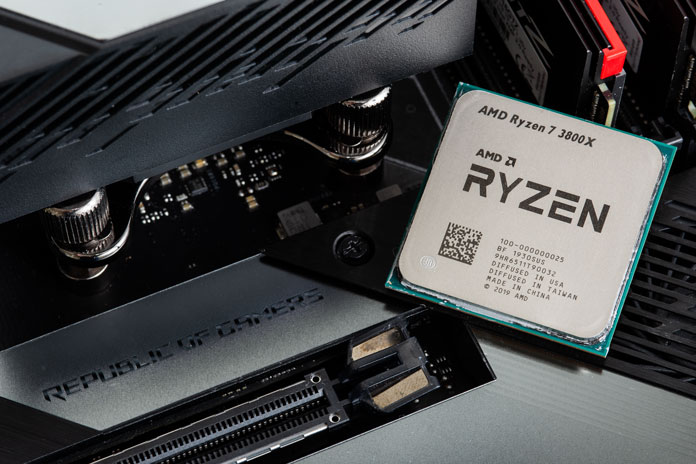
The AMD Ryzen 7 3800X CPU
To learn more about the best processor brand and model for your needs, we recommend starting out by reading detailed performance reviews at sites like Tom’s Hardware or Anandtech.
To reason in greater depth about the right CPU for you, it’s important to be aware of two different measures of performance—single-core and multi-core performance—that we’ll discuss shortly, as well as a CPU’s clock speed and its microarchitecture.
The microarchitecture, at a very high level, defines the various kinds of mathematical work a CPU core can do and how much of that work it can juggle at once. The introduction of a new microarchitecture is an important milestone for PC DIYers to be aware of, as it usually results in faster CPUs that raise system performance and motivate upgrades. The same basic microarchitecture might be implemented in chips ranging from two cores all the way up to those 64-core monsters we mentioned earlier.
As CPU companies introduce new microarchitectures, they tend to use higher generation numbers in their product names to signal how advanced the processor is at a glance. For example, AMD Ryzen 5 processors have always offered six cores, but the Ryzen 5 5600X is a more advanced and higher-performance CPU than the Ryzen 5 1600X, Ryzen 5 2600X, or Ryzen 5 3600X that came before it.
Once a manufacturer chooses the microarchitecture and number of cores that a CPU has, it can then choose different clock speeds that determine how quickly the many computational elements that make up the CPU core can do work. For a given CPU, you’ll often see two clock speeds, expressed in gigahertz, or GHz. The higher figure, such as 5.0GHz, is usually the peak clock speed, while the lower figure usually refers to a base clock that all cores may run at or near under heavier workloads. The higher both clock speeds are, the better the CPU’s performance will be, and the higher its price tag will end up.
These different clock speeds exist in part because some computing tasks simply can’t be divided among multiple CPU cores. A chip’s single-core performance, indicated in part by its peak clock speed, is most important under those conditions. The boost from the peak clock speed arises from the fact that when most of a chip’s cores are sitting unused, it has extra electrical and thermal resources, or headroom, at its disposal. Modern CPUs take advantage of some of that headroom when it’s available by boosting a single core’s clock speeds much higher than the base clock.
As a result, the peak clock speed defines how fast and responsive your system might feel when browsing the web, editing a document, transferring files, or even while running a game. If you don’t regularly load down your PC with extra-heavy work, you might want to favor fewer cores and higher peak clock speeds when choosing a CPU.
The work involved in some more intensive tasks, like video editing, 3D rendering, and program compilation can easily be divided among multiple cores, so multi-core performance becomes more important in those circumstances. If a task scales across multiple cores with ease, having a CPU with many cores can make it finish much faster than it would on a lower-core-count chip. Having more cores can also be useful for heavy multitasking workloads, where you have multiple programs working on their own tasks all at once. If you’ve ever dreamed of gaming and streaming video from one PC at the same time, for example, having plenty of cores at your disposal is invaluable.
In both cases, since those multi-core workloads cause the chip to consume more power and generate more heat as it works harder, its clock speeds may end up closer to the base clock in order to keep its temperature within an acceptable range.
For reasons of performance and efficiency, the CPU’s clock speed will constantly vary depending on a variety of factors, so don’t be surprised if you see a wide range of speeds between the peak and base clock specifications if you choose to monitor your processor in tools like CPU-Z. When a chip is at idle, or not performing any work, you may see its clock speeds fall far below the base clock as a power-saving measure, too.
Pair your CPU with the right motherboard
To form a complete PC, a CPU has to be paired with a motherboard—a large printed circuit board that provides power to the CPU and connects it to all of the other components that make up a system. A motherboard makes these connections by providing standardized slots for components and a number of external connectors, like USB ports, that you may already be familiar with. It also provides network adapters, such as Ethernet jacks and Wi-Fi radios, that link you to the internet, as well as ports for sound and even video output.
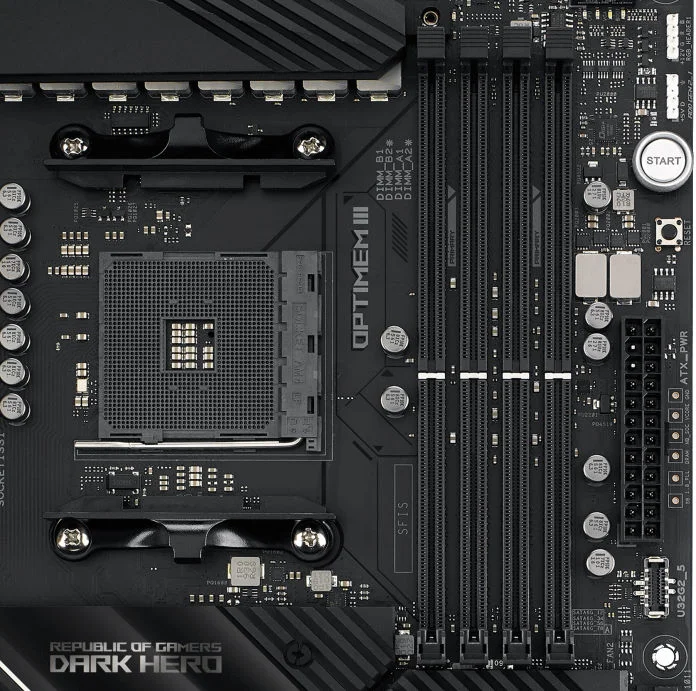
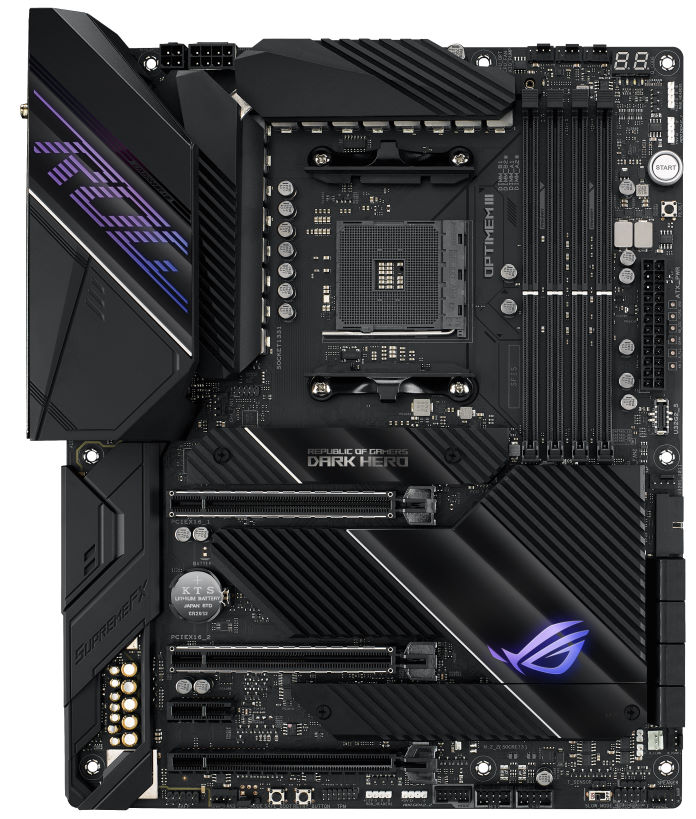 The ROG Crosshair VIII Dark Hero, an AMD X570 motherboard
Choosing a compatible motherboard for your CPU is essential because AMD and Intel CPUs each plug into specialized sockets and communicate with proprietary chipsets that are not compatible with CPUs from the other company.
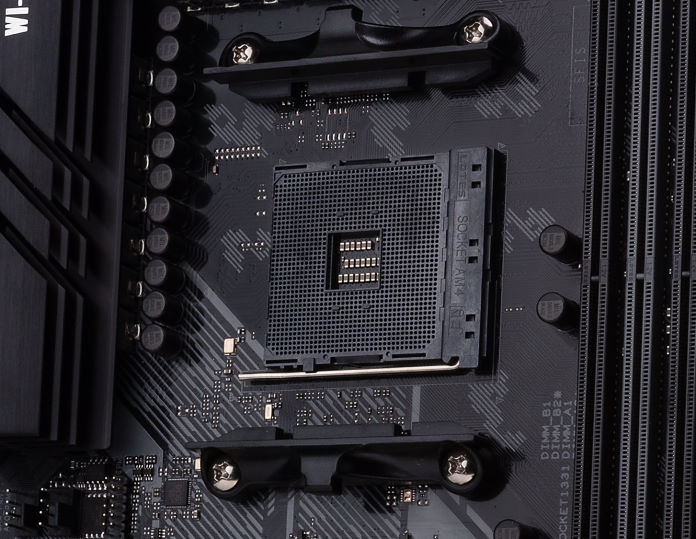
AMD Socket AM4
At the most basic level, current AMD processors need an AMD Socket AM4 motherboard, and current Intel processors need an Intel LGA 1200 motherboard.
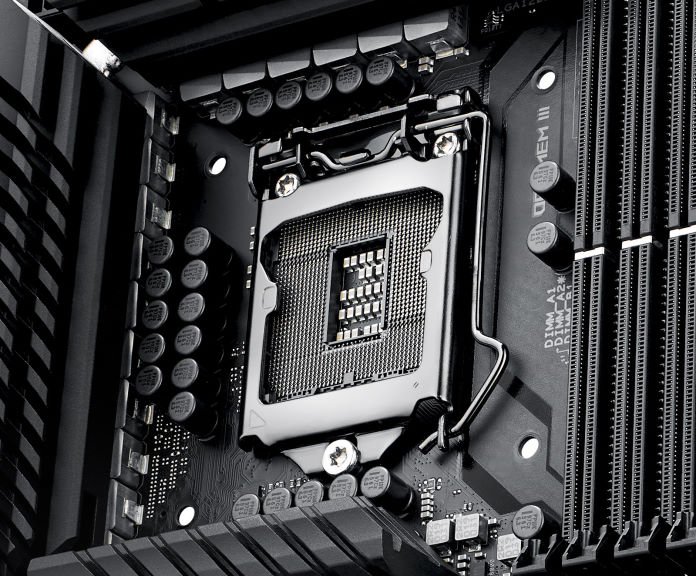
The Intel LGA 1200 CPU socket
Once you’ve decided to go with an Intel or AMD CPU and motherboard, the next step is to choose the right motherboard chipset for your needs from that manufacturer. CPU makers produce a variety of companion chipsets, or separate supporting chips, that are permanently installed on the motherboard.
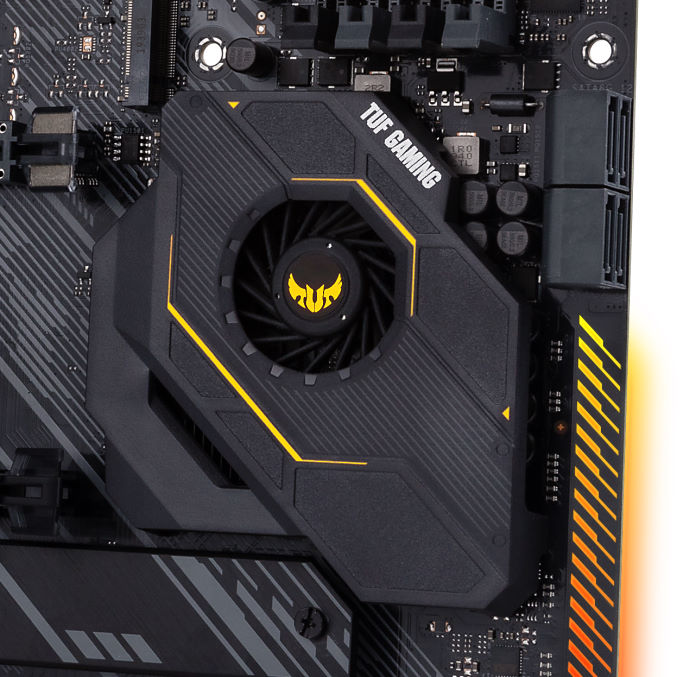 The X570 chipset under a heatsink on the TUF Gaming X570-PRO (Wi-Fi) motherboard
The chipset links up with and expands the connections available from the CPU, helping it to communicate with components like graphics cards, solid-state drives, traditional hard drives, and many others that the processor might not be able to talk to on its own.
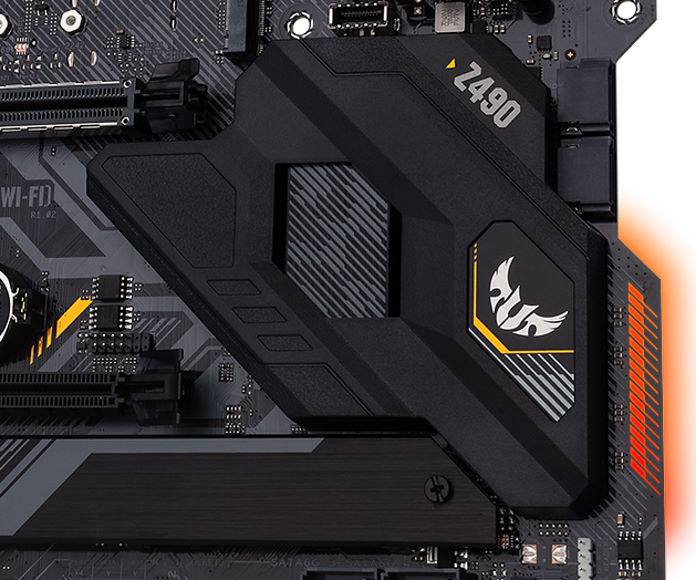
The Z490 chipset under its heatsink on the TUF Gaming Z490-PLUS (Wi-Fi) motherboard
Entry-level chipsets provide only the most essential ports and expansion slots that you need to get a PC up and running. More expensive boards with higher-end chipsets add fancier features that make the experience of using your PC better. They enable faster connections to more expansion slots for more flexibility and better performance, and they support cutting-edge USB connections for faster data transfers from devices like external hard drives. They may also come with audiophile-grade sound and wireless networking built in.
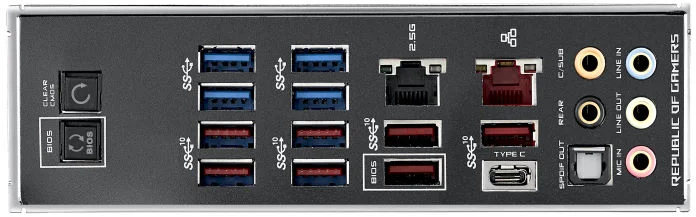
The rear I/O panel of the ROG Crosshair VIII Hero motherboard
Motherboards with the highest-end chipsets are also built with more powerful and more durable components, as well as better cooling, to enable a type of PC tuning called overclocking. In fact, some specific motherboard chipsets may be required for overclocking. Experienced PC builders overclock to get more performance out of their CPUs, graphics cards, and RAM. It’s not necessary to understand how to overclock in order to build your PC, although it’s a nice thing for your motherboard to support in case you choose to take it up at some point.
All else being equal, it’s generally worth choosing the highest-end motherboard with the most advanced chipset you can afford for the best experience and system longevity.
ASUS produces a wide range of motherboards for Intel and AMD CPUs using all of the latest chipsets. From lowest-end to highest-end, the most recent AMD chipsets you’ll find on mainstream motherboards include A520, B550, and X570, while recent Intel motherboards might use the B460, H470, and Z490 chipsets. Several more specialized chipsets exist from both companies, but you’re unlikely to encounter them while planning your mainstream system.
Once you’ve decided on an AMD or Intel CPU, you can visit our brand-specific motherboard product pages to begin finding the right one for you. You can also check out our detailed guides to AMD B550 and X570 motherboards, as well as our guide to Intel Z490 boards.
Choose the right motherboard form factor and case for your PC
Motherboards come in a variety of common form factors so that PC DIYers can ensure that their system has all the expansion slots they need, tailor the size of their build to the space they have available, or to make their systems more portable.
The three most common motherboard form factors you’ll see, ranging from smallest to largest, are Mini-ITX, microATX, and ATX. Smaller motherboards let your PC take up less space but aren’t as expansion-friendly, while larger motherboards provide more internal expansion slots and ports that builders can use to install components like graphics cards, video capture cards, or high-end sound cards.
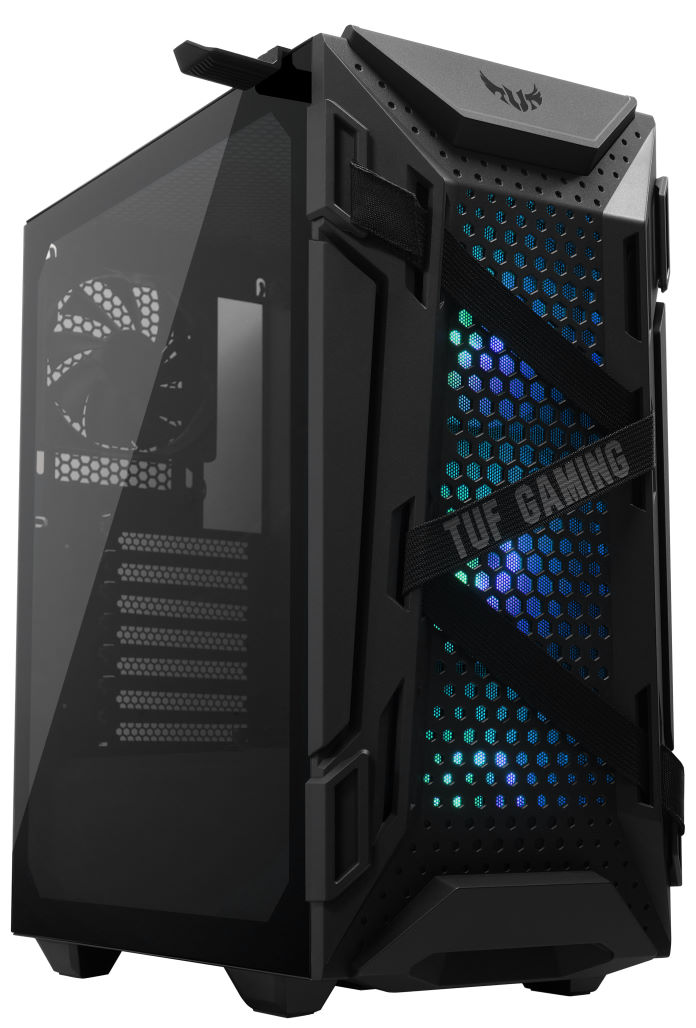
The TUF Gaming GT301, a typical ATX mid-tower case
In turn, manufacturers of PC cases—the enclosure that physically holds, protects, and helps to cool the various components that make up your PC—specifically build their products to fit motherboards using those form factors. Cases built for larger form factors can often hold smaller motherboards, but not vice versa. For example, an ATX case might provide mounting points for all three major motherboard form factors, but a smaller Mini-ITX case will only hold compact Mini-ITX motherboards. It’s ideal to choose a case that’s matched to your motherboard form factor.
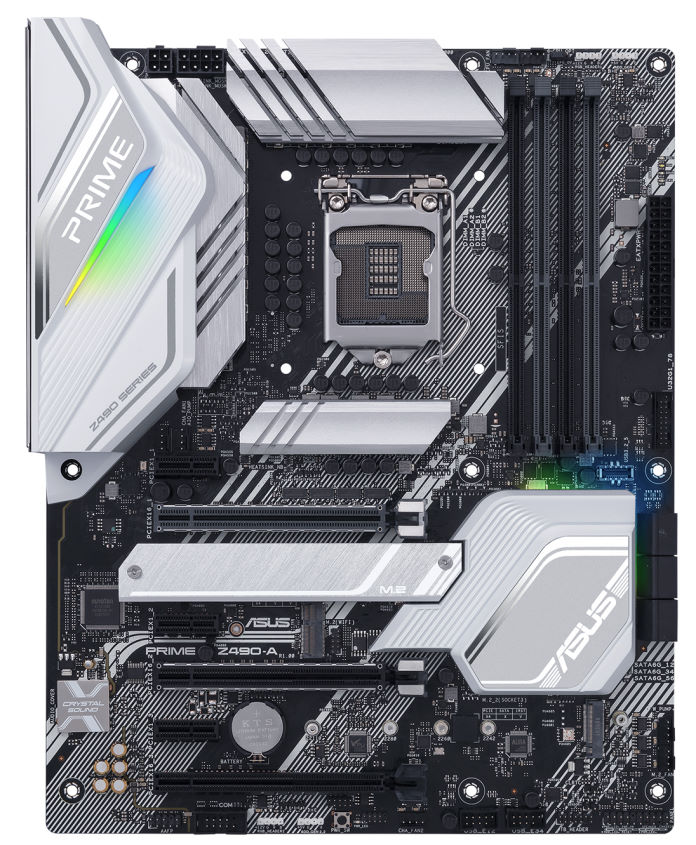
The ASUS Prime Z490-A, a typical ATX motherboard
If you’re unsure what form factor to choose for your new PC build, it’s hard to go wrong with an ATX motherboard. They provide up to seven expansion slots for plenty of flexibility in adding new components after your build is complete. This flexibility makes ATX motherboards the most popular form factor among PC builders, and their popularity means that you can easily find compatible cases for your system at a variety of prices. ATX cases also tend to be the roomiest options, so you can worry less about whether the components you’ve chosen will all fit inside.
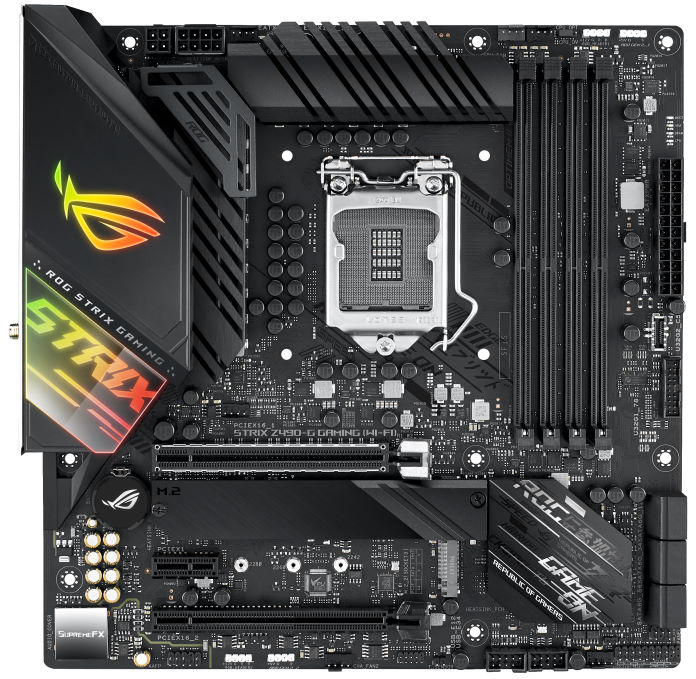
The ROG Strix Z490-G Gaming (Wi-Fi), a typical microATX motherboard
If you’d like to build a slightly smaller system, the microATX form factor strikes a balance between the flexibility of ATX and the greatly reduced size of Mini-ITX. microATX motherboards fit into smaller cases while providing up to four expansion slots and DIMM slots. They still offer freedom of expansion and plenty of memory capacity against a reduced system footprint, and they can be less expensive than some ATX motherboards, too. Be aware that the selection of microATX cases may not be as wide as for ATX motherboards, though.

The ROG Strix B550-I Gaming, a typical Mini-ITX motherboard
If you’d like to go even smaller still, Mini-ITX motherboards slim all the way down to one expansion slot and two DIMM slots, but they still have plenty of USB ports and other connectors on their back panels for expansion purposes. Mini-ITX cases can require careful planning to ensure that everything fits inside, though, so unless you’re an experienced PC builder, be sure to double or triple check that all of your parts fit within the dimensions of your chosen case before buying.
ASUS makes a variety of PC cases in our Republic of Gamers and TUF Gaming product families to fit the needs of a wide range of builders. Visit our category page to find out more.
Get the right RAM generation, speed, and capacity for your CPU
No matter whether you choose an AMD or Intel CPU and companion motherboard, you’ll need to purchase a set of random-access memory, known as RAM (or just “memory”) to go with it. RAM temporarily stores data that the CPU needs rapid access to as it performs all of its calculations, and it’s essential in order for your computer to function. Broadly speaking, the more RAM your system has installed, the more programs and data it can juggle at once, and the more capable it will be.
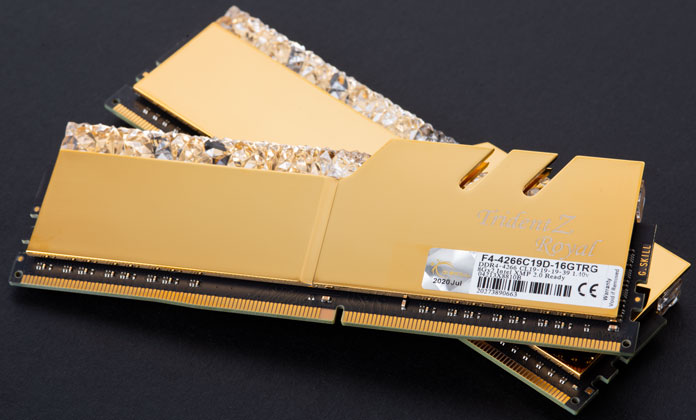
A pair of DDR4 DIMMs
Many different generations of RAM have come and gone over time. These days, you’ll most commonly see these generations referred to as “DDR” followed by a number, such as “DDR4.” DDR is an acronym for “double data rate,” but you don’t need a deep understanding of its meaning to choose the right memory for your system. The generation number is far more important.
RAM comes on a printed circuit board called a DIMM, which stands for dual inline memory module. You’ll often hear PC builders refer to DIMMs as “sticks,” since the modules resemble large sticks of gum. DIMMs are installed in standardized slots on the motherboard that are specific to each generation of DDR memory, so it’s impossible to install the wrong generation of RAM in a motherboard. If your RAM physically won’t fit into a slot, make sure it’s oriented properly and that it’s the correct generation for your system. Don’t force it into place!
DDR4 RAM is the most common standard available today, and it comes in a wide variety of speeds that are indicated by another number that follows the name of the standard. Some common RAM speeds you’ll see include DDR4-2133, DDR4-2666, DDR4-2933, and DDR4-3200.
Though both Intel and AMD CPUs can use DDR4 RAM, each manufacturer may have different standards for what RAM speed is compatible with their processors. For example, higher-end versions of Intel 10th Gen Core CPUs might support DDR4-2933 memory out of the box, while AMD Ryzen 3000 and 5000-series CPUs support faster DDR4-3200 memory. Always refer to your CPU’s product page or manual for authoritative information on the RAM speed it needs.
It’s worth noting that motherboards and CPUs often support higher RAM speeds via overclocking, but unless you’re an experienced builder, it’s best to stick with those supported, or “stock,” RAM speeds to start with. If you do want to try your hand at RAM overclocking, we provide qualified vendor lists, or QVLs, that detail specific memory kits that have been tested and verified for use with each motherboard. Refer to your motherboard’s support page to find these QVLs.
The four DDR4 DIMM slots on the ROG Crosshair VIII Dark Hero
Motherboards will generally have two or four RAM slots located on the right-hand side of the CPU socket. To allow the CPU access to more data at once, most motherboards implement two memory channels at a minimum—a design commonly referred to as “dual channel.”
Each slot on motherboards with two slots, or each pair of slots on motherboards with four, is usually associated with its own memory channel. It’s important to install memory in the proper slots to enable dual-channel operation for the best performance. Always refer to your ASUS motherboard’s manual for information on properly installing memory.
Unless you simply can’t afford more than one stick of RAM at a time, you should always plan to install and upgrade memory sticks in identical pairs. If you mix different modules of RAM with different speeds and capacities, your system may still run, but you may experience degraded performance or other unpredictable behavior. Memory is usually sold in matched pairs to begin with, so it’s easy to follow this principle in new builds.
The exact amount of memory you’ll need for your build is influenced by how much you demand of your system. The most basic non-gaming PCs can get by with 8GB of memory. If you’re building a gaming PC, system requirements for new titles are constantly increasing, and you want to be ready for them. We recommend 16GB of memory at a minimum for new gaming PCs, and 32GB isn’t out of the question if you’re a heavy multitasker on top of your gaming activities. Creative professionals working with high-resolution photos and video can benefit from even more RAM.
Although it’s not a concern for many builders, it’s good to be aware that CPUs and motherboards can have upper limits on the amount of memory they support. In the unlikely event that you’re shopping for hundreds of gigabytes of RAM, check the specifications of your motherboard and CPU to make sure it can support the amount you want to install first.
Paint pixels and raise your game with the right graphics processing unit
It’s no good to have a desktop PC if you can’t see anything it’s doing. To output video signals to a monitor, modern PCs use a graphics processing unit, or GPU. Unlike the CPU, which is a general-purpose processor that can perform most any kind of mathematical operation, the GPU greatly speeds up certain types of calculations that are necessary for basic display output and video playback. More powerful GPUs can perform those calculations quickly enough to run the 3D simulations necessary for gaming in real time.
We’ve already touched on it, but if you’re building a basic computer to get on the web, watch videos, and perform light productivity tasks in apps like Microsoft Office, you may be able to get by with the integrated graphics processing unit that’s built into some CPUs. This iGPU, as you may hear it called, is perfect for basic computing tasks and may even be OK for casual games.
To determine whether a CPU has an integrated graphics processor, check the manufacturer’s product page for the chip you’re interested in. For CPUs without an iGPU, you may see a note on that page or on the box that says “discrete graphics required” or a similar notice. As a rule of thumb, Intel CPUs generally include an iGPU, while only certain AMD CPUs include one.
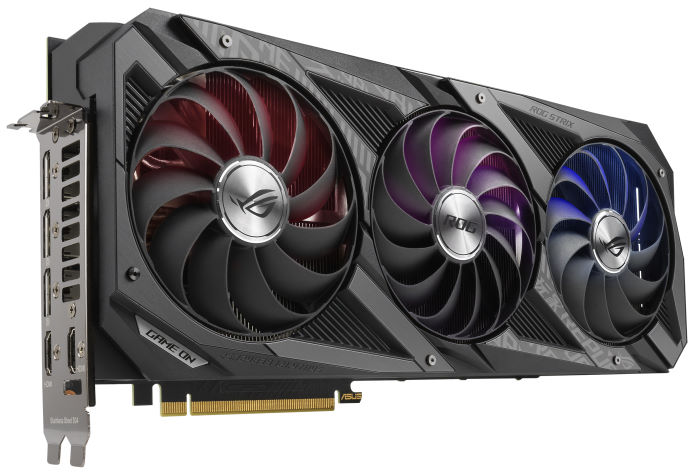
The ROG Strix GeForce RTX 3090 discrete graphics card
In the event that your CPU doesn’t have an iGPU, or if you plan to play more demanding 3D games like Fortnite, Dota 2, Rocket League, Fall Guys, or Minecraft on a PC that already has an iGPU, you’ll need to research and choose a discrete graphics card for your build. If you’re building an AMD system, you’ll probably need a discrete GPU in your parts list from the start.
A discrete graphics card is a separate circuit board that holds a powerful dedicated GPU chip, a dedicated pool of video memory or VRAM, and all the other power and cooling hardware those parts need to function. It may also have additional power connectors to deliver all the electricity it needs.
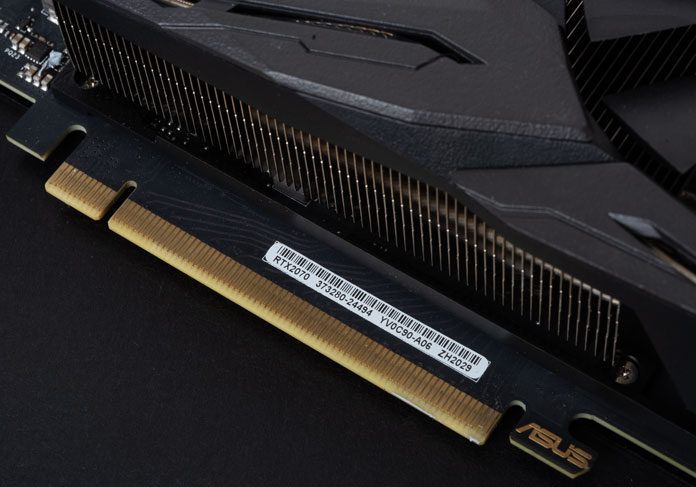
The PCIe edge connector on a typical graphics card
The graphics card plugs into the motherboard using an expansion slot. The most common type of expansion slot for motherboards and graphics cards alike these days is called PCI Express, also abbreviated as PCIe. Like RAM, PCI Express has been improved over multiple generations. The most recent standard is called PCI Express 4.0, but you’ll still find numerous PCIe 3.0 graphics cards on the market. Expansion cards that use the PCIe standard are broadly backwards and forwards compatible, so any PCI Express card that you can plug into your motherboard will usually function.
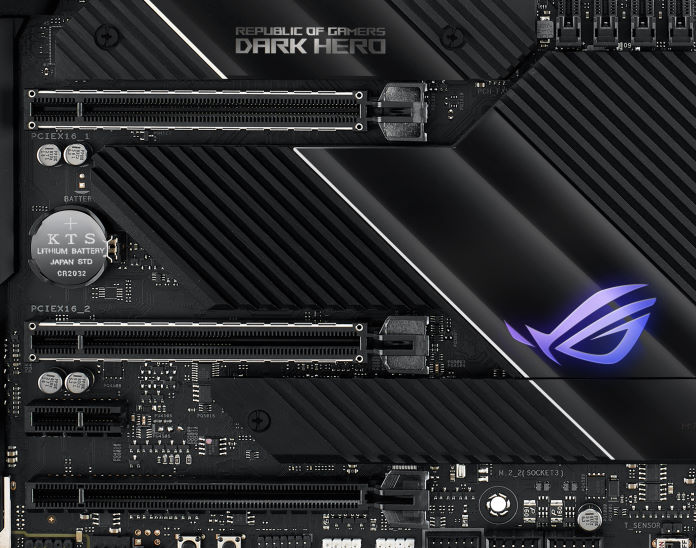
From top to bottom, the primary, secondary, and tertiary PCIe x16 slots on the ROG Crosshair VIII Dark Hero
Graphics cards plug into a type of PCIe slot called “x16,” pronounced by-16. The primary PCIe slot on most modern motherboards is a x16 slot that’s connected directly to the CPU for the best performance, and it’s where you’ll usually want to install a discrete graphics card. If you’re not sure which PCIe slot is the primary one on your motherboard, it’s usually a safe bet to assume it’s the longest one closest to the processor socket. Check your motherboard manual to be sure.
As with CPUs, there are two primary manufacturers of graphics cards today. NVIDIA GeForce graphics cards are the most popular, and they range from GeForce GTX models under $200 to far more powerful GeForce RTX versions that can sell for $800 or more. GeForce RTX cards enable cutting-edge graphics techniques like real-time ray tracing, which games like Fortnite and Minecraft RTX support. AMD also makes a full family of Radeon RX graphics cards that range from entry-level models all the way up to the high end, and the latest RX 6000 series supports real-time ray tracing, as well.
Broadly speaking, calculations on a type of mathematical data called floating point are paramount for GPU performance. Even the most basic discrete graphics card can perform over a trillion floating-point calculations per second, expressed as a teraflop per second or more than 1 TFLOPS. An exceptionally powerful graphics card like the GeForce RTX 3080 can perform almost 30 TFLOPS at its peak. As a very rough measure, the more TFLOPS a graphics card can process, the more frames per second it can produce, or the higher the in-game graphics settings it can handle.
Numerous websites and YouTube channels rigorously benchmark games on graphics cards to establish the level of performance they can deliver at a given monitor resolution, and it’s worth seeking out that information for your preferred games to help you choose the right graphics card for your needs. Some good places to start include TechPowerUp and Tom’s Hardware for written articles, and Gamers Nexus if you prefer video content.
Get visual with the right monitor
To make use of the pixels your GPU produces, you’ll need to add a monitor to your parts list. Few PC components vary as much in capabilities and price as monitors do. You can find a simple 1080p 60Hz display for $100 or less, but cutting-edge HDR gaming monitors and reference displays for professional content creation might command 10 times that amount or more. With that much territory to chart, it’s important to understand everything that makes a monitor tick.
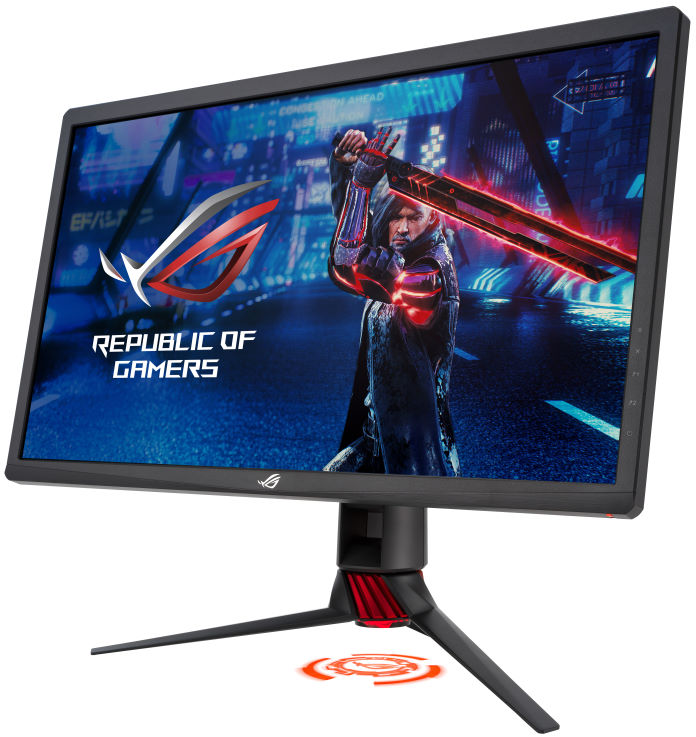 The ROG XG27UQ 144Hz 4K gaming monitor
Most monitors use a liquid crystal display, or LCD, panel to reproduce output from the graphics card. Several types of LCD panel technologies are in common use today. Before we go over those technologies, there are several basic performance characteristics to be aware of that you can compare across displays.
Pixel response time defines how quickly a monitor can change its pixels from one color to another. This transition is usually measured using a transition from one shade of gray to another, or the gray-to-gray response time. This figure is usually specified in milliseconds, and lower response times mean crisper on-screen motion. Viewing angle defines how far off of dead center your head can move before the colors of the display change to an unacceptable degree. Wider viewing angles are better. The contrast ratio expresses the difference between the darkest black and the brightest white a display can reproduce. For example, a 1000:1 contrast ratio means that the brightest white is 1000 times brighter than the darkest black. Higher contrast ratios are better.
With those basic performance characteristics in mind, let’s discuss how they play out in the three most common types of LCDs in use today. Twisted nematic, or TN, panels, are generally found in entry-level displays where low cost is most important. Until recently, TN panels had the lowest response times of any panel technology, making them favorites among competitive gamers. TN panels can have narrower viewing angles and potentially less vivid color reproduction than other panel technologies. For gaming, the latest ASUS Fast IPS panels now offer response times similar to those of TN panels without any compromises in viewing angles or color reproduction.
Vertical alignment, or VA, panels, are noted for their exceptionally strong contrast ratios, generally fast response times, and vivid color reproduction. VA panels have wider viewing angles than TN panels but may still trail IPS LCDs in this regard.
In-plane switching, or IPS, displays can offer an attractive balance of performance characteristics: wide viewing angles, vivid and accurate color reproduction, and solid contrast ratios. Because of these balanced performance characteristics, IPS panels have become one of the most popular LCD panel technologies in use. IPS panels are available in monitors of all types, from basic productivity displays to high-refresh-rate gaming monitors to professional displays for color-critical work.
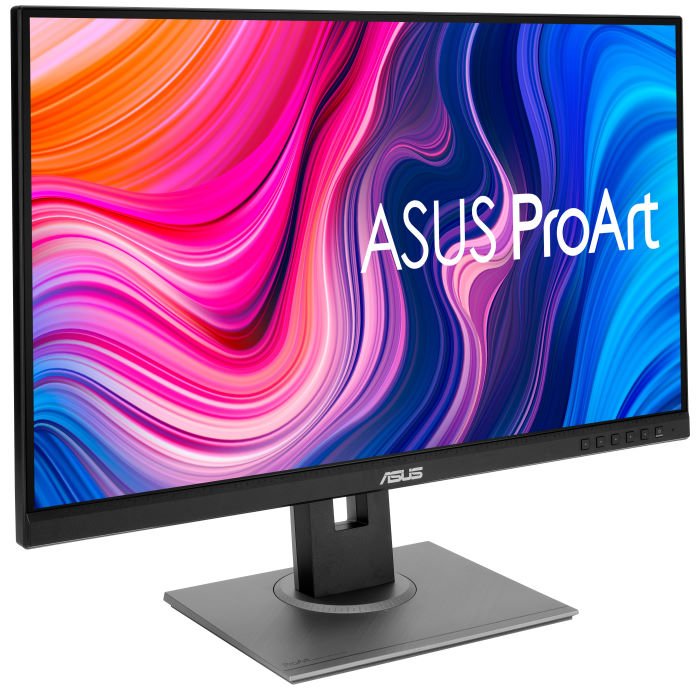
The ASUS ProArt PA278QV content creation display
Regardless of panel type, better displays can show more colors than basic monitors, and this performance is quantified in reference to a standard color gamut, or a certain subset of all of the visible colors. The most commonly used color gamut is known as sRGB. Monitors that claim 100% sRGB coverage will look great with most types of content and games available today. Displays with wide color gamuts, such as DCI-P3 and Adobe RGB, can reproduce more saturated or vivid colors than monitors that only support sRGB.
DCI-P3 support is especially relevant for high dynamic range, or HDR, monitors. These screens can display a much wider range of brightness levels from dark to light, resulting in more lifelike images and potentially stunning effects for content like flashes from explosions or the sun peeking out from behind a mountain. HDR support is commonly certified independently by the standards body VESA, whose DisplayHDR program sets a range of performance standards for HDR monitors, including those from ASUS. You can learn more about DisplayHDR-certified monitors at the program’s website.
A further measure of interest for displays is color accuracy, or whether a display’s representation of a given color is close to its theoretical representation within a color gamut. Displays whose color accuracy is measured will usually have a rated specification known as average Delta E, and an average Delta E of less than 2 is desirable for creative users who need their work to appear consistent across different displays. ASUS ProArt displays are factory-calibrated to ensure a low average Delta E, so creative users can trust their work to these monitors right out of the box. Some ROG gaming monitors are also factory-calibrated.
Display resolutions are expressed as a number of horizontal and vertical picture elements, or pixels. Multiplied together, those numbers tell you how many pixels comprise your display in total. Common monitor resolutions include 1920×1080 (also known as Full HD or FHD), 2560×1440 (also known as 1440p), and 3840×2160, or 4K. At the same diagonal size, such as 27″, a higher monitor resolution will result in crisper-looking text and graphics, less visible pixelation or “blockiness” in images, and more realistic-looking gameplay.
Let’s consider what effects resolution has on a gaming PC’s performance. A monitor with more pixels means more work for the graphics card to finish per frame of in-game animation, and that usually results in a lower frame rate. If you pair too weak a graphics card with too high a display resolution, your system may not be able to produce a satisfying, or “playable,” frame rate, even at the lowest in-game graphics settings. Frame rates are usually expressed as averages, and the higher the average frame rate a graphics card can produce, the better its performance.
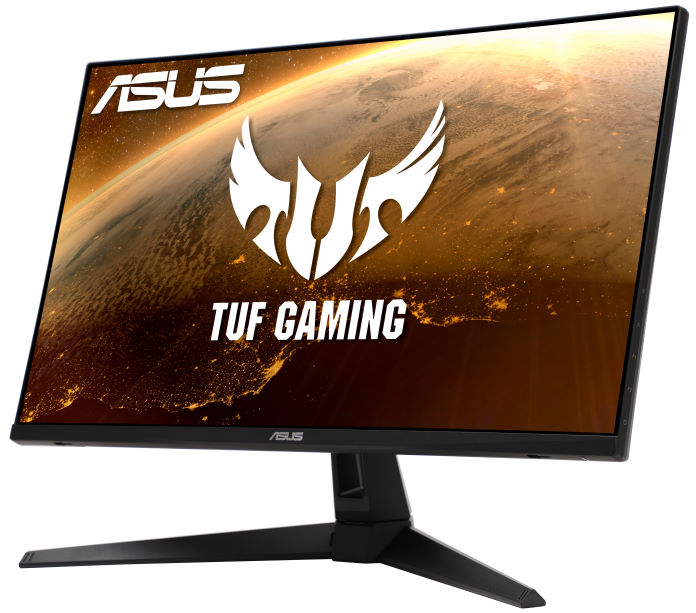
The TUF Gaming VG27AQL1A gaming monitor
Another important parameter to keep in mind when pairing a monitor with your PC build is its refresh rate, or the number of times display can show new data from the graphics card per second. The refresh rate is usually advertised in Hertz, or Hz, and common refresh rates include 60Hz, 90Hz, 120Hz, 144Hz, and 240Hz. The higher the refresh rate, the more fluid and smooth on-screen motion can look, and the more responsive your system can “feel” to keyboard and mouse input, especially in competitive games.
The monitor refresh rate is important because frame rates higher than the monitor’s refresh rate won’t be fully shown by your screen. If your monitor only supports a 60Hz refresh rate, for example, average frame rates too much higher than 60fps aren’t essential, so you may be able to get away with a less powerful graphics card at a given resolution and group of in-game settings. 144Hz or even 240Hz monitors need to be paired with a much more powerful graphics card to make the most of their capabilities.
Many modern monitors also support variable refresh rates, meaning that they can refresh what’s on screen right as the graphics card produces a new frame rather than simply refreshing a fixed number of times per second. If a monitor claims support for NVIDIA G-SYNC or G-SYNC Compatible, AMD FreeSync, or Adaptive Sync, it supports variable refresh rates.
Monitors with variable refresh rates avoid an undesirable image artifact called tearing, where parts of multiple frames are visible on screen at once, across a refresh rate range, such as 48Hz to 144Hz. So long as the GPU’s delivered frame rate is within its refresh rate range, a variable refresh rate monitor can cleanly draw each new frame as soon as it’s ready. This technique makes games look “smoother” and can make them feel more responsive to your input.
Variable refresh rates stand in contrast to an older technique called Vsync, which relies on a graphics card being able to produce enough frames per second to maintain a fixed (or “locked) 30 or 60fps (or higher, in the case of older high-refresh-rate displays at 120Hz or 144Hz). In the event that the graphics card can’t keep up with the display’s refresh rate with Vsync on, a user might see noticeably less smooth animation. Even in the best circumstances, Vsync can also make games feel less responsive, since each new frame can only be displayed so often.
For the best gaming experiences, check out the monitors from our TUF Gaming and Republic of Gamers product families. TUF Gaming displays give you access to high refresh rates and variable refresh rates at attainable prices, while ROG displays push the limits of resolution, refresh rates, and dynamic range with the latest technology.
Grab the right CPU heatsink to keep your system running cool and quiet
Modern CPUs can perform mind-boggling numbers of calculations per second. To do so, they consume significant amounts of electricity that is eventually dissipated as heat. The number of electrical components that make up a modern CPU core is so large, and they’re packed into such a small space, that it’s essential for some form of cooling device to be mounted on top of the processor to help dissipate all the heat those elements produce. Without a cooling system in place, a modern CPU would overheat and eventually shut off to protect itself from damage.
This external cooling device is called a heatsink, and it uses a fan to move air through some type of heat-exchanging system. To achieve optimal operating temperatures, and thus the best and most consistent CPU performance, a properly sized processor heatsink is essential for any PC build. To help with this choice, CPU makers express the amount of power they expect a processor to dissipate using a figure called thermal design power, or TDP, usually shown in Watts (W). Common TDPs for DIY PCs include 65W, 95W, and 105W, although you may see lower or even higher figures. The higher the processor TDP, the larger the heatsink you will generally want to use on your CPU for the best performance. Some heatsink manufacturers provide a maximum TDP they expect their products to be able to handle to make building easier.
TDP isn’t the only parameter that’s important to consider when choosing a heatsink, however. If we consider two heatsinks that claim to be able to handle the same CPU TDP, a smaller heatsink may have to spin its fan much faster and make much more noise than a larger heatsink would, so it’s important to consider not just the performance you need from the cooler but also the level of noise you’re willing to tolerate.
Some Intel and AMD processors include small heatsinks in the box to get system builders up and running without the need for extra components, but it’s becoming more and more common for higher-end chips to leave a heatsink out of the box entirely. When you’re planning out a system, you should always check to see whether a heatsink (also called a “thermal solution”) is included in your processor box. If a heatsink isn’t included, it’s important to select one that’s both adequate for the thermal needs of your processor and will fit into your case.
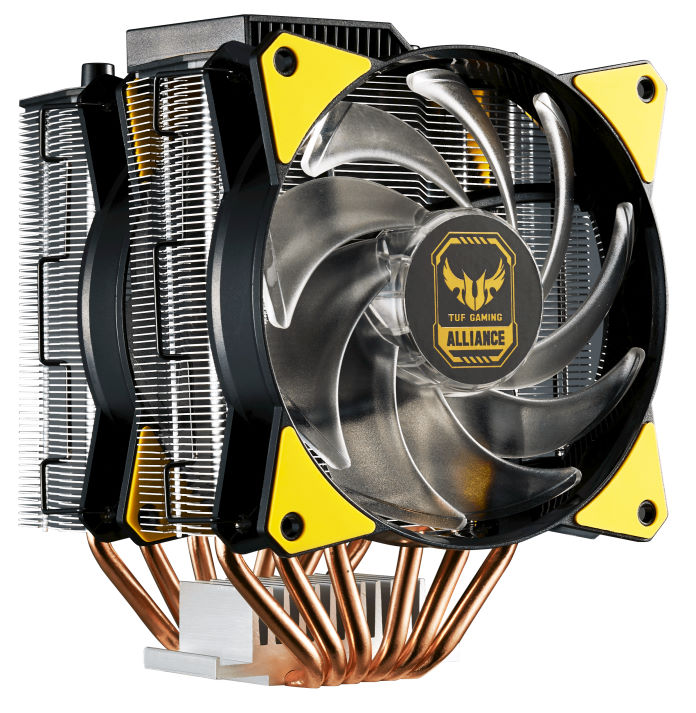
The Cooler Master MA620P tower-style heatsink, part of the TUF Gaming Alliance
There are two common types of heatsinks available to PC builders nowadays. One, called an air cooler or tower heatsink, uses the thermal capacity of air to cool the processor. First, heat travels from the processor into special liquid-filled metal pipes called heatpipes. When the liquid inside gets hot, it vaporizes and circulates in the pipe, transferring heat into large stacks of aluminum fins that are joined to the heatpipes. A fan or fans then blow air over these fins, moving the heat out of the heatsink. Air coolers are widely available in a variety of sizes to accommodate the thermal dissipation of CPUs with core counts both small and large. CPUs with a large number of cores may require a large and unwieldy air cooler that might not fit into any but the largest cases around, however.
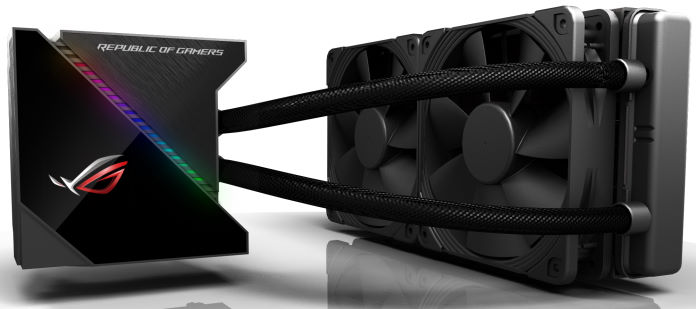
The ROG Ryujin 240, a 240mm closed-loop liquid cooler
Another type of heatsink, called a closed-loop liquid cooler or all-in-one liquid cooler, circulates water-based coolant through hoses that run between a pump head and a radiator like the one you’d find in your car. The pump head has a copper plate on its base that contacts the metal cover of the processor and transfers heat into the liquid sealed into the system that’s circulating on the other side. Fans mounted to the radiator then transfer heat from the liquid to the surrounding air.
Because the water-based coolant in these systems has a high heat capacity, these coolers can potentially handle the heat output of the hottest-running processors without relying on a large tower of heatpipes and metal fins. That means they can take up less space in a case, all else being equal, or even fit more heat-dissipation capacity into cases where a similarly capable air cooler wouldn’t fit. Check out our full line of CPU liquid coolers here.
To make it easy to check heatsink compatibility, case manufacturers (including ASUS) test and share the maximum possible air cooler height in millimeters that a given case can accommodate. Cooler manufacturers will prominently provide this figure in their specification sheets, as well, so it’s easy to compare the two figures and make sure that a tower cooler won’t interfere with the side panel of a PC case.
Checking the compatibility of a liquid cooler and a given case requires referring to a different measurement. Because radiators screw onto points inside a computer case that double as fan mounts, their size is usually expressed as a multiple of the fans they include. Common radiator sizes include 120mm, 140mm, 240mm, 280mm, and 360mm. Be sure to consult your case’s manual or product page to ensure that it has the right fan mounts to accommodate the closed-loop liquid cooler you want. Some cases also have restrictions on the height of the stack of radiator and fans that can fit inside without touching components like the motherboard or RAM, so be sure to double-check both dimensions of any cooler you’re shopping for.
Put all of your data in the right place with solid-state drives and hard disk drives
We’ve already discussed how RAM holds data that your CPU needs to access quickly for processing, but when your PC is turned off, any data stored in RAM goes away. As a result, a PC needs a permanent, or non-volatile, stored copy of data like your Microsoft Windows operating system, games, and other programs that it can load every time it powers on. This stored, persistent data resides on components called solid-state drives, or SSDs, and hard disk drives, or HDDs, which are more broadly known as storage devices.
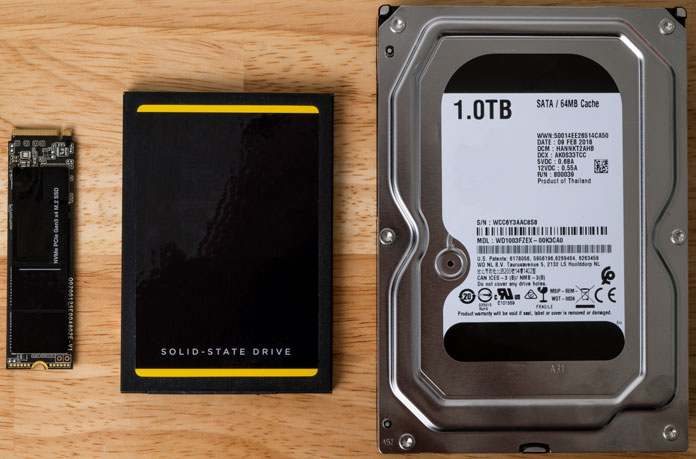 From left to right: M.2 SSD, 2.5″ SSD, 3.5″ HDD
Solid-state drives store data on a type of chip known as flash memory. They have no moving parts, so they can read and write digital data much more quickly than hard disk drives, which rely on spinning magnetic platters and other moving components to move information around.
SSDs have taken over as the primary storage device in most DIY PCs simply because they’re so much faster and more responsive than hard disk drives. The primary storage device is where your operating system and most commonly used programs or games should be stored so that you enjoy the best performance from your PC, and an SSD is an optimal tool for that job. Although you can certainly use a hard disk drive as a primary storage device, your PC may feel quite a bit less responsive as a result.
HDDs are still an essential PC component, however, because they are much cheaper per gigabyte of information that they can store than SSDs and are available in much larger sizes than even the largest consumer SSDs today. If you need to save huge libraries of photos, videos, or music, you might still consider adding a hard disk drive to your parts list. Many older games aren’t optimized to take advantage of SSDs, either, so storing them on an HDD can work if you need capacity more than speed.
![]() A typical M.2 slot
A typical M.2 slot
Because they use memory chips with extremely high component density, solid-state drives can pack multiple terabytes of storage capacity into remarkably tiny spaces. The latest form factor for solid-state drives, known as an M.2 SSD, fits these chips onto a standardized circuit board that’s just 22 millimeters wide and usually just 80 millimeters long—truly not much larger than a stick of gum. M.2 SSDs are installed in M.2 slots on the motherboard, and modern motherboards usually have two or more of these slots on their surface. M.2 slots are often concealed by heatsinks to keep the SSDs underneath running cool and to keep your build looking sharp.
 A populated M.2 slot
M.2 SSDs are further distinguished by their protocol—the way they talk to the rest of your PC. NVM Express, or NVMe, SSDs use a thoroughly modern way of communicating with the PC that potentially offers the highest available storage performance. NVMe drives communicate over the same PCI Express connection that your graphics card uses—just condensed into the much smaller M.2 slot. NVMe drives can use the PCIe 3.0 or PCIe 4.0 standards, but the majority of them still use PCIe 3.0.
PCIe 4.0 NVMe SSDs can be more expensive than their PCIe 3.0 counterparts, so unless your work demands the absolute best storage performance, it’s OK to stick with PCIe 3.0 NVMe SSDs to save some cash in most builds.
The other common storage protocol is called SATA, for Serial ATA. SATA is an older protocol used by a wide range of SSDs and HDDs alike. SATA SSDs aren’t as fast as NVMe models, but they can be cheaper. That said, prices for the two types of SSDs have gotten much closer in recent times for the same storage capacity, so it’s worth choosing NVMe over SATA if your budget allows.
Some SATA SSDs are available in the M.2 form factor, and they plug into the same M.2 slots that NVMe models use. Think of this compatibility as speaking different languages into the same telephone. Not all M.2 slots support SATA devices, however, so check your motherboard manual’s description of the specific slot to be sure you can install an M.2 SATA drive there.
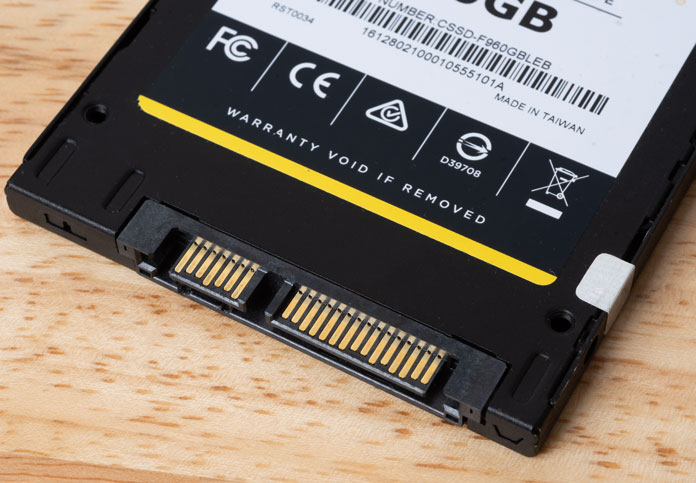
SATA data (L) and power (R) connectors
Other SATA SSDs come in a larger metal or plastic enclosure that has to be mounted on a separate tray in the case, and these are referred to as 2.5” SSDs. They connect to the motherboard using a type of cabling, also called SATA, which is split between a data cable that connects to the motherboard and a power cable that comes from your system’s power supply. As M.2 SSDs have become cheaper and more common, however, 2.5” SSDs have decreased in popularity and are now primarily used in older PCs that don’t have an M.2 slot on the motherboard.
The most common size of hard disk drive is called a 3.5” HDD, for the diameter of the magnetic platters inside. The whole hard disk drive unit is close to a paperback book in size, and your case will need a dedicated mounting point for it if you choose to use one in your build. Modern cases usually have two 3.5” hard drive trays or mounts, but some have many more. Modern consumer hard disk drives universally connect to the motherboard using the SATA cabling we discussed earlier.
When choosing an SSD as a primary storage device, you’ll certainly want to think about its capacity, measured in gigabytes (GB) or terabytes (TB, or thousands of gigabytes). 256GB is a comfortable minimum size for a basic PC these days, but if you’re a gamer, you will want a larger SSD. If you have a smaller game library, a 512GB SSD might be OK, but as cutting-edge games’ installed sizes grow to many hundreds of gigabytes and next-generation consoles expose the performance of SSDs to game developers for the first time, enthusiasts will definitely want to consider a 1TB or even a 2TB SSD to make sure they have room for all the titles they might want to play.
Hard disk drives offer broadly similar performance to one another, so choosing one is largely a question of how much capacity you need. Most hard drives start out at 1TB these days and can range all the way up to 16 or 18TB. HDDs with lower rotational speeds, such as 5400RPM, will be slower performers than ones with 7200RPM speeds, but faster-spinning drives may consume more power and make more noise than slower-spinning units. If you want the best performance from your HDD, a 7200RPM model may be worth the tradeoff
Some hard drives are built for specialized purposes like server storage, surveillance camera systems, or a type of network-connected storage device called a NAS, rather than for a client PC, so check the manufacturer product page of the drive you’re interested in to make sure it’s optimized for your needs.
Power up your system with the right power supply
The final component we’ll discuss is also one of the most important for your entire build. In fact, your PC can’t turn on without it. We’re talking about the power supply unit, or PSU. The PSU converts power from your wall socket into forms that can be consumed by the various components in your PC. It connects to those components using specialized cables with a variety of standard plugs that usually only fit into the components they’re designed for. For more information on which of these connectors goes to each component in your build, refer to your motherboard manual.

The ROG Thor 850W fully modular PSU
Power supplies come in fully modular, semi-modular, and non-modular varieties, each of which refer to a type of cabling system. Fully modular units don’t have any fixed cables running out of their enclosures. Instead, you install only the cabling you need using sockets on the front of the unit. Semi-modular units might have fixed cables for the highest-current wiring, but let you customize the remainder of the cables for storage devices and peripherals. Non-modular PSUs come with all of their cabling hard-wired.
If your budget allows, we recommend choosing a modular or semi-modular unit so that you don’t have to stow and organize extra cabling that you’re not going to use inside your PC case. This can result in a cleaner-looking system build and better airflow inside your PC.
The total amount of power that a PSU can supply to a system is expressed in Watts (W). The most common PSUs for PC DIYers these days start at about 430W to 450W, and they can be as large as 1600W or even more. PC builders who aren’t using discrete graphics cards can choose PSUs toward the lower end of that range, while gamers with higher-core-count CPUs and midrange or high-end graphics cards will want to choose a 750W or 850W PSU at a minimum.
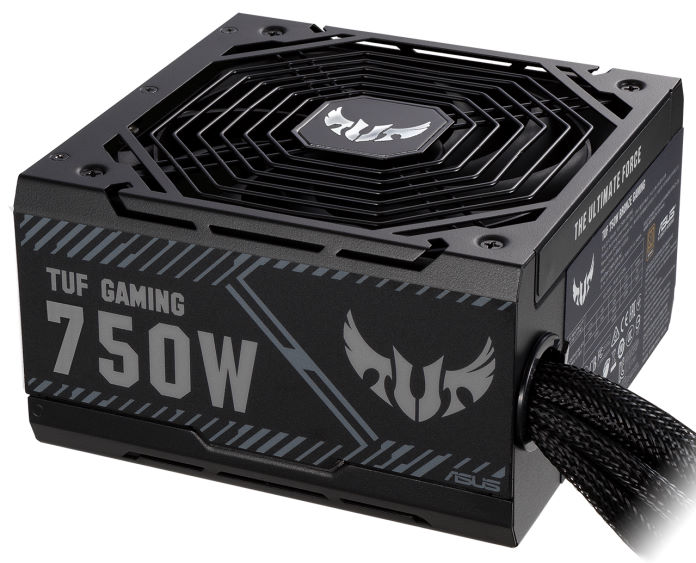
The TUF Gaming 750W Bronze non-modular PSU
To get a useful estimate of how much power your system might consume, you can put together all of its components using PCPartPicker and check the estimated total power from its output. Just be aware that less powerful PSUs might not be that much cheaper than higher-capacity units, and that it’s often not ideal for efficiency, longevity, or system noise levels to run a PSU near the limit of its rated capacity for long periods. A good rule of thumb is to buy a PSU with roughly twice your system’s expected power draw to ensure the best efficiency, quietest operation, and longest life.
Efficiency is a key measure of a modern power supply’s performance. The 80 PLUS certification program provides an independent measure of how efficient a PSU is at common load levels, and PSUs that pass testing receive a certification level in keeping with their performance. We recommend looking for an 80 PLUS Bronze PSU at a minimum. Higher-end PSUs are often 80 PLUS Gold certified, and the highest-end units wear 80 PLUS Platinum or 80 PLUS Titanium badges. As PSUs get more efficient, they do get more expensive, and an 80 PLUS Gold or Platinum unit is likely ideal for most enthusiast systems without going overboard.
Like motherboards, PSUs do come in different form factors, but the vast majority of system builds will use an ATX PSU, since that’s what most PC cases are designed to accommodate. You may see smaller PSUs in the SFX or SFX-L form factors, but those are designed for use in compact Mini-ITX cases with specialized mounting points, and their cables tend to be shorter as a result, You shouldn’t choose one unless you know for certain that you need it.
ASUS offers several PSUs in the TUF Gaming, ROG Strix, and ROG Thor families to fit the needs of a wide range of system builds. Check our our dedicated PSU category page to find the one that’s right for you.