

The Resizable Base Address Register, also known as Resizable BAR, is an exciting feature of the PCI Express expansion bus standard that has the potential to deliver more performance to gamers in select titles. ASUS has been working with our industry partners to bring support for this feature to over 180 of our motherboards and to our custom versions of GeForce RTX 30-series graphics cards. We know that DIY PC builders the world over are excited to gain access to these potential performance improvements. This handy guide will show you how to enable Resizable BAR on your ASUS-powered PC.
In order to enable Resizable BAR on your system, you will first need to ensure that your PC has a compatible motherboard, graphics card, and CPU inside. You will then need to ensure that your motherboard has the latest firmware update, and that your graphics card’s video BIOS (VBIOS) is up to date. Once your system’s firmware is fully updated, you’ll also need to make a couple simple settings changes in your motherboard’s UEFI.
Finally, you’ll want to make sure that your system is running the latest available graphics driver from NVIDIA. GeForce graphics driver version 465.89 WHQL improves performance in 17 games with Resizable BAR enabled, and more supported games will be added over time with future driver updates.
Step 1: Update your motherboard’s firmware
For system builders with AMD platforms, those with a Ryzen 5000-series CPU or Ryzen Threadripper 3000-series CPU and many ASUS A520, B450, B550, X570, and TRX40 motherboards can install a firmware update to enable Resizable BAR support. For those with Intel platforms, many of our B460, H410, H470, Z490, Z590, and X299 motherboards now support Resizable BAR, as well. You can find a full list of system requirements for Resizable BAR at NVIDIA’s GeForce blog.
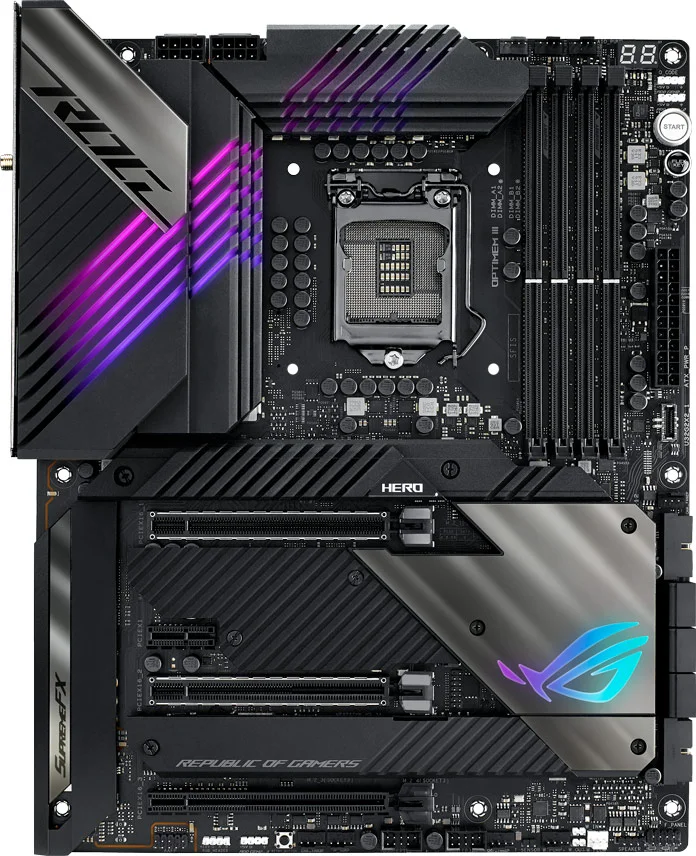
The ROG Maximus XIII Hero motherboard
Whether your ASUS-powered PC uses an Intel or AMD platform, you can check whether a firmware update is available to enable Resizable BAR on your motherboard by navigating to its support page through our product finder.
Once you’ve obtained the necessary firmware update file from your ASUS motherboard’s support page, you’ll need to actually perform the update. Your motherboard may offer several methods of updating its firmware, including through Armoury Crate or AI Suite 3 in Windows, EZ Flash in the firmware interface, or through USB BIOS FlashBack™ on select models. For more information on how to perform a firmware update on your motherboard, please consult this handy guide (applicable to both AMD and Intel platforms) or refer to your motherboard’s user manual through its support page.
Step 2: Update your graphics card’s VBIOS, if necessary
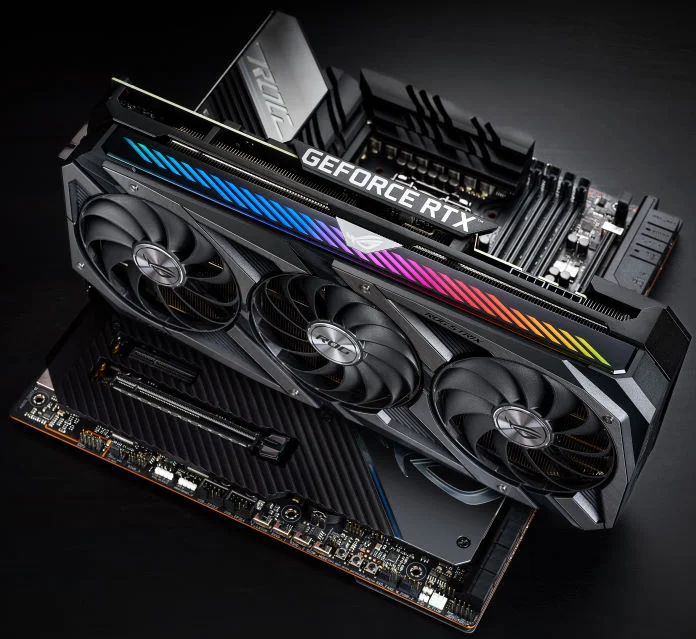
Once you have updated your motherboard to the latest BIOS version, confirm that you have a compatible NVIDIA GeForce graphics card installed in your system. All of our GeForce RTX 3060 graphics cards support Resizable BAR out of the box. However, a video BIOS (VBIOS) update is required before Resizable BAR can be enabled with our GeForce RTX 3060 Ti, GeForce RTX 3070, GeForce RTX 3080, and GeForce RTX 3090 graphics cards. We provide self-contained VBIOS updater packages through our product support pages. To find your graphics card’s support page, please start here.
To update the VBIOS, simply download the update package from your product’s support page, extract the package from its compressed archive, and run the executable inside. Once the update is complete, your PC will restart. Your graphics card will then be running the latest VBIOS version. Ensure that your PC is connected to a reliable source of power before updating the VBIOS, and do not unplug it during the course of the update.
Step 3: Apply the proper firmware settings
Once your motherboard’s firmware is updated to the latest version and you have ensured that your GeForce RTX 30-series graphics card has been updated to a compatible VBIOS or is already compatible with Resizable BAR, you’ll need to enable the feature in your motherboard’s firmware. These instructions apply to both Intel and AMD motherboard platforms.
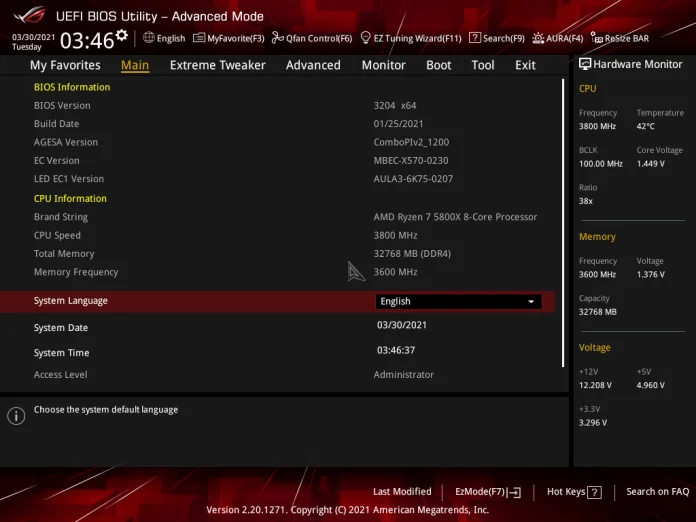
Enter your motherboard’s firmware interface by powering on or restarting your PC and repeatedly pressing either the Del or F2 keys during startup. If your motherboard enters the EZ Mode interface by default, switch over to the Advanced Mode interface by pressing F7.
Once you have entered the Advanced Mode interface, navigate to the Advanced tab using the arrow keys or mouse, then locate the “PCI Subsystem Settings” submenu. Enter this submenu by clicking on it or hitting “Enter.”
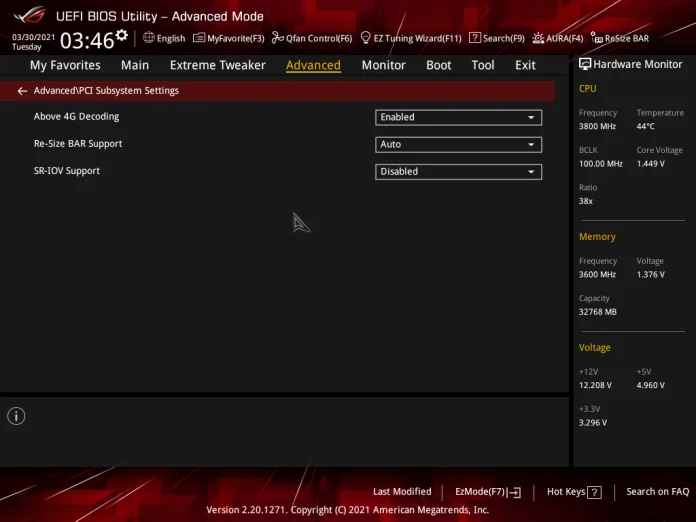
Within the “PCI Subsystem Settings” submenu, change the setting for the “Above 4G Decoding” parameter to “Enabled,” and ensure that the “Re-size BAR Support” parameter is set to “Auto.” Press Esc on your keyboard to return to the Advanced menu, then navigate to the Boot tab using the mouse or arrow keys.
The next step in the process is to disable the Compatibility Support Module (CSM) in your motherboard’s firmware. Before proceeding, be aware that if your primary storage device for the Windows operating system uses the Master Boot Record (MBR) partitioning scheme rather than the GUID Partition Table (GPT) scheme, if your Windows installation is configured to use the Legacy BIOS mode instead of the UEFI BIOS mode, or both of the prior conditions are true, disabling the Compatibility Support Module may result in a (temporarily) unbootable system.
The MBR partitioning scheme and the Legacy BIOS mode are typically seen on older installations of Windows. If your system was built recently, its Windows installation may already use GPT and the UEFI BIOS mode. In that case, it is likely safe to disable the Compatibility Support Module. If you are sure that your primary storage device uses GPT, and your Windows installation is configured to use the UEFI BIOS mode, you can continue with the following steps.
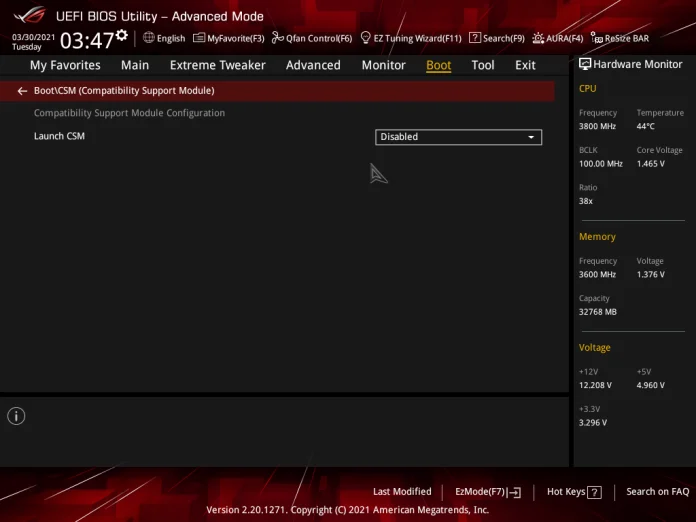
In the Boot tab, locate the “CSM (Compatibility Support Module)” submenu, highlight it using the arrow keys and press Enter, or click it. Within the “CSM (Compatibility Support Module)” submenu, locate the “Launch CSM” option and set it to “Disabled” if it is not already. Press F10 to save all of your changes and exit the firmware. Your PC should boot into Windows normally.
If you are unsure whether your primary storage device uses MBR or GPT, or you do not know whether your system is configured to use the Legacy or UEFI BIOS modes, you can exit the firmware interface by pressing the Esc key until the firmware prompts you to exit without saving. Accept the prompt and boot your system normally.
To determine the partitioning scheme that your system drive uses, you can use Windows’ Disk Management utility. Once your PC boots back into Windows, press the Start key or click the Start menu and type in “Disk Management.” Windows may return a search result called “Create and format hard disk partitions.” Hit Enter, or click this search result.
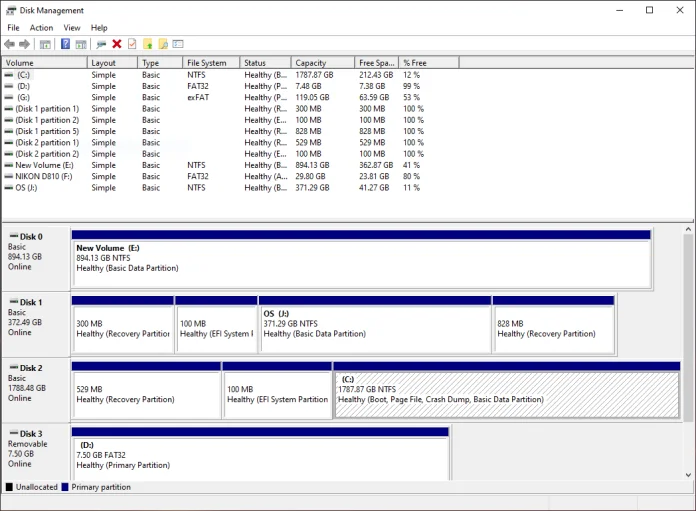
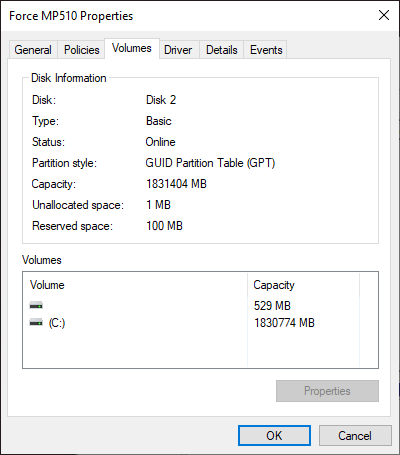
Within Disk Management, locate your primary boot device by looking for a partition marked “C:” in the visualization of all available partitions across your storage devices. Right-click this device’s label (“Disk 1, Disk 2,” etc.) on the left edge of the window. Choose “Properties” from the menu that appears and then click the “Volumes” tab at the top of the window that opens. Locate the line marked “Partition style” and validate whether the partition scheme is GPT or MBR.
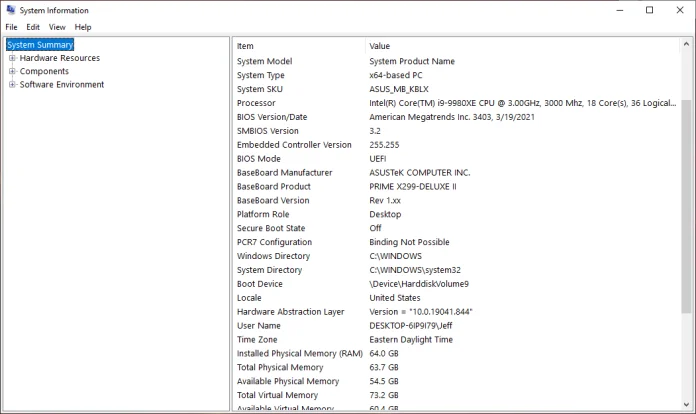
Next, verify that your system is configured to use the UEFI BIOS mode. Press the Start key on your keyboard or click the Start menu and type “msinfo,” then press Enter. In the window that appears, locate the BIOS Mode line item and confirm whether it indicates the “UEFI” or “Legacy” BIOS mode.
If your primary boot device is configured to use GPT, and your system is configured to use UEFI BIOS mode, you can reboot your PC and safely re-apply all of the settings changes listed in the previous steps of this section. Save your changes to the firmware by pressing F10 and hitting Enter, then allow your system to boot normally.
If your primary boot device uses MBR, if your Windows installation is configured to use the Legacy BIOS mode, or both of the prior conditions are true, you cannot disable the Compatibility Support Module, and you cannot perform the necessary steps in the firmware to enable Resizable BAR. Changing your system drive’s partitioning scheme from MBR to GPT, or your Windows installation from Legacy BIOS mode to UEFI, is beyond the scope of this guide.
In the event that you do disable the Compatibility Support Module and find that your system no longer boots, you can always revert the change by re-entering your motherboard’s firmware and reversing the steps above for the “CSM (Compatibility Support Module)” submenu.
Step 4: Preflight checks
Once you’ve made the necessary changes to your system’s firmware and saved them, it’s time to update your graphics driver to the latest version, then verify that your system has enabled Resizable BAR with your graphics card.
The latest graphics drivers from NVIDIA are always available through the GeForce Experience app, or you can download them manually here. Follow the prompts in GeForce Experience if needed, or download and install the latest graphics driver from NVIDIA like you would any other executable.
Once you’ve completed the driver update process and restarted your PC, you can verify that Resizable BAR is enabled. Press the Start key on your keyboard or click the Start menu and search for the NVIDIA Control Panel. Launch it by clicking the search result or pressing Enter if it’s installed. If the NVIDIA Control Panel is not already installed, you may be prompted to install it. Proceed with the installation if prompted and continue with these steps.
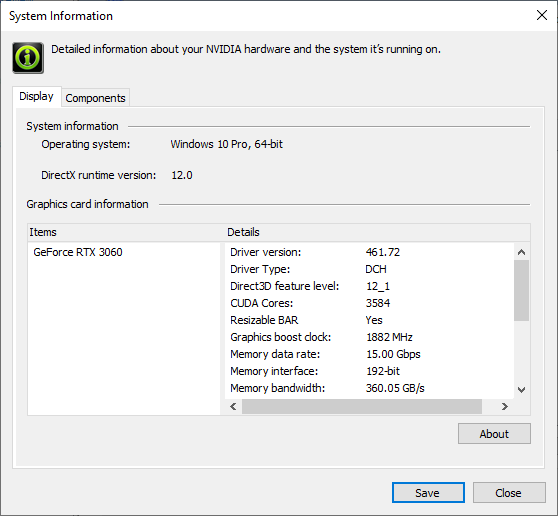
If the NVIDIA Control Panel is already installed and you are able to open it, locate the “System Information” button in the lower left corner of the main NVIDIA Control Panel window and click it. In the pop-up window that appears, under the “Display” tab, locate the “Resizable BAR” line item under the “Details” list. If “Yes” appears for Resizable BAR, your system is properly configured to take advantage of the feature. Refer to NVIDIA’s list of compatible games, fire up the compatible title of your choice, and enjoy the performance benefits.
If “No” appears, ensure that your motherboard’s firmware is fully updated with a version that supports Resizable BAR, that your graphics card’s VBIOS is updated to the latest version, if needed, that the above configuration steps have been followed, and that you have properly saved your changes in the motherboard firmware. Repeat the above steps to verify that Resizable BAR is properly configured.
We hope this guide to enabling Resizable BAR on your ASUS-powered PC has proven useful. If you need further assistance, please do not hesitate to contact our customer support teams for more information. Enjoy the power of your newly upgraded system!