

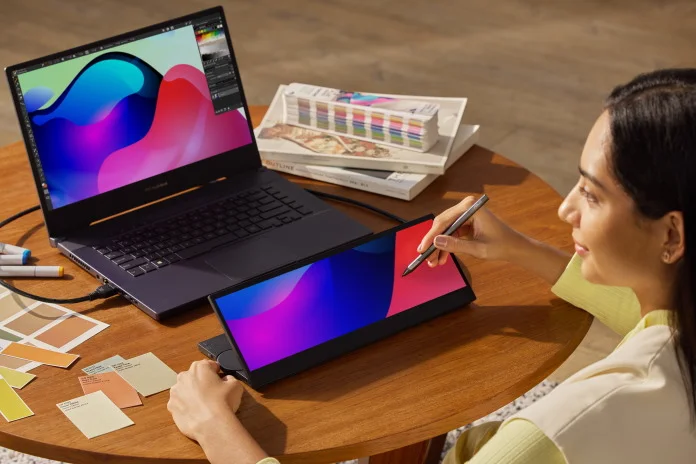
Many creators use a second display for multitasking. That additional real estate is invaluable for keeping on eye on reference materials, communicating with your team, or making use of the dual-monitor capabilities in apps like Adobe Premiere Pro. The ProArt Display PA148CTV can be much more than just a second display, though. Through this versatile portable touchscreen, you can also use the exclusive ASUS Control Panel app to gain quick and intuitive access to your most commonly used functions in Adobe Photoshop, Lightroom Classic, After Effects, and Premiere Pro. And it’s fully customizable through the ProArt Creator Hub app so that you can create the perfect control surface for your workflow.
Start with a display or notebook compatible with the ASUS Control Panel
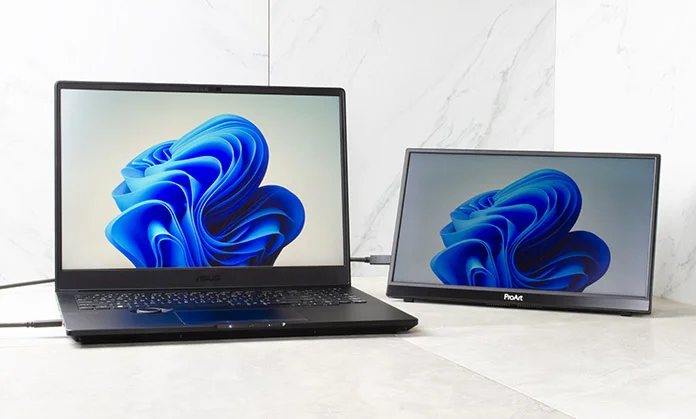
To get started with the ASUS Control Panel app, you’ll need a compatible device. Our ProArt Display lineup makes it easy to add this functionality to your existing workstation. It starts with the ProArt Display PA148CTV. This innovative monitor gives creators versatile input options with its integrated ASUS Dial and Control Panel functionality. On top of that, it’s a professional-grade monitor with 100% coverage of the sRGB and Rec. 709 color gamuts, and it’s factory calibrated and Calman Verified to achieve a ΔE of less than two.

For creators who rely on stylus input for their work, our upcoming ProArt Display PA169CDV offers Wacom EMR tech in addition to an ASUS Dial, the Control Panel app, and professional-level color accuracy.
For a space-saving option, consider the ProArt Display PA147CDV. In a slim, convenient enclosure, this display gives you a versatile surface for stylus input, touchscreen controls, and an integrated ASUS Dial, all in addition to full ASUS Control Panel functionality.
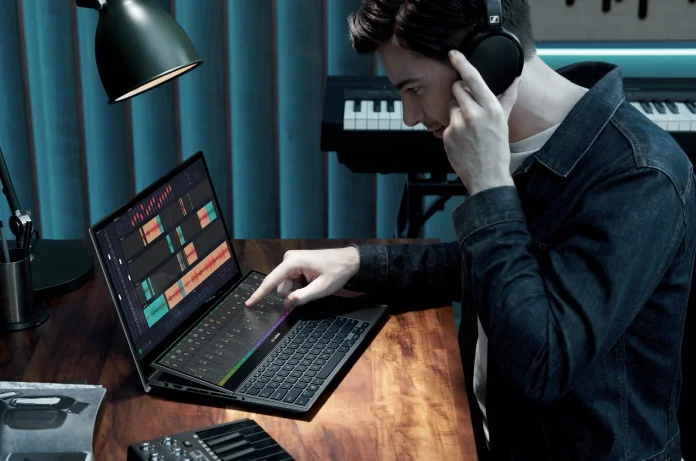
Alternatively, you could purchase one of our innovative dual-screen laptops to gain access to the ASUS Control Panel. The Zenbook Pro Duo 15 OLED gives you a complete creative workstation in a portable package with its 4K OLED display and powerful components. On top of that, it features the ScreenPad Plus, a second screen built right into the chassis that raises up to a comfortable angle when you open the laptop’s lid.
Connect the display and open the app
If you’re using one of our dual-screen laptops, you’re ready to open up the ASUS Control Panel app and start creating. Owners of a laptop equipped with a ScreenPad Plus should follow this link for setup instructions. Users of one of our portable ProArt displays have a couple quick steps to get started.
First, make sure that your workstation has the necessary connectivity for using the ASUS Control Panel through a ProArt Display. If your system has a USB Type-C port wired for both power delivery and a DisplayPort signal, you can use one cable to power the device, send a display signal, and handle the touchscreen functionality. The ProArt Display PA148CTV has two USB Type-C ports so that you can connect it to your PC and a power adapter as necessary, and its Micro HDMI port gives you a second option for connecting it as a display. If your workstation lacks the connectivity you need, perhaps it’s time for an upgrade. We have a wide range of creator-focused laptops, desktops, displays, and peripherals ready to upgrade your experience.
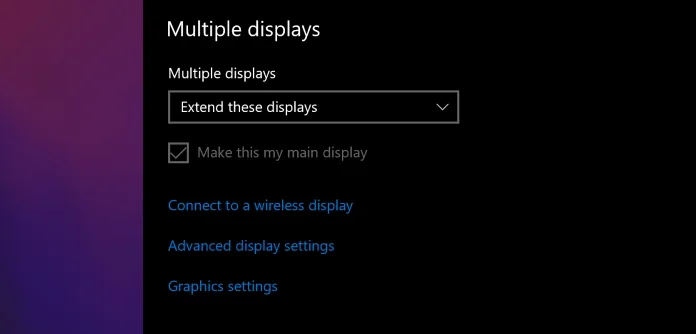
Once your cable or cables are connected, take a moment to make the ProArt Display your main display—this is necessary for the touchscreen functionality to work as you’d expect in Windows. First, right click on your desktop and select “Display settings.” Select the ProArt Display at the top, and then check the box that says “Make this my main display.”
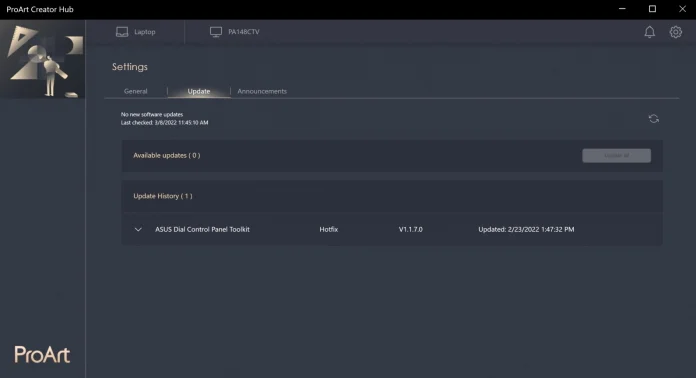
Next, you’ll need the ProArt Creator Hub app. This tool provides a wealth of functionality for creators. It gives you an easy tool for monitoring vital system resources, calibrating displays, configuring the ASUS Dial, and much more. In the app, update your software for your device, notably by downloading the Control Panel toolkit.
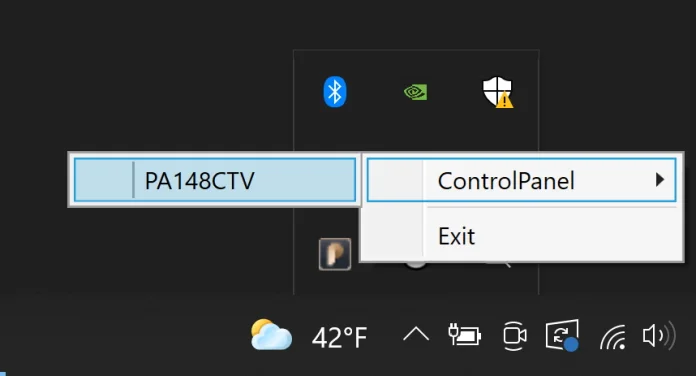
After the ASUS Control Panel is installed and running, its icon will appear in your system tray. Right click on the icon and select the display where you’d like to see the Control Panel. The app will open up on the display you selected. Please note that the interface will be blank until a compatible app is opened and selected by the user.
Start creating in your favorite Adobe apps
With your display connected and the ASUS Control Panel open, you’re ready to work in Adobe Photoshop, Premiere Pro, After Effects, or Lightroom Classic with the Control Panel at your fingertips.
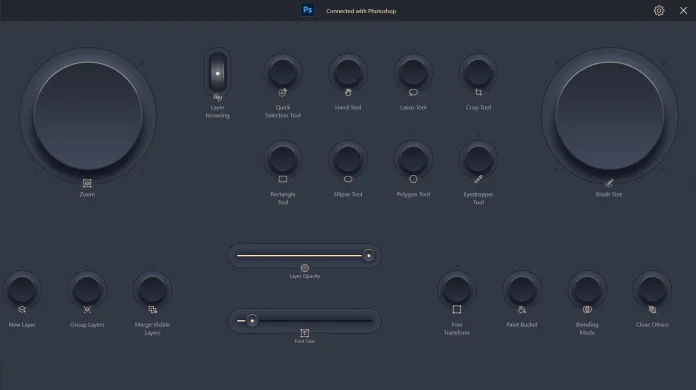
The preset options in the ASUS Control Panel for Adobe Photoshop offer you intuitive control over a wide range of common tools. Two large dials provide analog control over the Zoom and Brush Size functions. The Brush Size tool is especially helpful for any workflow where you need to make frequent adjustments to size of your brush, as it lets you make these tweaks without moving your cursor away from your primary workspace.
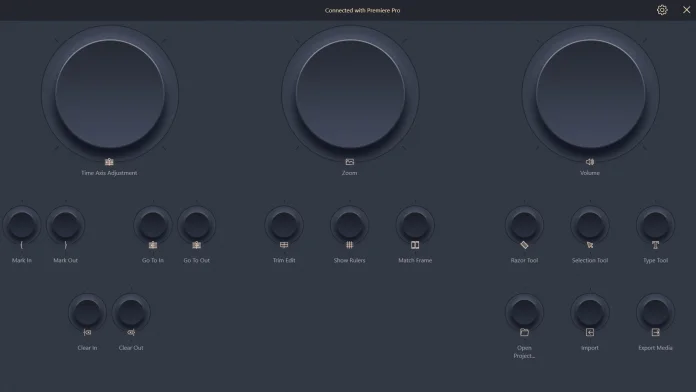
When you’re working in Adobe Premiere Pro, you’ll find convenient dials for adjusting and navigating the Timeline. Easy buttons let you change tools quickly—no complex hotkeys required.
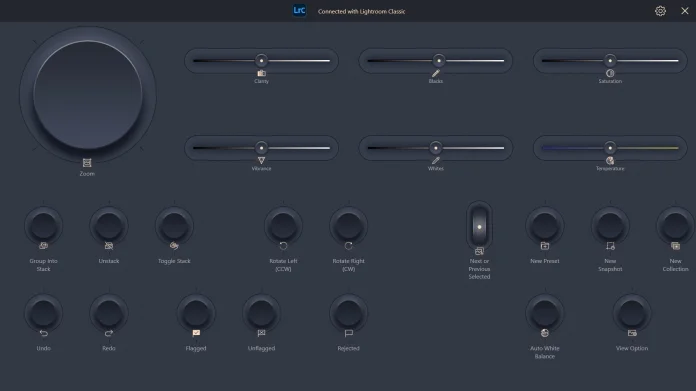
When you’re using Adobe Lightroom Classic, you’ll see an array of slider tools that let you make quick adjustments to key attributes of your photos. While you certainly can make adjustments to saturation, vibrance, temperature, and others using a mouse and keyboard, for many people it’s more intuitive to have an analog interface that lets you slide a bar up and down until you find the perfect setting.
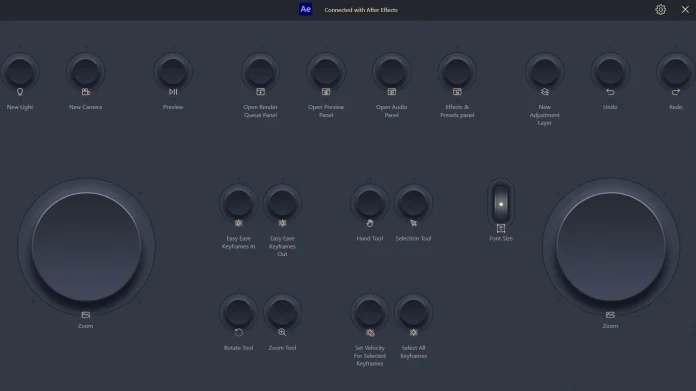
An array of buttons and tools make the ASUS Control Panel an easy interface for navigating Adobe After Effects. With one press, you can quickly change to the tool you need, open the right panel for the task at hand, adjust the zoom, and more.
Customize to make the perfect control interface for your workflow
The ASUS Control Panel offers robust presets for Adobe Photoshop, Premiere Pro, Lightroom Classic, and After Effects. But since no two creators are exactly alike, we built in comprehensive customization options so that you can construct and customize your own Control Panel layout. To personalize your experience, open the Control Panel app and click on the settings icon in the upper right-hand corner.
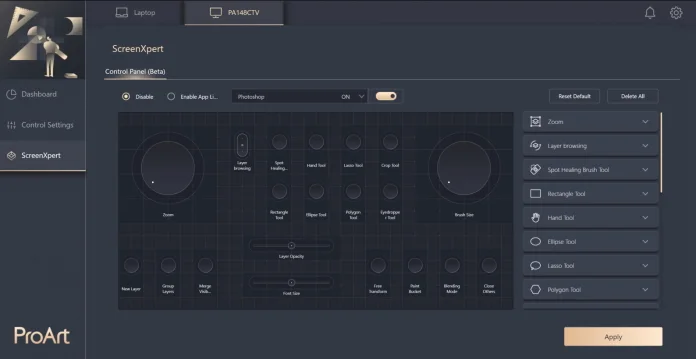
To edit one of the preset options, click the dropdown menu above the virtual interface and select the appropriate app. Then, you can use the right-hand menu to select and adjust the parameters for any of the built-in options.
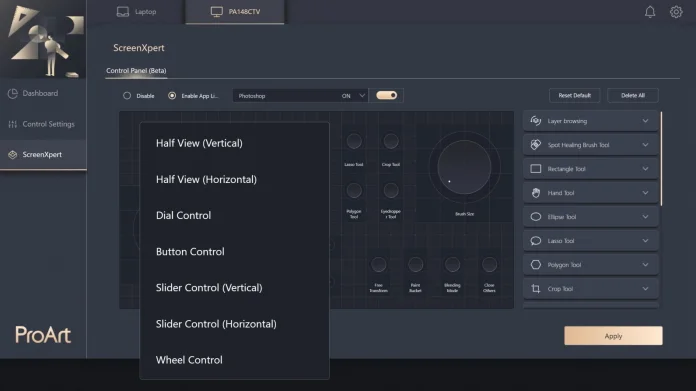
Adding additional tools to your customized Control Panel interface is as simple as clicking on the grid. Select the type of tool you need—a dial, button, slider, or wheel—to place it in the interface, and then select which function that you’d like to connect to the tool. There’s a long list of Adobe functions that you’ll be able to access, as well as common Windows features like mute, Task Manager, hide desktop, and copy and paste. Once you have your setup configured just as you like it, hit the “Apply” button in the lower right-hand corner.
Intuitive control of Adobe apps through the ASUS Control Panel
The ASUS Control Panel gives you intuitive, versatile, and fully customizable controls for working in Adobe Photoshop, Premiere Pro, After Effects, and Lightroom Classic. With the Control Panel app configured for your ProArt Display or laptop equipped with an ASUS ScreenPad Plus secondary display, you can get a visual interface for all your most commonly-used functions. This innovative tool streamlines your workflow so that you can focus more on the project at hand. Upgrade your creative workstation with a compatible ProArt Display to give yourself access to this versatile tool.