

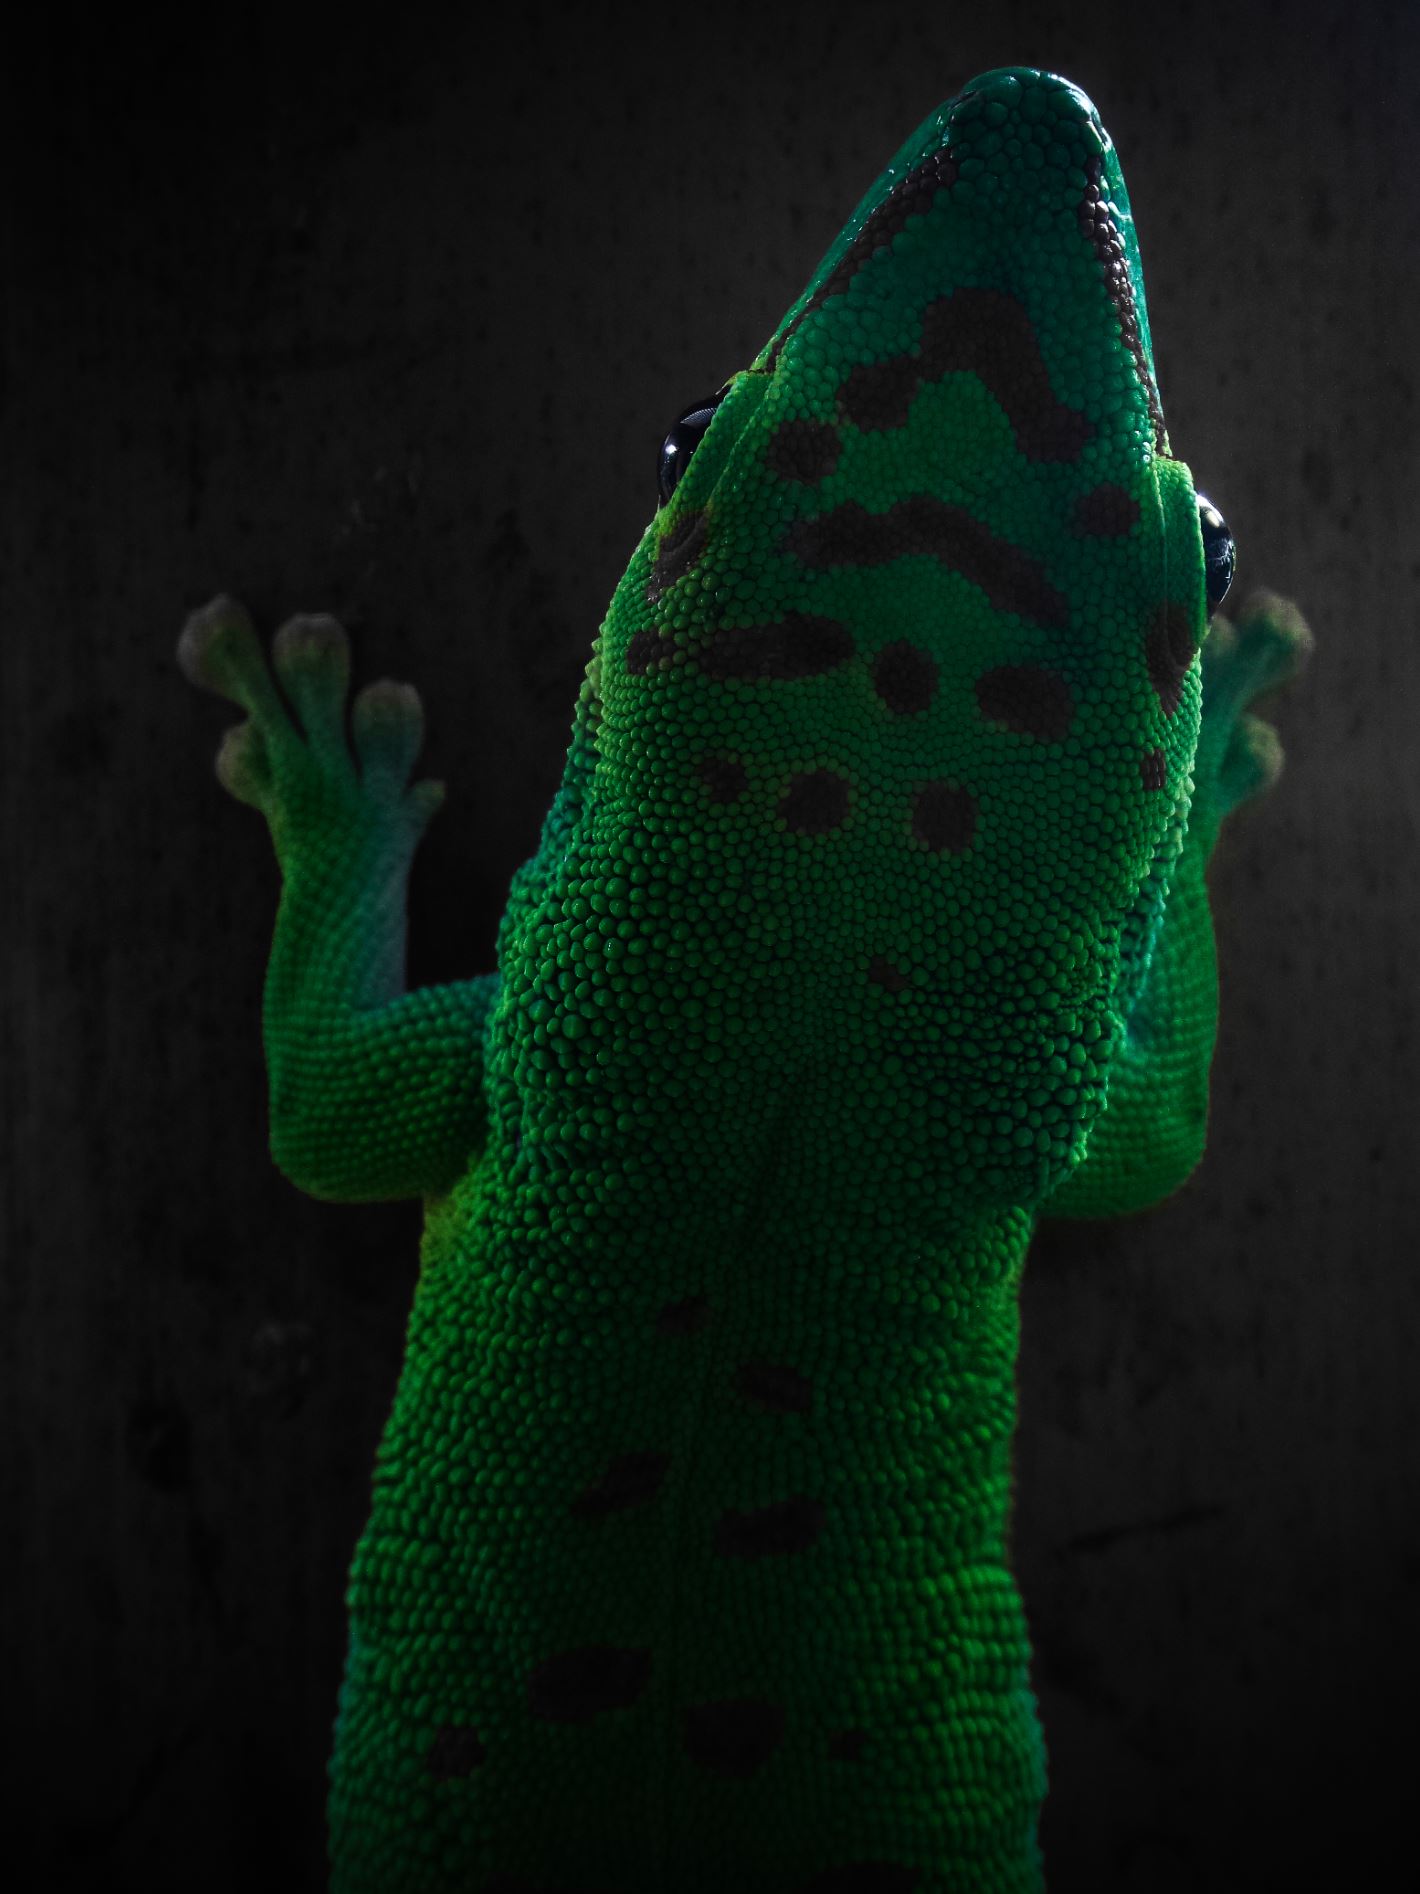
Hi Everyone! I’m back with a quick tutorial on how I made the Gecko picture I shared last week. First off: Materials. You will need a smartphone, preferably a ZenFone Zoom with optical zoom capability. Second, you will need a picture editing software such as Adobe Lightroom or even the ASUS built in software.
Photography basics:
When I am taking a picture, there are three things that I concentrate on: light, composition, and settings.
Light is the most important consideration because it determines if your picture will work or not. In general I look for even light that naturally occurs around sunset. Photographers often call this time the “golden hour.” When you get a chance, try taking a picture of a flower out in the bright sunlight and then again in the shade and you will see why I love even light.
Composition is completely subjective, but that hasn’t stopped people from trying to explain it mathematically. Probably the most famous attempt is the Fibonacci Spiral or Golden Ratio. It mimics natural patterns in nature and is generally a good starting point for photographers. In a nutshell, you put your subject in the curve’s tail and everything will somehow work out.
Yeah, I don’t quite buy it either. The other 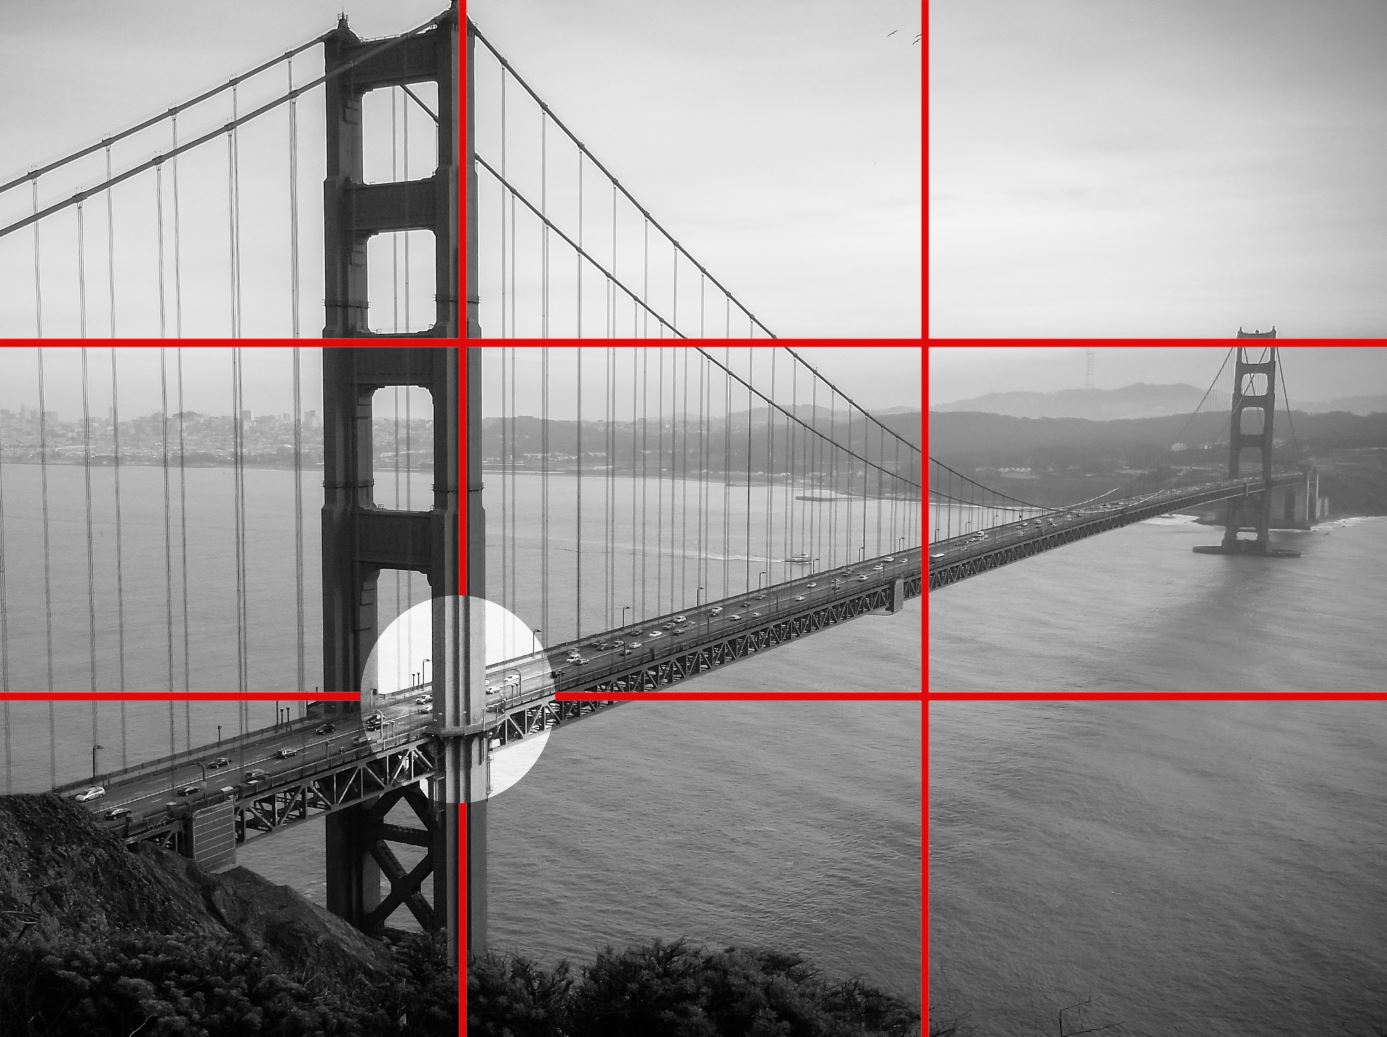 technique is to use “the rule of thirds” which divides the picture with a “tic tac toe” grid. Simply place your focal point at any of the four intersections and the picture will be asymmetrically balanced. This one does work for me. For example, in the Golden Gate Bridge picture, I line the bridge’s northern tower with the left third and the span on the lower third.
If all of this is too much and you just want to keep it simple, just remember to keep your horizon lines level and fingers out of the lens.
Settings are often overlooked as many choose to shoot in auto mode. That’s okay, but professional photographers always use manual. Why? Control. Auto mode is an algorithm’s compromise to get an ideal shot, not an artistic one. By learning to use manual mode, a photographer starts to understand the mechanics of the camera and in turn, how to optimize it for maximum quality and artistic expression. There are no shortcuts here and every camera is different. But, to get you started, try adjusting the ISO and shutter speed. ISO is the sensor’s sensitivity to light. Lower is less sensitive resulting in higher quality, but it won’t work in the dark. Higher ISO is more sensitive and works better in the dark, but reduces quality by introducing image noise. Shutter speed is how long your sensor is exposed. The longer it is open, the more light hits the sensor, but keep it open too long and you will get motion blur or an over-exposed image. What you are trying to find is a balance between ISO and shutter with the lowest possible ISO and the fastest shutter speed possible without an overly dark image.
Taking the picture:
Now to the fun stuff, taking the picture. Get your smartphone and take it somewhere awesome, like the rain forest! If you’re like me, you have a day job and this isn’t possible, so do the second best thing: go to a zoo or a museum where light tends to be controlled and the critters don’t bite or sting. Find a composition you like. I find reptiles excellent subjects because they tend to be slow, allowing me to use a low ISO (50 with ZenFone Zoom) and long shutter speeds (½ second). Once you’ve identified the subject, get comfortable because it may take a few minutes to get the right exposure. Start with the lowest ISO possible and start slowing down the shutter to get a viewable image. If it doesn’t look perfect like an auto picture, don’t worry you’re on the right track!
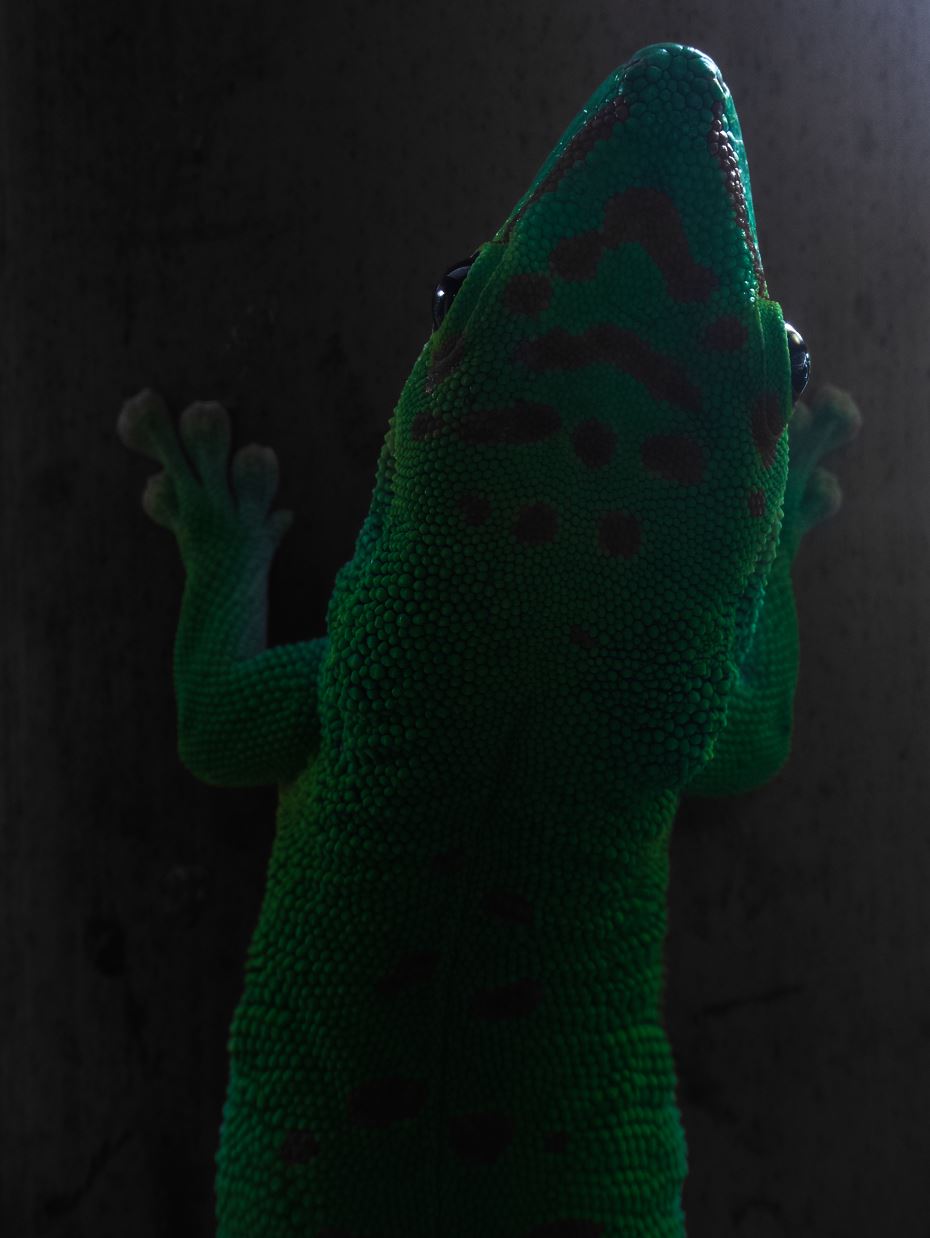
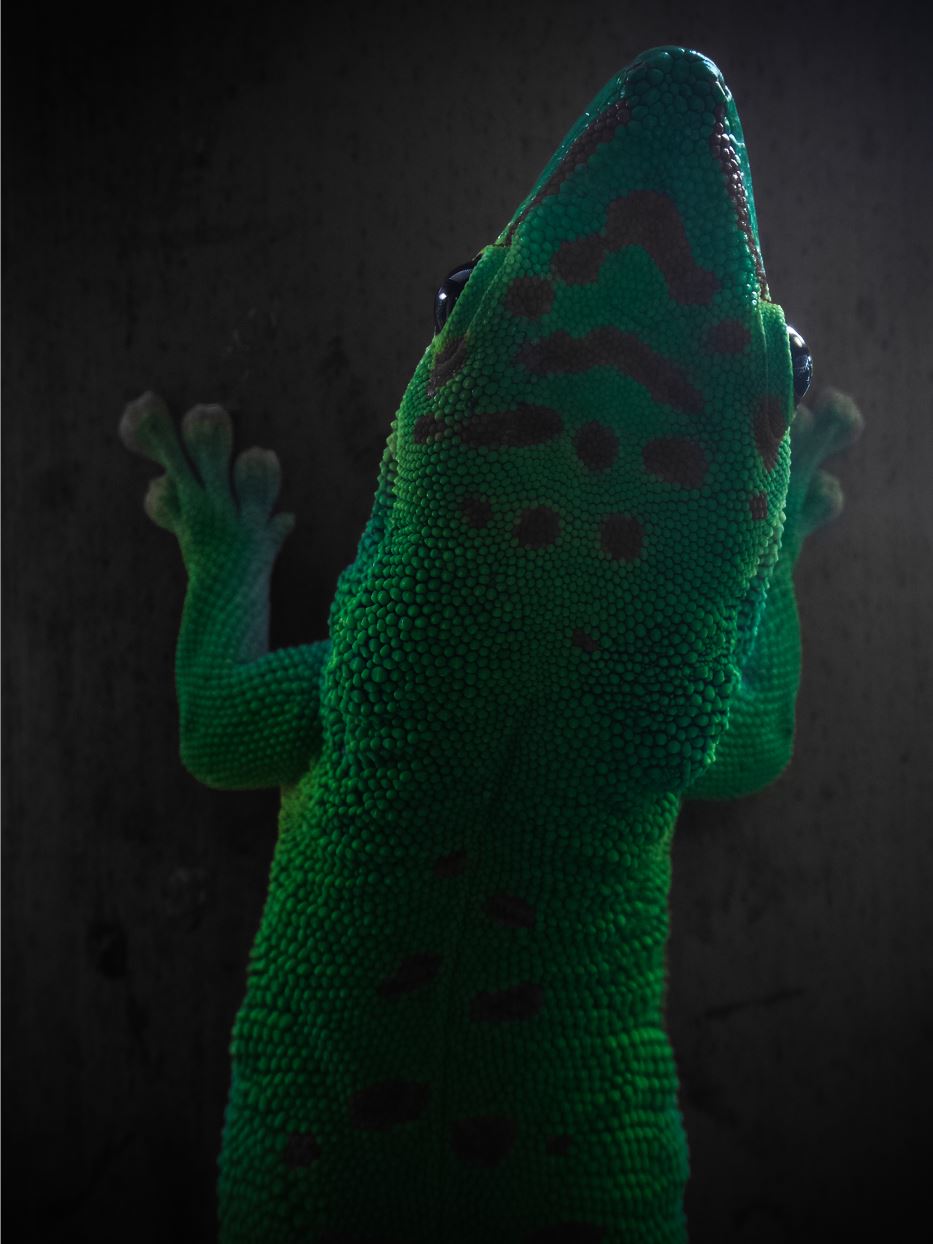
Full disclosure: I am using a new Gecko picture  because as the original was taken using ASUS HDR mode by accident, not manual. (This is not best practice, but I liked the composition and couldn’t tell the gecko to move his head back for a re-shoot.) Below is “Gecko 2”, a picture I took in full manual, completely untouched.
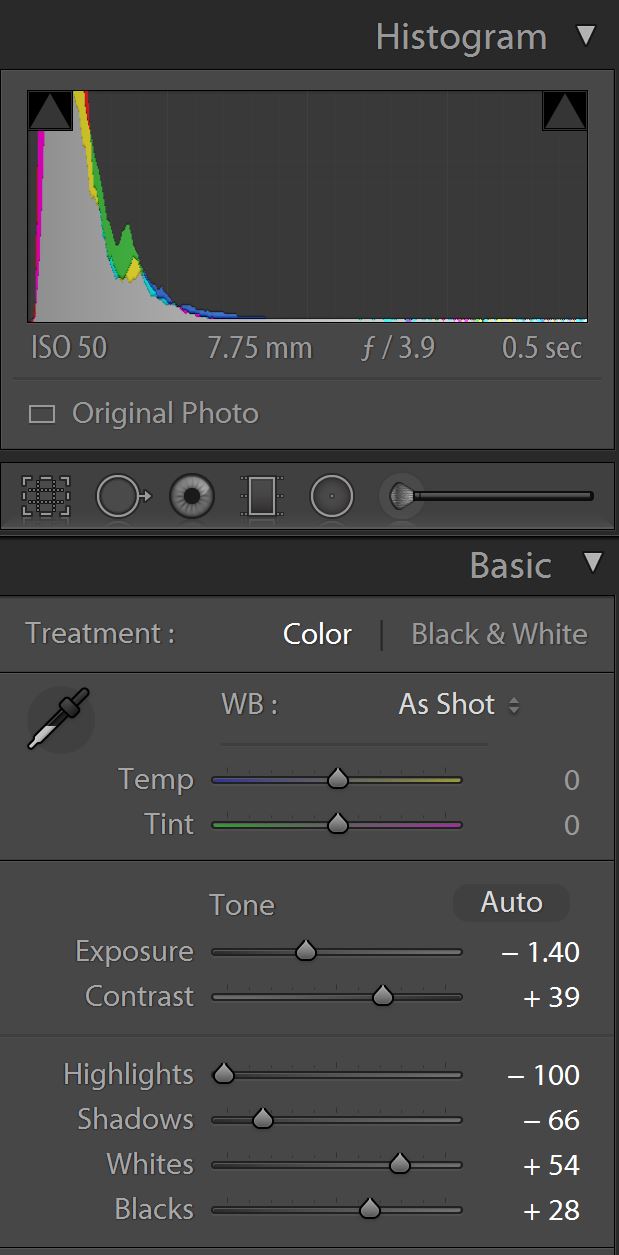
Most of the time my manual shots don’t look very good on the viewfinder/screen. This is because I’m not thinking about how it looks, but how much data I am capturing which I can later adjust in post processing. I want detail with lots of rich mid tones. The highlights and shadow come later in post production. In this case I am using Adobe Lightroom.
Post Processing:
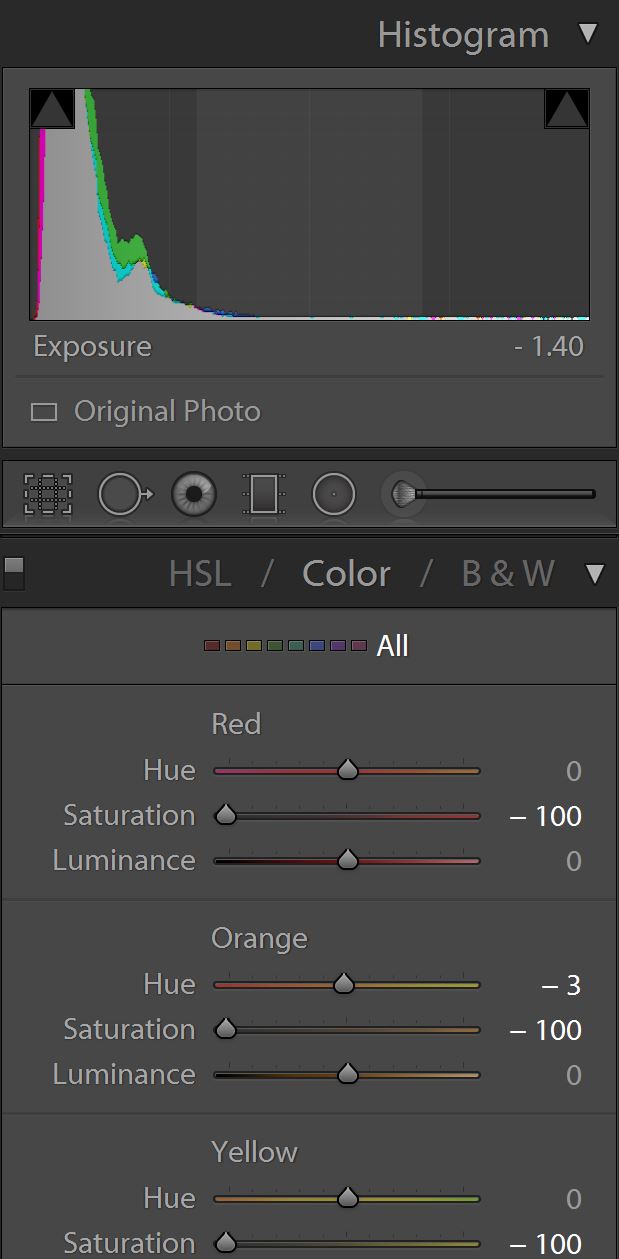
Step 1: Turn down exposure and bump up the contrast. Turn down the highlights and shadows, but bump up the whites and blacks for a dramatic feeling.
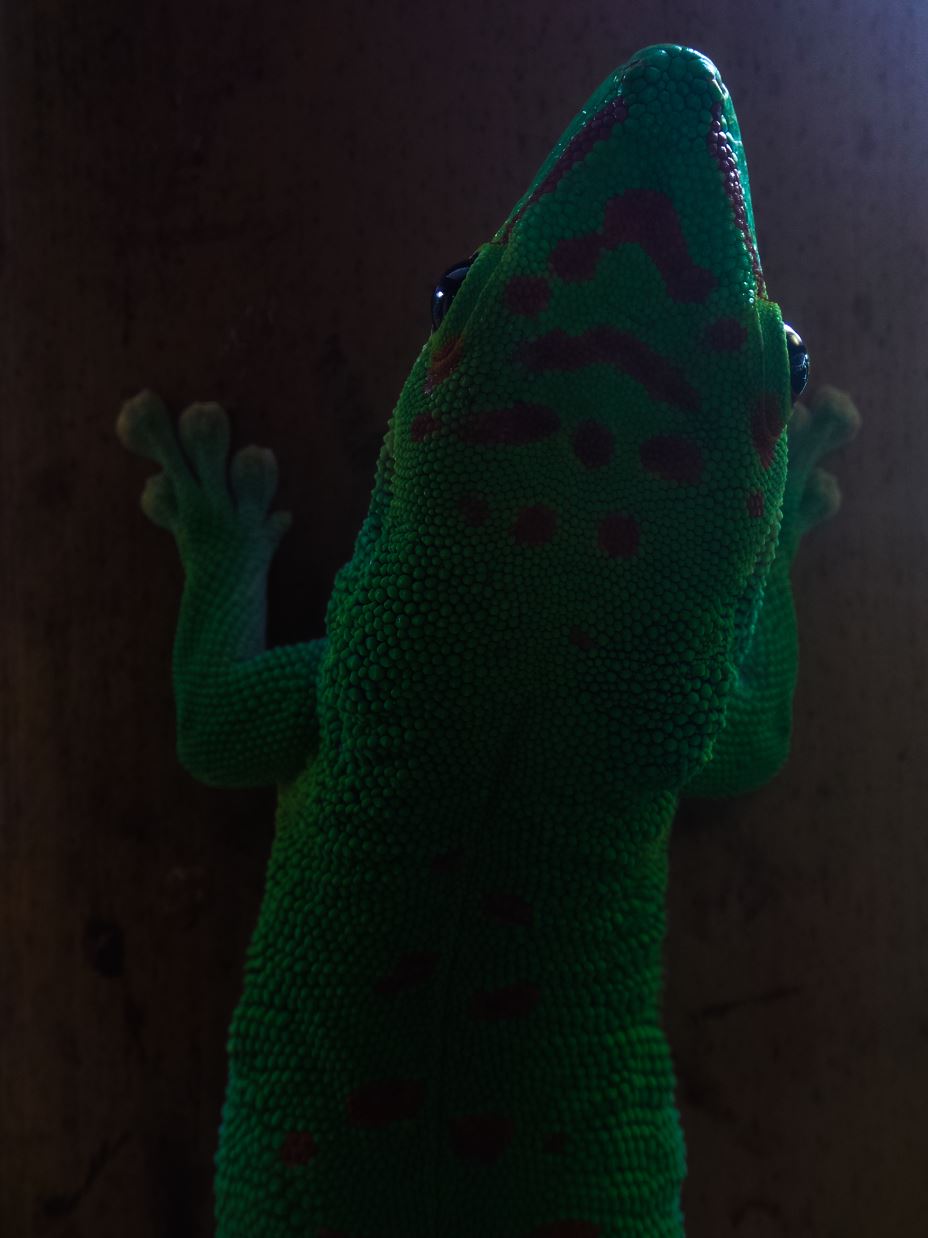
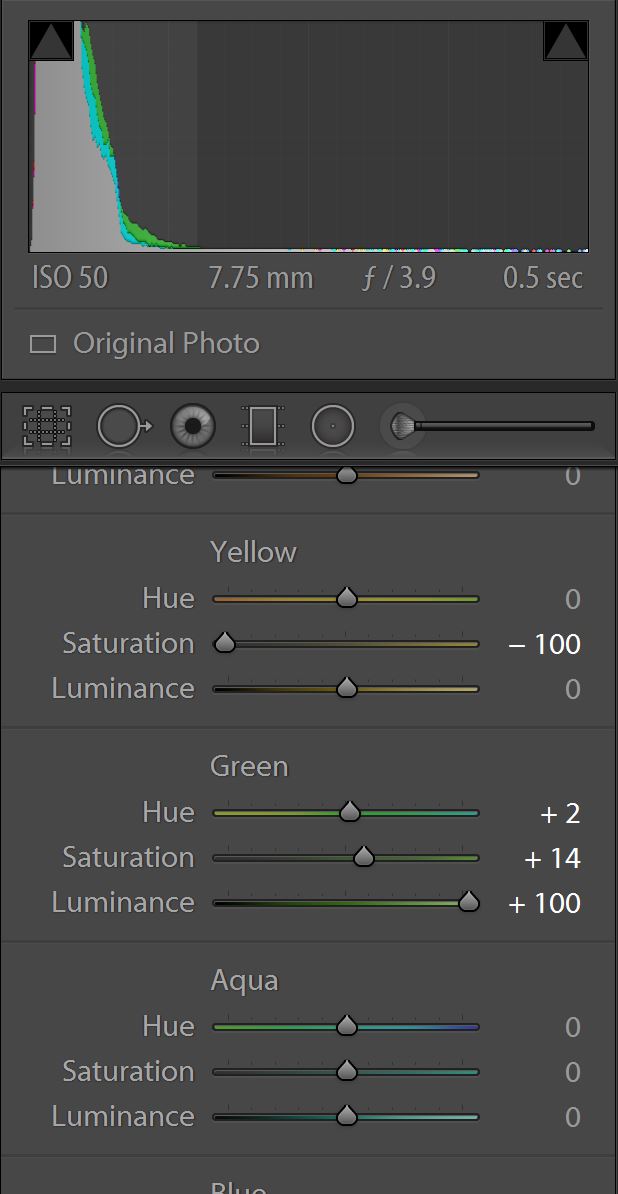
Step 2: Turn down saturation on yellow, orange, magenta, red, and purple
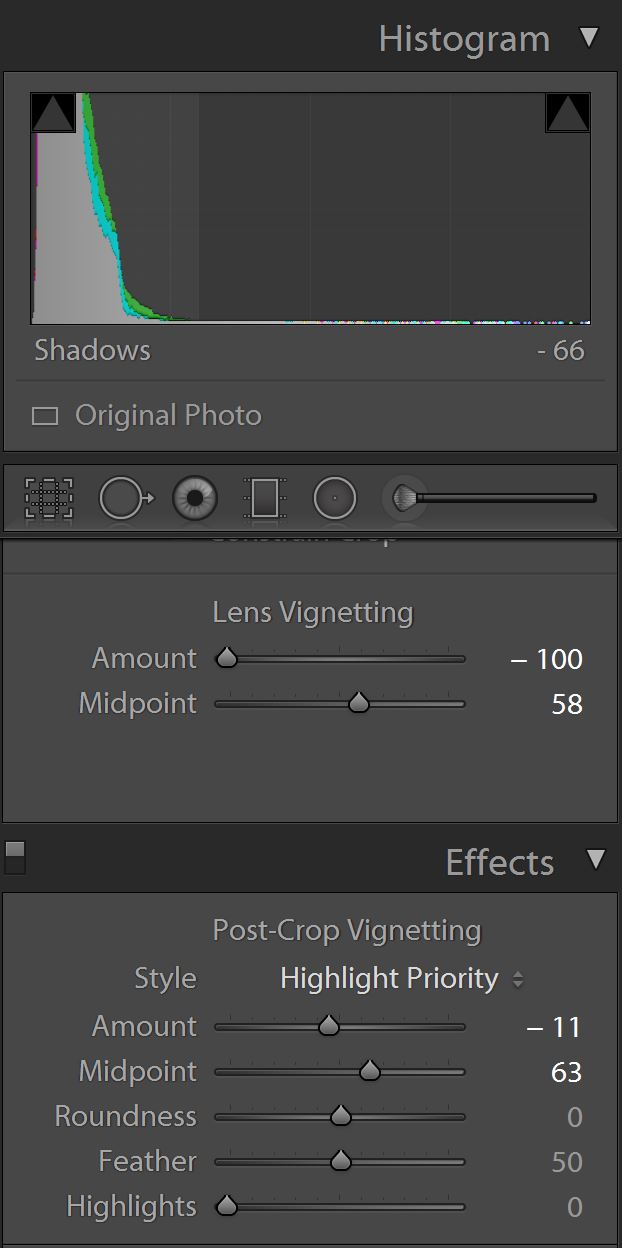
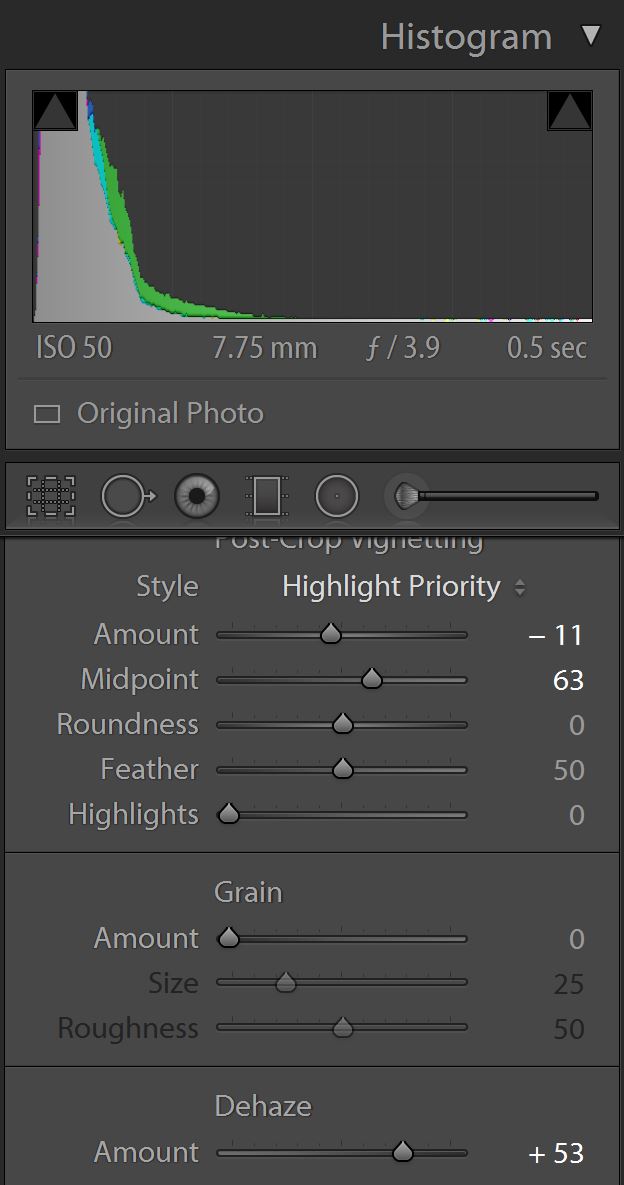
Step 3: Add a little lens vignette (dark) to bring to block out the glare in the corner, adjust midpoint for proper fit.
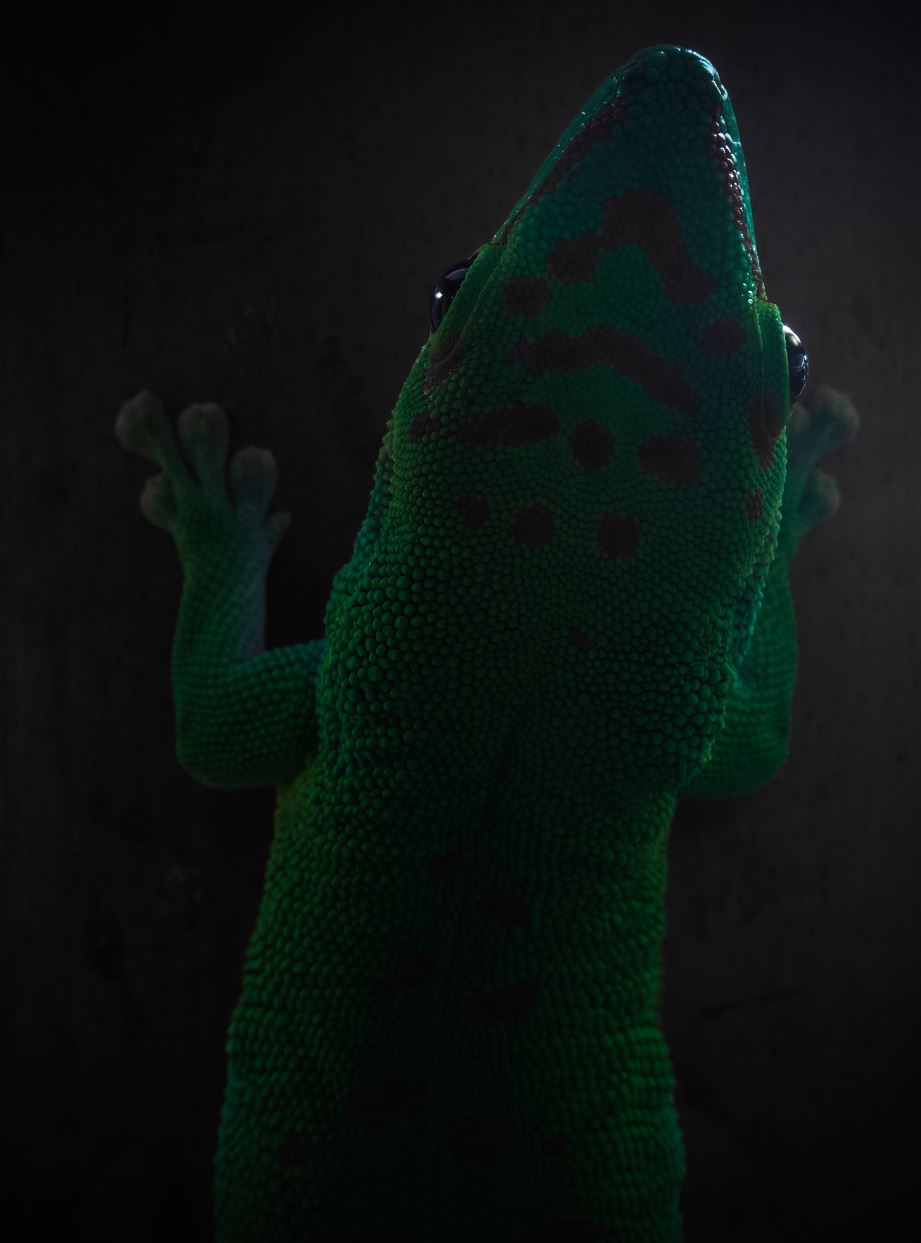
Step 4: Turn up the greens and boost the exposure to bring more attention back to the gecko.
Step 5:Use a little bit of Dehaze to even out the picture and make the colors pop.

Step 6: Print and enjoy!

Next time we will be exploring food photography, so remember to check back with empty stomachs!
Cheers,
Mark Chan