Unlocking the bootloader on your phone isn’t always a straightforward process. The bootloader is a key part of your phone’s security, and it’s locked for a reason. While we can’t recommend unlocking, we’re not here to tell you what you can and can’t do with the hardware you’ve bought. If you want to root your phone or personalize your Android experience with custom recoveries and third-party ROMs, well, who are we to stop you? ASUS has dedicated utilities that reduce the ZenFone bootloader unlock procedure to just a few clicks, and this step-by-step guide will walk you through the process from start to finish.
Before we get started, it helps to know what the heck you’re doing in the first place. And, more to the point, why you’re doing it. If your relationship with your phone doesn’t go beyond standard, everyday use, and you’re happy with your phone as it is, you likely don’t need to unlock your bootloader or root your device at all. Unlocking the bootloader on your ZenFone is dead simple, but you should understand that it’s not a something to be done on a whim, either. To quote the late Benjamin Parker: “With great power comes great responsibility.”
When you break it down, the term ‘bootloader’ is pretty self-explanatory: it’s the program that loads when your phone boots and checks to make sure everything is as it should be. More specifically, the bootloader is looking for any unofficial software that the manufacturer (that’s us, in this case) or your carrier hasn’t signed off on. This is an extremely important part of your phone’s security. It’s what stops unapproved and potentially malicious third-party software from doing real harm. It’s also what stops you from doing all kinds of fun things, like rooting to install an ad blocker, or flashing a custom ROM. Think of a locked bootloader like a gate in front of your house, designed to open only for you and no one else. It’s very secure and keeps unsavory types at bay, but it also blocks the good guys that you’ve deemed safe, like the pizza guy or your friendly neighborhood FedEx driver. Unlocking your bootloader is like deciding to leave that gate unlocked because you’d rather have pizza and packages and take your chances than keep things locked down.
So there’s risk, but unlocking your bootloader can open up a whole new world of Android customizations. If that’s worth the risk to you, read on for instructions on how to unlock the bootloader on your ZenFone. I’m using the 5.5-inch ZenFone 3 Deluxe for this guide, but there are bootloader unlock tools available for the 5.7-inch ZenFone 3 Deluxe, ZenFone Zoom, ZenFone 2 Laser, the ZenFone 3 Laser, the ZenFone 3 Zoom, and the ZenFone 3 Max.
First thing’s first: this is the kind of party that requires a disclaimer. ASUS is not responsible for what happens to your phone if you choose to unlock your bootloader. Anything you do beyond this point is at your own risk and of your own free will.
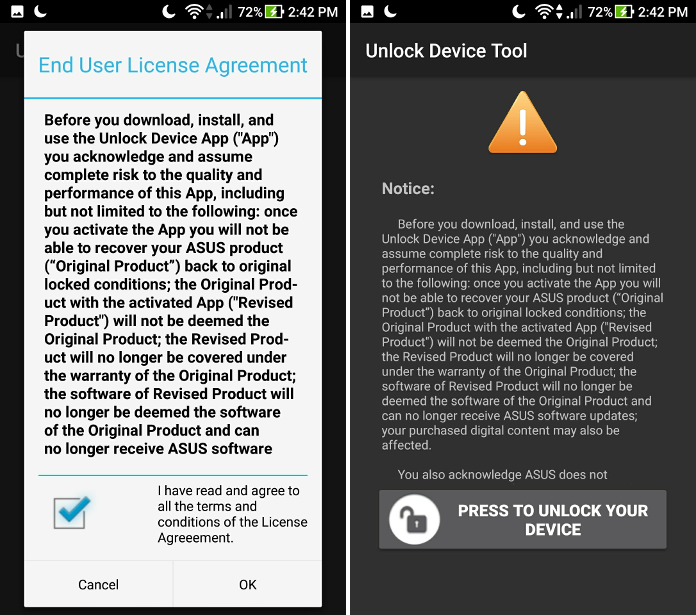
Before you download, install, and use the Unlock Device App you acknowledge and assume complete risk to the quality and performance of this App, including but not limited to the following: once you activate the App you will not be able to recover your ASUS product (“Original Product”) back to original locked conditions; the Original Product with the activated App will not be deemed the Original Product; the Revised Product will no longer be covered under the warranty of the Original Product; the software of Revised Product will no longer be deemed the software of the Original Product and can no longer receive ASUS software updates; your purchased digital content may also be affected.
You also acknowledge ASUS does not guarantee service satisfaction to any Revised Product, including events involving paid service requested by you to be performed to the Revised Product. Furthermore, such repaired Revised Product will not be covered under the warranty of the Original Product; the software of the repaired Revised Product will not be deemed the software of the Original Product and will not receive ASUS software updates.
It is strongly advised that you avoid activating this App unless you fully understand and accept the risks that may arise.
Charge your phone
This is a good habit to get into before you do any kind of customizations on your phone. Whether you’re unlocking your bootloader, rooting your device, or flashing a custom ROM, a perilously low battery is not your friend, and it can really throw a spanner in the works when you’re tinkering. Keep it one hundred, folks (or at least above 70%).
Back up your data
Boring, but also a no brainer. When you’re excited, it’s tempting to play fast and loose with the rules of data management. Let this serve as a warning: unlocking the bootloader will wipe your phone of all data, so before you touch anything, back up your device. Do not skimp on this step. It is worth the time, and you will never regret backing up your files. Google-based apps like calendar and email are easy, but we’ve been living in the cloud long enough that third-party app data can easily be left behind.
Lots of app developers leverage Google Play Services to offer backups of in-app data, so go through all of your favourite apps to ensure you’re taking advantage if the option exists. Any photos and videos that haven’t yet been synced to your cloud storage service of choice should also be actively backed up before you set out on your bootloader adventures. Don’t forget about your text messages and call logs, which are stored locally and not backed up by Google. You can download a third-party backup app if you want to preserve this data for later restoration.
Allow installation from unknown sources
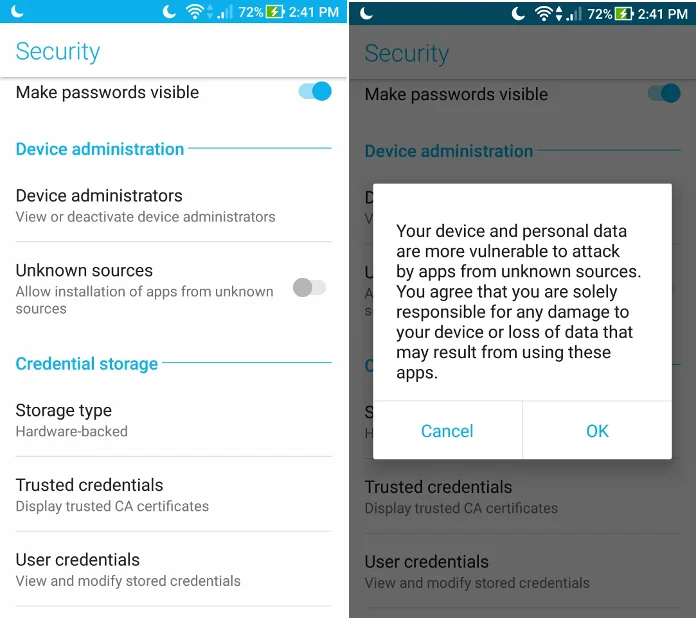
Visit your phone’s settings menu and navigate to Security > Device administrators > Unknown sources. Check the box and then read and agree to the scary warning.
Download the Unlock Tool to your computer
You can find the Unlock Tool for your ZenFone on the device’s support pages under Drivers & Tools. If you’re using a ZenFone 3 Deluxe, check to make sure you’re downloading the right version. There are a few ZenFone 3 Deluxe models that vary in SoC and screen size. I’m using the ZS550KL, which is the 5.5-inch version based on Qualcomm’s Snapdragon 625, so I’m using the this ZenFone 3 Deluxe Unlock Tool.
Note: this tool specifies it’s for Marshmallow but it worked just fine on my ZenFone 3 Deluxe running Nougat. Proceed at your own risk!
Plug your phone into your computer and transfer the APK.
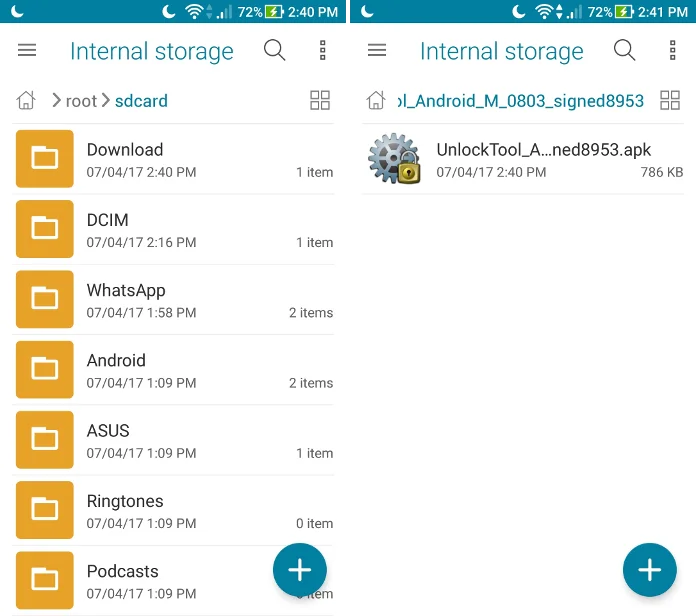
Mount your phone via USB and then unzip the Unlock Tool download. Drop the APK file into the Downloads folder on your phone. You can put it anywhere you want, but Downloads is where I like to put everything so I know exactly where to look for them later.
One last warning: back up your phone
Just in case you’ve gotten distracted and have been using your phone for other stuff during this process, here’s your last chance to save locally stored files and manually run backups. You’ll lose any data you may have generated since your last backup (like screenshots for a guide on how to unlock your bootloader, to give one totally theoretical example) so make sure you’re really ready to wipe your phone.
Pull the trigger
Open up the File Manager app on your phone and navigate to Internal storage > Downloads. You should see the APK ready to install. (If you transferred the zip file over, no worries; you can extract the APK here and then proceed with the installation.) Agree to the warnings about unlocking your bootloader. These pop up before you can install the Unlock Tool app. We’ll ask you to agree to one last set of warnings before you actually run it. If you don’t feel the gravity of your actions by now, you probably never will.
Fair warning: this is your last chance to bail. If you’ve changed your mind, just close the Unlock Tool and uninstall it like you would any other app. Otherwise, press the unlock button.
That’s it!
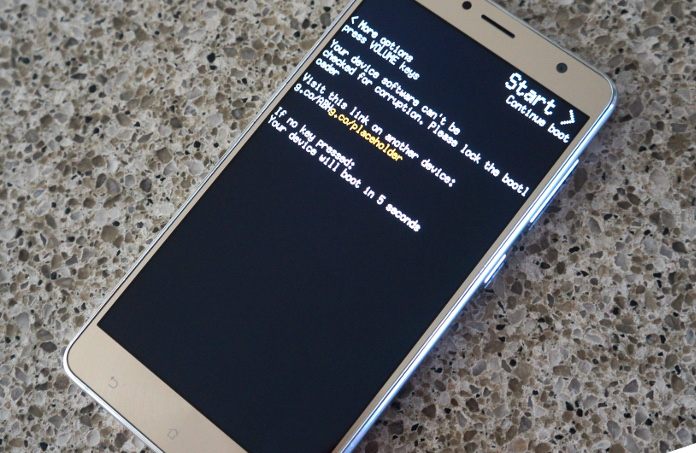
Once you’ve run the tool, your phone will restart. This doesn’t take too much longer than a regular boot cycle. Your phone won’t feel any different, but rest assured, it is not the same device it was five minutes ago. You’ll see a brief warning when your phone boots to let you know that it was unable to check for corrupt files because the bootloader is unlocked. That means you’re ready to explore the crazy world of custom ROMs, kernels, and recoveries!